Showing posts with label Toys. Show all posts

Thursday, November 29, 2012

Fun with Pinypon and Nenuco! - a review #PinyponParty

Mommy Parties Pinypon Review
Riley & Reagan's dolls all dressed and ready to go!
Well, we're at it again!  I love to throw parties and the girls love to have play dates, so you can bet I was super excited to be hosting another event for MommyParties!  This time we were fortunate to be able to test out some super cute toys perfect for the girls and their friends.  MommyParties sent us a complete kit to throw a party play date for the girls and 10 of their closest friends between the ages of 4-7.  This was perfect for us since Reagan just turned 5 and Riley is just about to turn 7 so their friends fit right into this age range.  MommyParties gave me some great ideas for food and games, so we just ran with it and had a blast!


The Party:
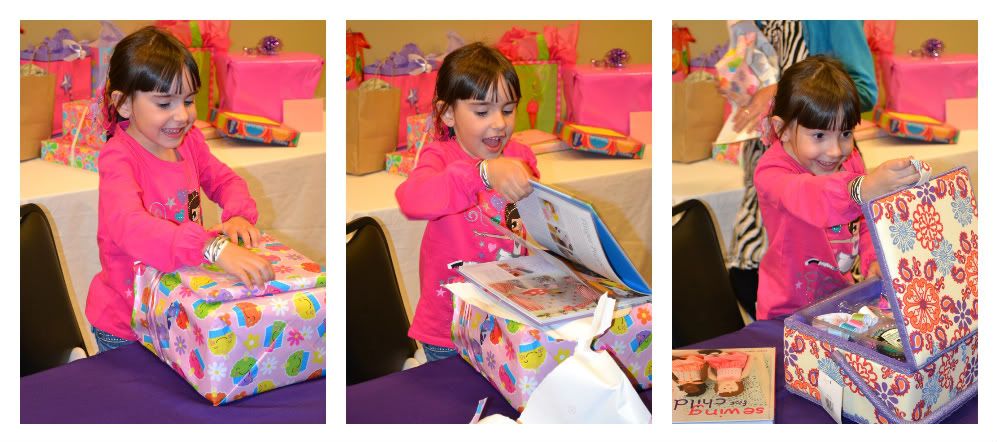
Unfortunately life happens so we had to postpone our party by a week.  Riley and Brian were sick and parties are no fun with sickies.  Because of the date change we lost a few guests, but we still had a good turn out and the kids had a blast.  I set up the dinning table with the Pinypon dolls, PinyPon Caravan, and Nenuco Newborn Doll.  Each child got to play with and take home one of the Pinypon dolls.  They also got to play with the Caravan and Nenuco doll that we were sent to test out.  After play time we served lunch and then the girls decorated cupcakes.  The grande finale of the party was the prizes.  I had each of the girls names written on pieces of paper.  Riley then picked names for the two winners which got to take home their very own Nenuco doll and Pinypon Caravan.  They were so excited.  Such a fun time for both the kids and the mommies.

The kids had fun at our Pinypon review party

Pinypon

What Is It?  Pinypon is a miniature figurine doll that you can mix and match their hair, heads, upper body, lower body, and accessories.  In addition to the dolls, you can also buy other accessories such as the Caravan we received, or other items such as a mall, hotel, apartment, or car.  Kids can collect dolls and exchange pieces with friends to create their perfect doll.

Eating cupcakes at our Pinypon testing party
What I Thought:  The dolls are super cute!  They have an anime feel to their design and come in super bright, fun colors.  The toys look very well made and great quality.  I also like the price.  Each doll is about $4, or $20 for a set of 10.  Seems like a good deal to me!  My only negative feedback comes from the fact that I have a smaller baby at home who loves to put things in his mouth.  These toys have some small accessories, and when I say small... I mean really small.  That's part of the cute and fun factor, but with a baby it makes things difficult.


What The Girls Thought:  The girls loved them!  They all had so much fun playing with both the dolls and the caravan.  They loved switching up the pieces and especially loved playing with their dolls on the caravan with all the small accessories.  What could be more fun than having a tea party with super tiny plates, cups, and even mini straws.  The highlight was the shower though.  The caravan actually has a shower that really works when water is added.  I'll admit that it took another mom to figure it out, but once we did the kids had a blast washing their dolls.  My only complaint was the time it took to stick all the stickers on and figuring out where they all went.  Once they were on it looked awesome though.  The girls only complaint was that it was slightly difficult to put their dolls back together once they took them apart.  My 7 year old had an easier time than my 5 year old.  With my help the pieces went together nicely though and after using them a few times they snapped on and off a lot easier.  This was my 7 year old's favorite toy.

Pinypon is so cute!
Nenuco Newborn Doll 

Testing and reviewing our Nenuco Newborn Baby Doll
What is it?  The Nenuco Newborn Doll is a soft plastic doll that your children can hold, dress, feed (water from a sippy cup), and pacify.  When the baby is done eating your child can put them on the potty and the doll will pee.

What I thought:  I like the soft plastic used for the doll so it isn't super hard, but it's still completely waterproof.  One of the legs was bent in from the packaging, but after being out of the box for an hour, it went back to normal.  I did find the doll a bit messy with the water, but at least it's just water.  My only recommendation would be to provide a cloth diaper with the doll.  This way the child could feed the baby without them being on the potty.  Luckily I have lots of cloth diapers on hand.  LOL!!!

What The Girls Thought:  The girls are going through an elimination fascination phase so they think this doll is awesome!!!  What could be more fun than holding your own little baby, feeding them, and then putting them on the potty?  My girls could do this over and over and over... and they did.  I'll just have to keep my eye on them and make sure they don't give the baby juice.  I wouldn't want any mold to grow in there.  This was my 5 year old's favorite toy at the party.

I would love to thank MommyParties, Pinypon, & Nenuco for this great opportunity and would totally recommend these products.  The girls had a great time and can't wait to get their new toys out again tomorrow.

For more information on Pinypon and Nenuco you can visit the following links:


Nenuco Newborn Baby Doll with a cloth diaper on
How cute would this doll be with a cloth diaper on! 

Elf on the Shelf in our Pinypon Caravan
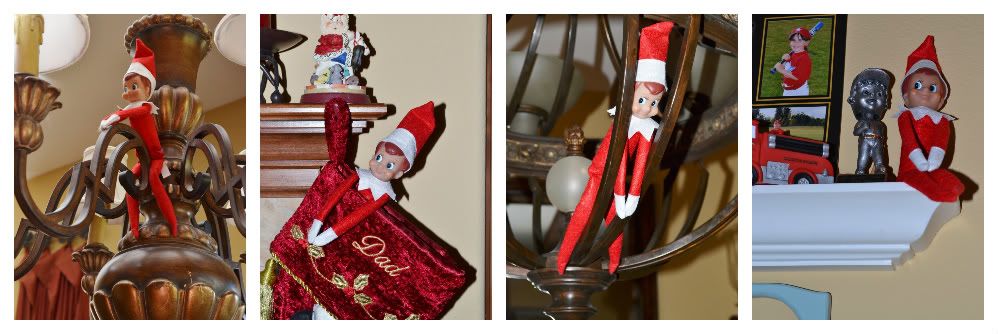
Our Elf on the Shelf wanted in on the fun too!

**This product was given to me for the purpose of a review, but the review is comprised completely of my own opinions  and was not influenced by any other outside source.**

Monday, August 27, 2012

Reagan's Gutzy Gear Birthday ... and review

Our Gutzy Gear party setup
Our Gutzy Gear Party Setup
This past weekend my little girl turned 5.  Can't you believe it?!?!  I'm still in shock.  She's growing up wayyyyyy too fast.  Not only did she just turn 5, but she also just started Kindergarten.  Sniff Sniff... Linc is now my only baby in the house.  I've now got a first grader and a kindergartner.  Where has the time gone?  Well, to celebrate this big day for my big girl we threw her a party with 13 of her closest friends.  Add in my three kids, a few more babies, and a whole lot of adults and you have quite the event!  It just so happened that Gutzy Gear contacted me to hold a party to present one of the newest back to school products on the market and what better time to present this product than at my daughter's birthday party after their first week at school!  The party ended up being a little bit Hello Kitty (my daughter's selection), a little bit of water fun (thanks to our 109 degree heat), and a whole lot of Gutzy (thanks to Gutzy Gear).

The Kids Are Putting On Their Gutzy Gear Straps
We started off the party with a coloring competition.  Each kid at the party got to create and color their very own patch design.  We had everything from rainbows and cats, to robots and Egyptians.  It was quite the art display.  My daughter (the birthday girl) then got to pick two of the pictures to be winners.  The winning pictures got an extra patch for their Gutzy Gear patch sets (but we'll get to that later).  So who were the winners?  Maggie drew a beautiful picture of a cat, and Sophia drew a picture of a girl and boy in a meadow.

Gutzy Gear Patch Selection Time!
After our patch drawing competition the kids grabbed their backpacks and we got started with the decorating fun.  Gutzy Gear was so nice to supply each child with a starter set of Velcro backpack straps that includes one patch as well as a set of two additional patches.  I ended up opening all of the double patch sets and laying all the patches individually on the table.  The birthday girl got to pick her two patches first.  Then the winners of the design contest got to pick their patches plus their additional winning patch next.  After that all the kids just dug in and picked whichever patches matched their personality.  There were tons to choose from, from hearts and flowers, to fast food and monkeys.  The kids had a blast and they can't wait to show them off at school on Monday.  They were even excited to see all the additional patches that were available on the back of the packages.  There really are a lot out there to choose from.

A Little Water Play To Wrap Up The Party Day
After our fun time with the patches we set the kids down for some pizza, cake, ice cream, presents, and then some fun water play out in the back yard.  Her favorite gifts were her nighttime slippers from her Aunt Lisa and the stars nightlight that we got her for her room, but I think she's really the most excited about showing off her new backpack bling when she gets back to school.  Thanks Gutzy Gear for letting us test out your products and giving my daughter and her friends such a great birthday party!!!


MY REVIEW:

So Many Gutzy Gear Patch Choices
How It Works - Each starter set comes with two black Velcro straps that you just apply over the strap(s) of your backpack or satchel (or anything else you can think of such as on your guitar strap, bike rails, etc).  You also get one Velcro on patch to get you started.  You then buy additional Velcro on patches (they come in sets of two), to further decorate your straps.  For even more fun you can swap patches at school with your friends so your straps are always changing.

What I Like - I love the concept of Gutzy Gear.  I know I loved patches on my backpack when I was a kid and my girls love decorating anything they can get their hands on.  The bad part about regular patches is getting them to stay on.  You have to sew, pin, or iron on most patches.  Not only that, but you're usually stuck with them forever because it's permanent.  I LOVE that Gutzy Gear is not permanent.  They can easily change the look of their straps by just un-Velcroing one patch and putting on another.  I also love how secure the Velcro is.  These patches will not fall off.  They are totally secure when applied to the strap.  The full back side of the patch is covered in hook fabric instead of just one little square.  The straps are also wrapped in a very soft velour loop fabric so they aren't itchy on your arms.  Last, but certainly not least, is that I love the patch options.  They have so many to choose from.  You can go online to get them (GutzyGear.com, Amazon.com, etc.), or you can find them in your local stores such at Toys R Us or KMart.  I couldn't find them at our K-Mart, but our Toys R Us had them.

The Birthday Girl w/ Her Gutzy Gear
What I didn't Like - Although the concept is great, I do wish the price was a little less.  Starter sets go for $10 and a set of two patches goes for $5 so it can get to be quite a pricey hobby.  After saying that though I guess I would say this is pretty close to being a Disneyland Pin collector and we all know those aren't cheep, so if you look at it that way these prices are pretty reasonable.  Maybe if they removed the included patch from the starter set, then they could knock $2 off.  I found that most kids wanted to choose their own patches and didn't care for the included one.

In Conclusion - Despite the price, I still love the concept and I plan on taking my girls down to Toys R Us so they can pick out another set of patches for their backpacks.  I know how much kids like to express their style and this is a great way for them to do it!  They've already been scoping out all the patch options available.  Oh yes, I see a patch collection obsession coming on.


WANT A CHANCE TO WIN !!!

Gutzy Gear is giving away 101 gift cards to Toys R Us.  All you have to do is visit Gutzy Gear on Facebook and let them know, "Where do you Go Gutzy?".  This contest will end September 7th, so you better hurry!  Here's what they're giving away:

1 - $500 Gift Card
10 - $100 Gift Cards
20 - $75 Gift Cards
30 - $50 Gift Cards
40 - $25 Gift Cards

Also, check out this deal on how to get a FREE, Rare Gutzy patch. This promotion ends on September 30, 2012.

**This product was given to me for the purpose of a review, but the review is comprised completely of my own opinions  and was not influenced by any other outside source.**

Wednesday, July 11, 2012

How To: Upcycle a Magazine into a Game of Pick Up Sticks #freefromtrash

Upcycle magazines into a game of pick up sticks
Well it's day 11 of the Upcycled Crafting Challenge and I'm still going strong.  Today I'm going a bit off track though.  Although today's item is technically a soda can, I've decided to create today's project with a magazine since I skipped that day.  My daughter was really excited about this project.  She's all gung ho about magazine crafts.  Normally she'll to collages with them, but today we've decided to do something a bit different.  Today we're going to create a game of Pick Up Sticks using pages of a magazine.  This one was a double bonus, because not only does my daughter really love craft projects, but she also loves games.

What You Will Need:

Magazine
Water
Cookie Sheet
Glue Paste (I just mixed water and glue 50/50)
Paint Brush
Smooth Worksurface

Step By Step:


Voila!  You've just created a super fun game that will create hours of fun for your kids.  I know Riley and I were busy for quite awhile after our sticks dried.  Now it's been years since I played this game so I had to Google how to play it.  Check out the rules below if you've forgotten too and have fun!    


This is a game for two or more players. The object of the game is to pick up the most sticks.

To begin the game, a bundle of sticks are somewhat randomly distributed so that they end up in a tangled pile. The more tangled the resulting (dis)array, the more challenging the game. In some versions of the game, any isolated sticks, or sticks lying alone, are removed.

The first player attempts to remove a single stick, without moving any other stick. In some versions of the game, player uses a tool to move the stick away from the pile; this "tool" may be one of the sticks, held aside before the game begins. In other versions, players must pick up the sticks by hand. In either case, players must not move any other sticks while attempting to remove the chosen stick; if any other stick moves, his or her turn ends immediately. Players who successfully pick up a stick can then have another turn; the player keeps removing sticks until he or she causes a secondary stick to move.

The game is over when the last stick is removed. The winner is the player with the highest number of sticks picked up.

In some versions of the game, different-coloured sticks are worth different number of points, and the winner is the person with the highest score.


*This post is part of the Upcycled Crafting Challenge (#freefromtrash) hosted by Calley, The Eco Chic, and is part of a one month challenge to create from trash.  This challenge will hopefully open your eyes to the number of items that we still end up trashing every day that could be used by ourselves or our kids to create fun and useful items.  To find out more about the challenge and to see other projects click on over to Calley’s announcement post.*

Check out some of the other great posts from today below and be sure to link up your projects today too!!!  Just link to your blog post, Pinterest picture, Photobucket Picture, etc.  I'd love to see your upcycled magazine projects.

Monday, April 9, 2012

How To Make Your Own Playdough

How To Make Your Own Playdough
My girls are craft going freaks so we're always trying to think of new things to make around the house.  Today was no exception with a super cold wind chill outside that I had no desire to take the girls out in at all.  What to do... what to do... We'll make playdough!  Check out the recipe below for a super quick and easy way to make non-toxic playdough with ingredients that you most likely already have in your cupboards.  I guarantee your kids will be totally excited about this one.  I know my girls were.  They were jumping up and down like crazy!


What You Will Need:
2 cups Flour
2 cups Water
1 cup Salt
2 Tbs Vegetable Oil
1 Tbs Cream of Tarter (optional for better elasticity)
Food Coloring

Step By Step:
How To Make Your Own Playdough - Mix Ingredients
- Combine flour, water, salt, oil, and cream of tarter in a large sauce pan.
How To Make Your Own Playdough - Cook In Pan
- Keep stirring over low heat.
- You will know it's done when the playdough starts rolling up into a ball and is no longer sticky.
- If you find that after 10 min of mixing your mixture isn't turning into dough, then add more flour and salt slowly till you get the correct consistency.
- Take the pan off the heat.  
How To Make Your Own Playdough - Roll Into Balls
- Remove your dough from the pan and place on a clean counter or cutting board.
- Knead the dough till you get a nice consistency.
- Divide the dough into balls so that each ball can be made into a different color.  I made four balls with mine.
How To Make Your Own Playdough - Add Food Coloring
- Using your finger create a divot in each ball of dough.
- Add about 3-4 drops of food coloring to your dough.  The more food coloring, the brighter the color.
- Fold and press the food coloring into the dough till it's fully distributed.  Make sure to keep the coloring in the center of the dough so that it does not get on your hands.  Once it's kneaded into the dough the color will not get on your hands.  If you're worried about the coloring make sure to wear gloves and cover your work surface with wax paper.

Voila!  You're done!  So easy and lots of fun for the kids.  Now the real fun begins with all the cute creations they will make with their new playdough.  Do you want to have even more fun with your playdough?  Try adding essential oils, spices, or other fragrant items to make your playdough smell yummy.  How about lemon oil for yellow dough?  How about lavender for purple dough?  How about cinnamon for red dough?  Let your imagination run wild.  Want another fun addition?  Try adding glitter to your playdough for some bling.  Try adding sand for some texture.  The options are limitless.  Don't feel the need to stick with your typical play dough.

When you and your kids are done playing for the day, just store your new playdough in some Tupperware or Ziploc bags.  If it starts getting a little hard just sprinkle some water on top and massage it in.  After awhile it may be impossible to bring your playdough back from the dead.  At that point it's just time to start over and make some more.  No worries though.  Making more dough is the fun part.  Have fun!

Monday, December 19, 2011

Riley's Sewing Kit - A gift for my little DIYer in training

This week Riley is turning six years old. Can you believe it !?!? SIX !!! What happened to my little girl?  It seems like only yesterday that she was still sleeping in my bed with me and teetering around the house just barely learning to walk.  How time flies.  

Some people I have a hard time shopping for, but not Riley. She's my little mini me and LOVES to do craft projects. She could do them all day long. So when it came time to go shopping I had the perfect gift in mind for my little Do-It-Yourself'er and I just knew that she would be excited. It all started with a book I found at Hancock Fabrics a few months ago titled "Sewing For Children". It was full of fun and easy sewing projects for kids aged 3 and up. Dolls, purses, pillows... it was all in there with fun bright colorful photographs. Riley was going to love it!!!  Then I got to thinking.  This book would be perfect if it was paired with a sewing kit for her to get started on her projects.  Not just any sewing kit, but one made with love by myself with all items hand selected just for her.

The first thing I did was scan through the book to see what kind of projects were in there and what she might need.  The book conveniently had a list of items in the back that helped me get started.  Next, I headed to the store to gather all her goodies.  I like to create gift bundles that have a coordinated theme so I started with the book design.  It was most perfectly designed with pinks and purples (Riley's favorite colors) so I started from there.  The next item I chose was her sewing basket.  I found a super cute purple basket with a paisley flower pattern on it.  So cute!!!  The rest of the items just fell into place.  I just went down my list and picked colors that coordinated with the theme.  When I got home I packed everything together in her little sewing basket (how lucky was I that it all actually fit) and then I wrapped it up in some pretty pink flower paper and pink ribbon.  Luckily her birthday party was the next day because I just couldn't wait to give the gift to her.  I just knew she was going to jump up and down with excitement.

Listed below is what I put in her sewing kit.

Tutorial Book - I got the book Sewing For Children" by Emma Hardy.  It's geared towards children 3+ with lots of fun projects, easy instructions, and bright colorful pictures that will attract your child's eye.
Sewing Basket - I purchased a 12x12 basket/box made by Dritz.  It had a fun design in Riley's favorite colors.
Knitter's Needles - I selected these over standard sewing needles because they are much more blunt than regular needles.  I didn't want Riley pricking her fingers a million times.
Pins - The pins on the other hand are sharp so I'll keep a close watch with these.  I selected long pearlized pins in a rainbow of colors.  Make sure your pins have a large bright head on them so they're easy to find if they hit the floor.
Thread - I just purchased cheap thread in fun bright colors.  When she gets more experienced I'll start getting the better thread.
Scissors - I found some small craft scissors that were sharp enough to cut fabric.  I didn't want them too large and hard for her to handle.
Tape Measure - I just got a basic white fabric tape measure.
Air Erasable Marking Pen - This will be great not only for tracing patterns, but also in the beginning to trace lines for her to sew on so she creates straight lines.  I got hers in a fun pink color.
Embroidery Floss - This will be great when creating large detail work on her projects.  I picked out pinks and purples to match the theme of the basket.
5" Embroidery Hoop - I just got a small hoop for fine detail projects.  Now she can embroider words and pictures onto her projects.  I love the bright purple color hoop that I found.
Yarn - This will be perfect for making pom poms on projects, braided straps for purses, or hair on puppets.
Fabric Bundles - I originally was going to get fabric cut off of bolts, but was excited to find little fabric bundles of coordinating fabrics pre-cut and tied with a ribbon.
Felt - Fun and easy to use, I got a few sheets of felt in various colors.  I like the pre-cut squares.
Buttons - Buttons are great for all projects.  I got a large bag of buttons of several sizes and lots of bright colors.
Ribbon - I just got some simple 1/8" ribbon in colors that would match the theme of my gift box.
Iron-On Appliques - These will be great for her to iron onto shirts, pants, or a purse.


The next day was Riley's birthday party.  She picked our gift to open first and normally I'd have protested and have her open it last, but I was just so excited for her to open it that I just grabbed the camera and waited for the look of excitement on her face.  I was not disappointed.  She was soooooooooo excited.  She wanted to go through it all right then and there, but with other presents waiting we hand to set it aside.  It was definitely her favorite gift of the party in addition to the little kids sewing machine that her Auntie Lisa got her.  That's my little crafty girl.  I predict that she'll be a famous designer one day creating beautiful items for the world to see ... maybe cloth diapers?  Haha!  Probably not since she thinks my obsession with fluff is pretty kooky.  She's probably right.  : )

Tuesday, December 6, 2011

A New Family Tradition - Elf on the Shelf

Have you joined the latest craze?  If not then you're definitely missing out.  I'm not one to jump on the bandwagon when new fads roll out, but this one caught my eye and sucked me in pretty quickly.  Last week I was scrolling through my Facebook and blogs that I follow and I kept seeing the same thing ... The Elf On The Shelf. You can only hear about the same thing so many times before you give in.  I went straight to my faithful information source Google to find out exactly what this The Elf On The Shelf was, and this is what I found ...
"Have you ever wondered how Santa knows who is naughty and who is nice? The Elf on the Shelf – A Christmas Tradition is the very special tool that helps Santa knows who to put on the Naughty and Nice list. This interactive holiday hide-and-seek tradition is perfect for children and families of all ages.
The tradition begins when Santa sends his scout elves out to Elf Adoption Centers. Waiting for their families to bring them home, these patient elves hibernate until their family reads The Elf on the Shelf, gives their elf a very special name, and registers their adoption online. Once named, each scout elf will receive its Christmas magic and become a part of the family’s Christmas each and every year. 
Excellent listeners and even better observers, these scout elves are the eyes and ears of Santa Claus. Although they cannot be touched, or else they may lose their magic, the elf will always listen and relay messages back to Santa. Taking in all the day-to-day activities around the house, no good deed goes unnoticed; these scout elves take their job seriously.
Each night, after the family goes to bed, the scout elf uses his magical Christmas powers to fly back to the North Pole. Once there, the elf will make his or her daily report to Santa and visit with elf friends where they will tell stories about their beloved families, play with the reindeer, and of course, sneak some of Mrs. Claus’ cookies!
Before the family awakes each morning, their special scout elf will fly back to their home from the North Pole. However, since these elves like to play games, don’t expect to find them in the same spot!  While some like to hide in the freezer (probably because it reminds them of the North Pole) and others prefer to sit on the fireplace mantle or hang from the chandelier, these elves love to play hide-and-seek with their families.
On Christmas Eve, the scout elf will listen for Santa’s bell and then fly back to the North Pole until the next season, wishing every girl and each boy a Christmas of peace and a year full of joy. "
Whoo Hoo!  This was totally up my ally.  I'm a Christmas freak and anything that I can do to surprise someone (especially my kids) just lights up my day.  I was so excited that I jumped the gun and bought my elf right off the website.  ARGH!!!!  What was I thinking.  Found out 15 minutes after I placed my order that I could have just drove down to the Target down the street to get one.  Boooo!  Of course as impatient as I am I drove down to the Target the next day to buy another Elf.  I just had to start the new tradition on December 1st and my Elf from the website wasn't going to get here till today (Dec. 6th).  
That night I let the girls know that I had a surprise for them and I showed them our new friend in the house (The Elf On The Shelf).  Riley got all excited when she saw it.  She had already been introduced to The Elf On The Shelf at school that day.  She proceeded to tell us and her sister Reagan all the rules about naming the elf and not touching him or he will lose his powers.  While I fed Lincoln, Brian read the girls the book that our elf came with and then we all voted on what we wanted our elf to be named.  After quite a few choices it was unanimous that our elf be named Eli ... Eli the Elf.  Next we went online to register our elf in the system and while we were at it we watched a cute video about the elves that they had on their website.  The girls couldn't wait to go to sleep and find Eli in the morning.  We even had them tell Eli what they wanted for Christmas so Eli could tell Santa when he saw him.
So where is Eli each morning?  He's in the Christmas tree.  He's in the light fixtures.  He's in a Christmas stocking.  Yes, he's even on a shelf.  The girls shriek with excitement each morning they find him and can't wait to find him the next day.  I do have to admit that I had hoped our elf would turn our girls into little angles, but he's mostly just turned them into tattle tales.  Guess an Elf can't solve everything, but he does bring us all smiles.  I'm so glad we started this tradition and look forward to each morning and next year.  One day Lincoln too will be looking for Eli the Elf.  Till then Lincoln will enjoy milk, while Santa enjoys cookies, and the girls enjoy Eli.  

**This review is comprised of my own opinions and was not influenced by any outside source.  The product was purchased by myself and was not given to me or asked to be reviewed by any outside source.  No advertising was purchased in order to feature this product. **

Monday, November 14, 2011

Sewing Up Some Fun For Baby - How To Sew Baby Blocks

As you all can tell I'm going sewing crazy.  I've sewn curtains, blankets, bedding, blankets, diapers, and more.  I'm just addicted to my sewing machine now.  I'm always looking for a new project, and  I was totally excited when I saw on my friend's blog Mommy Mandy, a tutorial on how to sew your own baby blocks.  They are so cute, soft, and fun looking.  Oh yeah, I'm all over that!!!

The thing I love about sewing baby blocks is that it gave me a chance to use up some of my scrap pieces of fabric that keep piling up in my sewing cabinet.  I also had a lot of ribbon scraps that I was able to use up too.  I love it when I can do a project and not even have to run out and buy more supplies.  I even happened to have a bag of stuffing on hand in order to stuff them with.  Extra bonus!

Now that I'm excited and you're excited, let's get started!!!


What You Will Need:
Scrap pieces of fabric (I like to use three coordinating fabric pieces that are different textures)
Ribbon (That coordinates with your fabrics)
Stuffing
Thread
Sewing Machine
Pins
Needle
Crinkle Paper or Plastic Bags (Optional)
Bells (Optional)
Squeaky Ball (Optional)

Step By Step:

Follow this link to see the step by step instructions including photos from Zaaberry's blog.  HERE
**Note:  I like my square cutouts to be 4-1/2 x 4-1/2**

You can also view my video tutorial on YouTube below.


Fun Optional Variations:
- Try using crinkle paper or plastic grocery bags inside of your block instead of or in addition to the stuffing so that your blocks will have a crinkly sound when your baby plays with them.
- Try adding some bells inside some of your blocks so that your baby can hear some jingles when he shakes the blocks.
- Try adding a squeaky toy inside your block (in addition to stuffing) in order to have a squeaky toy.
- Try making each block a different color scheme (Red, Orange, Yellow, Green, Blue, Purple) so that they can be used to teach your toddler different colors.

I love my cute little block set that I sewed.  I have one squishy standard block with just the stuffing interior, one block with grocery plastic bags stuffed inside instead of the regular stuffing, and one block with stuffing and a couple bells inside.  Each one has three different textures also.  I used minky, fleece, and sailcloth.  I also added various sizes of ribbon on each side.  The final outcome is a block set that will stimulate my little guys senses and teach him different sounds, colors, and textures.  I hope he loves them.

I hope you enjoyed this tutorial and go on to sew some baby blocks of your own.  If you do then remember to post some pictures on my Facebook page so I can see how they came out.  I love checking out your projects.  Till then keep checking back for more tutorials, helpful information, reviews, and giveaways here on my Adventures In Fluff ... and other mommy stuff.

Friday, October 14, 2011

Stocking Up On Baby Toys - In Honor of Breast Cancer Awareness

My Mom, Dad, Riley, & Reagan
Not sure if many of you know, but my mom was diagnosed with breast cancer 3 years ago on Christmas Eve.  Not the most ideal of times to find out you have cancer, but then is there really an ideal time?  My mom took it in stride though and was very strong.  She went through 6 months of chemo to kill the cancer and 3 surgeries to reconstruct her breasts that were removed.  It was a hard time for her and our family, but we're so happy to see it in the past and count our blessings every day that things have turned out as well as they have and the cancer has not come back.

Now that it's Breast Cancer Awareness Month, I think back upon that time and look around at how everyone honors and commemorates all those women and men that have had to struggle with breast cancer in the past and who are currently struggling with breast cancer right now.  People wear ribbons, run races, donate money, and buy products that give proceeds to breast cancer foundations.  You even see sports teams wear pink on their uniforms and businesses light up or paint their whole building pink, all in honor of Breast Cancer Awareness.  Well, I wanted to do my part as well.  It might be small, but having another child makes me value life all that much more and I'm sure that you all can understand that.  I decided to honor Breast Cancer Awareness with some toys for Lincoln.

Haha!  Toys you say?  Yes, even toys can honor Breast Cancer Awareness.  When I saw the Bright Starts "Pretty In Pink" line I thought they were soooooo cute!  Not only were they cute, but a portion of the proceeds from this line goes to support breast cancer awareness and research.  They have toys, bouncy seats, play gyms, and even high chairs in this line.  It's a pink dream for anyone that has or is expecting a girl.  Now I know you're probably saying, "But you're having a boy!".  I know I'm having a boy, but that doesn't mean that even a boy can't have just a little bit of pink for a good cause.

Bright Starts was nice enough to let us test out some of their Pretty In Pink product line and sent us their Rattle & Shake Barbell, as well as their Play-a-Lot Petals toy.  I love both of them.  The Rattle & Shake Barbell is colorful, bright, and textured on all parts.  I love toys that are textured because it awakens your baby's senses as well as makes the toy more interesting and easy to hold.  The Play-a-Lot Petals is also really cute.  It can clip onto your stroller, high chair, shopping cart cover, or any other items that can have toys clipped on.  I love this feature because dropping toys in public on the dirty ground is not cool.  This toy is also brightly colored and textured like the rattle.  It also has crinkle tabs which babies seem to love, and a mirror on the back.  I do admit, I kind of look like an alien in the mirror, but that makes the toy even more fun to look at (even for mommies).  I broke out the toys for my friend's son last week and although he's only 2 mos old, he still couldn't take his eyes off the brightly colored toys.

Overall I love the cute Pretty In Pink line and don't have a problem with my little guy playing with pink toys, especially in the name of a great cause.  I also have a couple friends that are due with little girls pretty soon that would LOVE these toys so if you're reading this then you have an idea of what might be in your gift... Pink, Pink, and more Pink.


Some other items you might want to check out if you're wanting to show your support for Breast Cancer Awareness ...

Love this onesie.  Kind of a rocker take on Breast Cancer Awareness.
It wouldn't be an Adventure in Fluff without a cloth diaper.  This diaper cover looks so soft and cuddly.
GroVia Newborn AIO Diaper in Cosmos
GroVia is having a great sale right now on all their Cosmos (pink) diapers in honor of Breast Cancer Awareness Month.
I'm sure you all know by now that I'm totally into owls right now.  This bib is sooooo cute!
LOL!  Ok, I just had to add this funny little beenie into the mix.  Would be totally funny if you had twins.
Love this cute little blanket and the little ribbons on the sides that are twisted like the breast cancer awareness ribbons.
OK, these aren't technically a breast cancer awareness item, but what says breast cancer awareness more than breast pads in the shape of hearts???

**This product was given to me for the purpose of a review at my request, but the review is comprised completely of my own opinions  and was not influenced by any other outside source.**