Showing posts with label Prefold Diapers. Show all posts

Thursday, October 11, 2012

The Key To A Bulletproof Nighttime Diapering Solution

Bulletproof Nighttime Cloth Diaper Cover
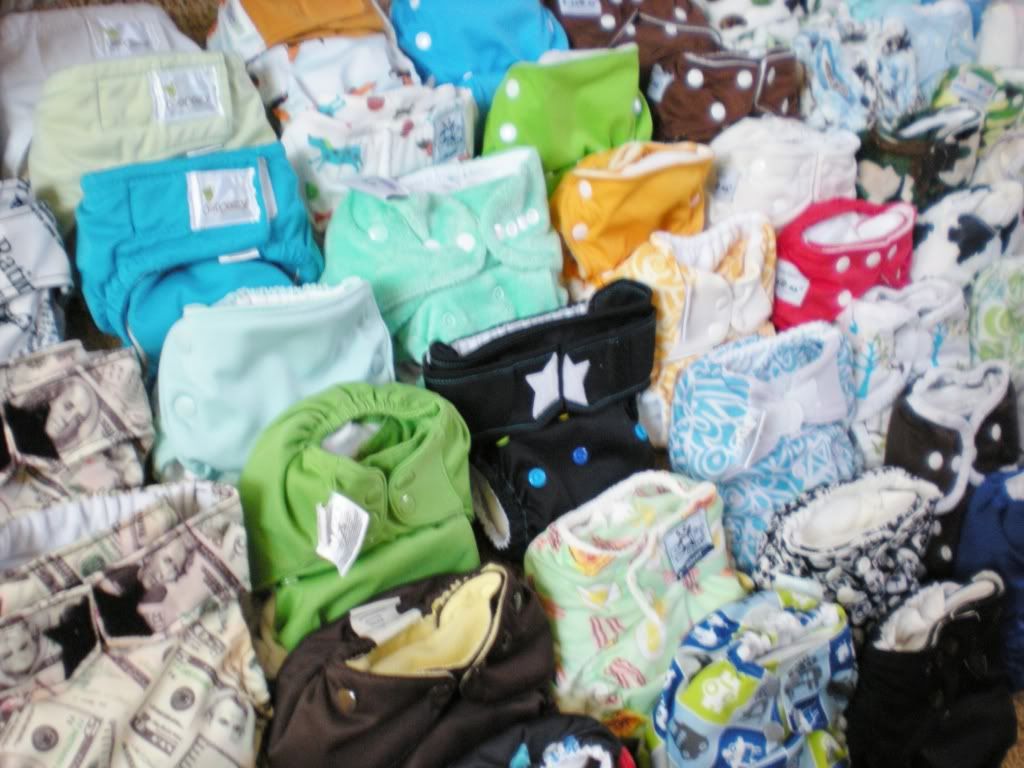
Well September is over and we just got done reviewing tons of fitted diapers.  That got me to thinking... what is the key to success with fitted diapers?  I should clarify.  What is the key to success at night with fitted diapers?  Yes, some fitted diapers are more absorbent than others and a great absorbent diaper is definitely a key ingredient, but that's not what I found to be "THE Key Ingredient".  I could use almost any of the diapers I reviewed for the September Fitted Diaper Event at night and get no leaks (yes, there were a few that I could not).  So what was the key ingredient?  Should I tell you?  Ok, I guess that's the whole point of this post...

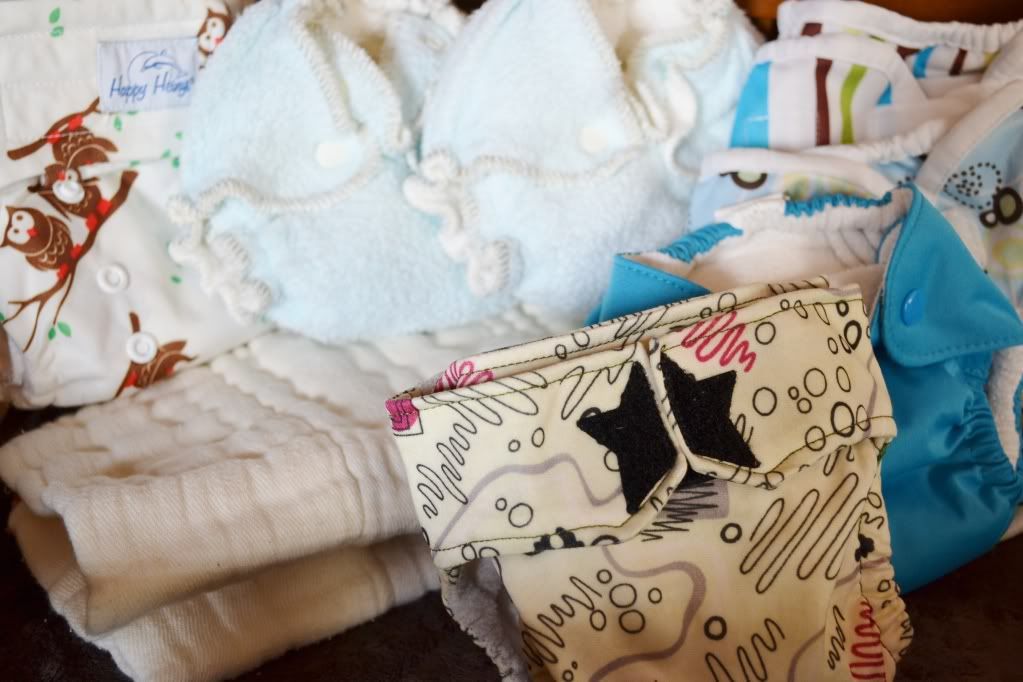
The key ingredient to a bulletproof nighttime diapering solution is all in the cover.  Yep, that's right.  If you have the right cover and you put it on correctly then you should have a leak free night provided your fitted diaper (or prefold, or flat for that matter) is somewhat decent in absorbency.  Now I've tried several covers and I keep going back to the same three brands.  Not to say that these three brands are the only ones you could use, but they do have some key features that you want to look for in a nighttime diaper cover.


KEY FEATURES TO LOOK FOR IN A NIGHTTIME DIAPER COVER:
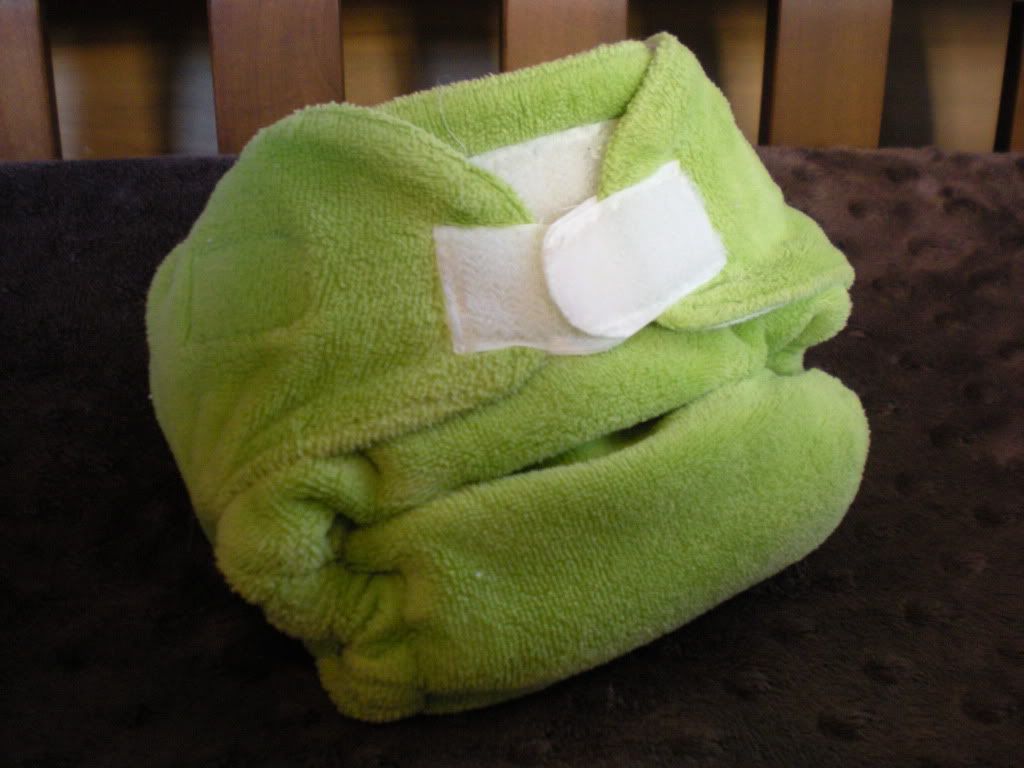
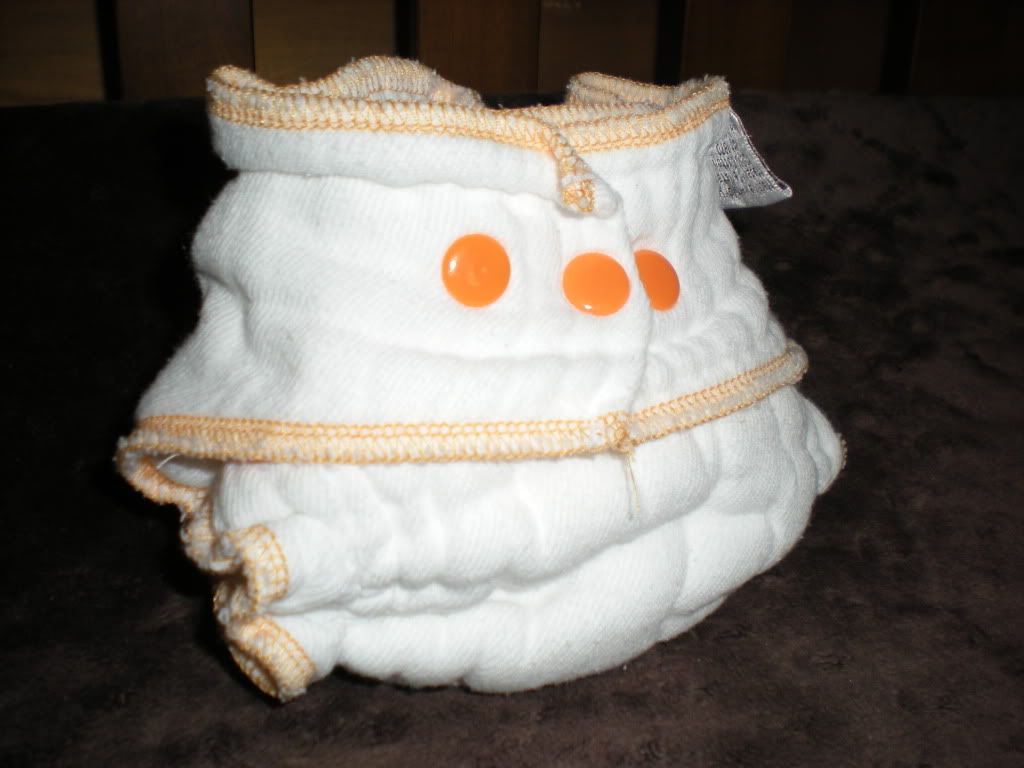
  • SIZE - It's got to be big!  Fitted diapers, flats, and prefolds are usually not too trim when it comes to nighttime solutions.  Some are, but most are fairly bulky.  That said, you're going to want a diaper cover that can cover your diaper completely.
  • INTERIOR GUSSETS - I've used covers both with and without gussets, and have found that those with gussets seem to create a better seal than those that do not have them.
  • STRETCH - Covers that stretch tend to fit your baby better, creating a nice seal.
  • SUPERIOR ADJUSTABILITY - Whether it be snaps or hook & loop closures, you're going to want a cover that will give you the best adjustability.  This is all about fit.  You want a good seal around your baby's waist and legs to keep that moisture in.
  • PUL/TPU/POLY ONLY - You don't want any natural fibers on your cover.  What I'm mainly getting at here is that you don't want a hidden layer of PUL or TPU with a cotton layer over it.  It never fails that the moisture inside will find a way to that cotton exterior before the night is up.  This goes for any cover that has a natural fiber on the outside such as bamboo... but it's usually cotton.
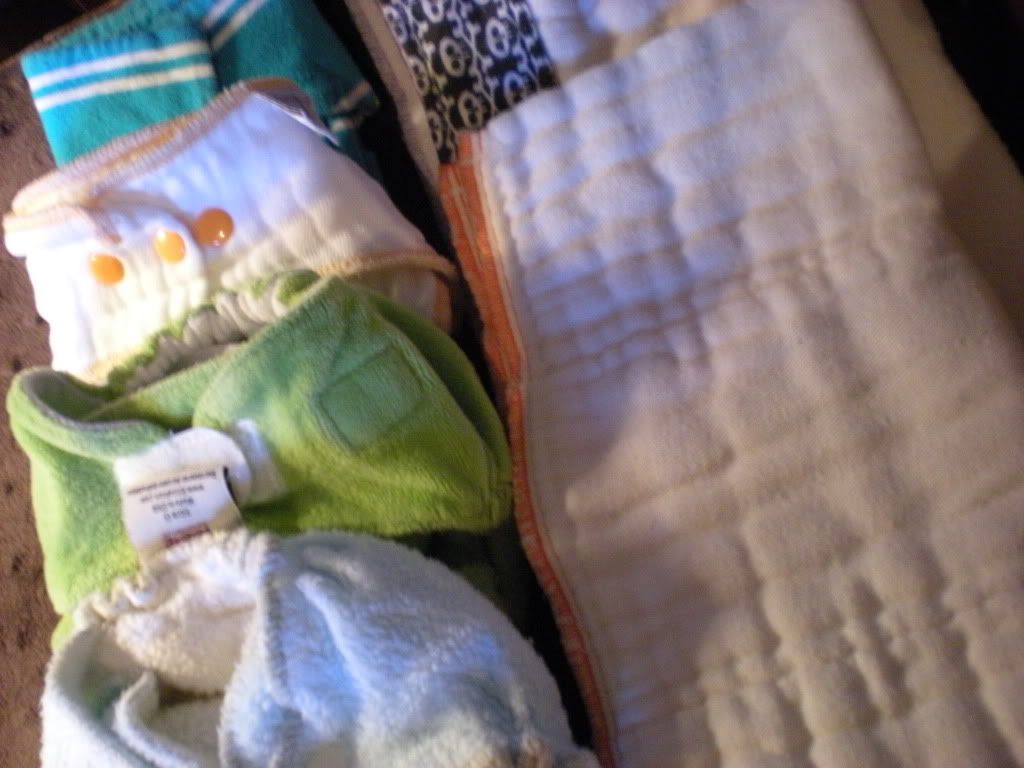
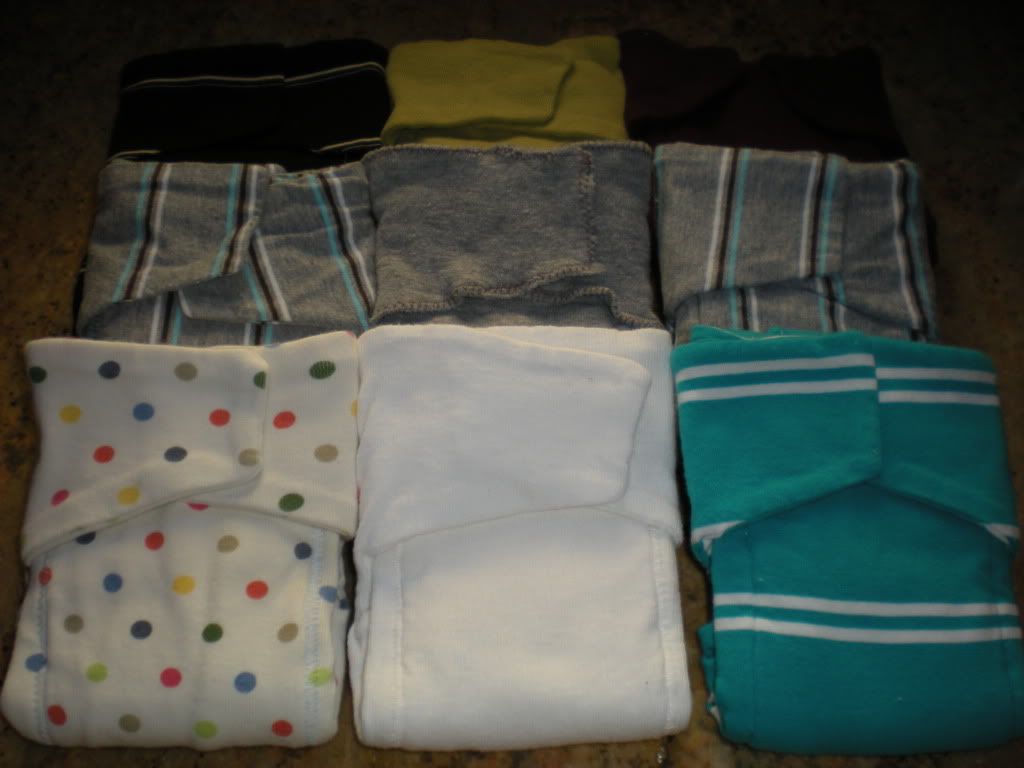
MY NIGHTTIME DIAPER COVERS:
Ok, I want to state again that these are not the only covers that will work at night, but they are the ones in my stash that I use exclusively for nights and rarely fail me.  Oh, and yes these are affiliate links so if you want to buy any of these covers and want to help support this blog then please use these links.  Thanks!!!

Ok, so you have your diaper cover.  Now what do you do?  Just having an awesome diaper cover that meets all of the features above will not guarantee you a bulletproof solution.  It's all about how you use the diaper cover.  I'm sure we all know that you put on your absorbent diaper, be it a fitted, prefold, or flat, and then you put the cover on over it, but do you really put your cover on correctly?  Maybe you're really tired.  Maybe your baby is really wiggly.  Maybe your baby is really cranky and you just want to get them to bed fast.  Maybe you just didn't realize how to put a cover on correctly.  Whatever the reason, you're still getting leaks.  Well there's a checklist I go over when putting on a nighttime diaper cover every night.

THE NIGHTTIME DIAPER COVER CHECKLIST:
  • Put on your absorbent diaper (fitted, prefold, flat).
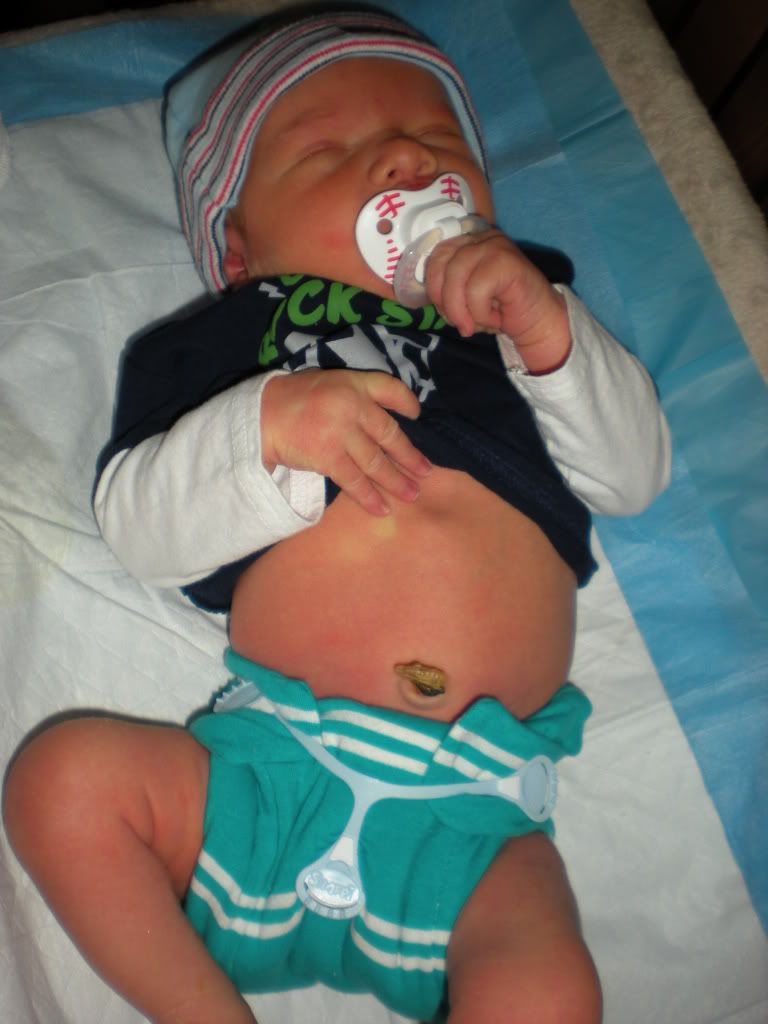
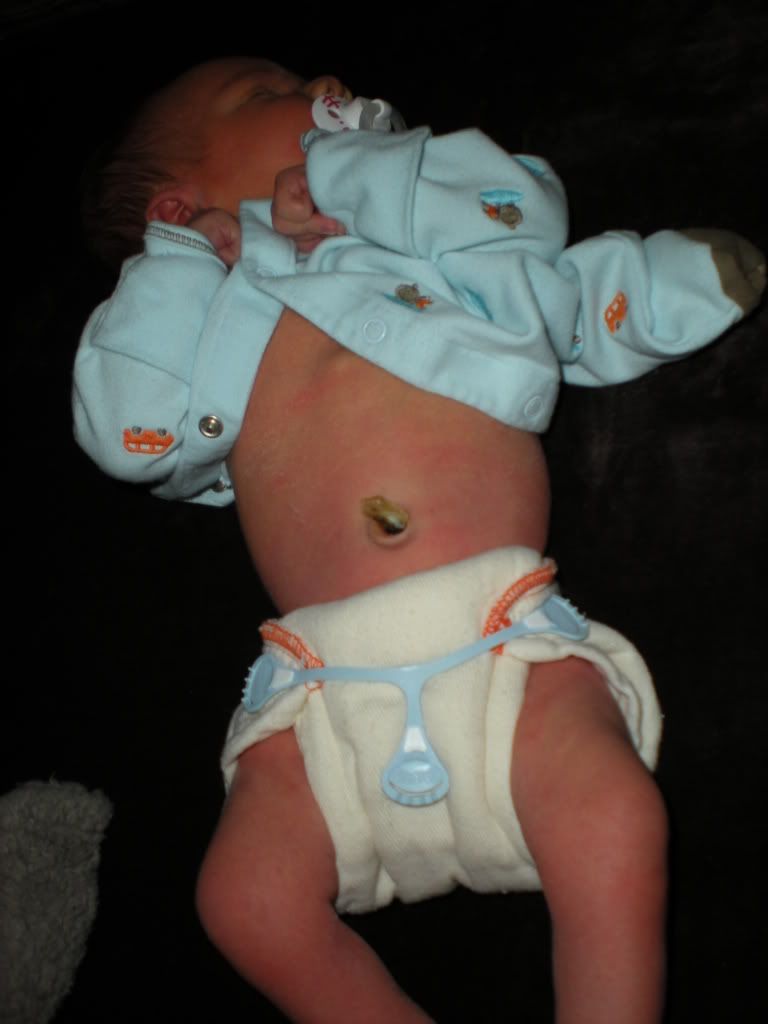
  • Put your diaper cover on over your absorbent diaper snugly but not so tight that it cuts into their skin.  You just want to make sure that the edges are completely touching your baby's skin, but not digging in.
  • Check the leg openings to make sure that none of the absorbent diaper is sticking out.  If it is then tug on the diaper cover and poke your absorbent diaper in till you no longer see it.  There should be a nice seal on the legs and you shouldn't see any of your absorbent diaper.  Pay special attention to the top of the legs.  You shouldn't see your absorbent diaper ANYWHERE!  If you can't get the cover to stretch over the diaper fully with a little wiggle room then you need a bigger cover.
  • Check the top of the diaper (front and back).  Can your see your absorbent diaper?  You shouldn't be able to.  If you do then tug your diaper cover up over it and poke your absorbent diaper in.  You should have a nice seal around the top of your diaper.  Not tight... but a nice seal.
  • If you use hook and loop closures on your covers then be sure to put pants over the cover.  You don't want your baby to accidentally loosen the hook and loop closures over night.  Even babies that don't pull on their diapers might loosen the closures just by rolling around if the hooks get attached to a blanket or doll.
So there you have it!  That's my bulletproof nighttime diapering solution.  It's all in the cover!  Yes, like I said before, there are a few diapers that I can't use at night, but overall, if I use a good cover and I put it on correctly then I usually have a leak free night.  It never fails that the one night I put on a cover that doesn't meet my requirement, or I don't check the diaper cover application list, is the night I wake up next to a puddle.  Ewwww!  I hope this helps you too and nighttime diaper leaking becomes a thing of the past.  Good Luck!!!

**Please Note!!!:  I'm not saying that these are the only covers that will work or that PUL is your only option.  I do know that wool is a great option.  I just haven't really used it much yet to talk enough about it. **

Friday, January 27, 2012

My Post Newborn Diaper Stash

Well, it's official... Linc is finally out of all his newborn diapers.  Sniff Sniff.  I actually sold most of them today.  It's a bittersweet feeling.  Yay!  I've got more money to buy new diapers!  Booo!  Linc is growing too fast and I'll never get to use these little diapers again since 3 kiddos is the max limit for us.  Bye Bye itti bitti fluff.  We had a nice two months together and now you'll move on to another little baby's bum.

That brings me to the exciting part.  Big boy fluff!!!!  Linc's been in his big boy fluff for a month now, but I realized I hadn't shared it with you all.  He looks soooo cute!  I love having so many options on styles and colors and it seems like the possibilities are endless.  Too bad my wallet isn't... or so my husband says.  Darn!  Listed below is my post newborn diaper stash.  I'll be testing these babies on Linc to find out which ones we love and which ones we don't.  In the process I'll be writing up reviews for you all to see.  Can't wait to find out which ones we fall in love with and which ones we don't.  If you're trying to decide upon a certain diaper I have listed below and you'd really like to see the review sooner rather than later then comment below with your diaper selection.  I'll try and review those diapers first.


All-In-One Diapers
Qty:1 BumGenius Elemental (One Size)
Qty:1 BumGenius 3.0 (Size: Small)
Qty:1 Bummis Easy Fit by Tots Bots (One Size)
Qty:1 GroVia (One Size)
Qty:1 Kissaluvs Marvels (One Size)
Qty:3 OsoCozy (Size:Small)
Qty:2 Ragababe Easy AIO (Size: Small)
Qty:2 Ragababe Easy AIO (Size: Medium)

Total: 12

All-In-Two Diapers
Qty:1 GroVia Shell w/ Organic Cotton Soaker (One Size)
Qty:1 Itti Bitti Tutto (One Size)
Qty:1 Ragababe 2 Step (Size: 1)
Qty:1 SoftBums Echo w/ Dry Touch Pod, Organic Bamboo Pod, & Organic Bamboo Mini Pod (One Size)

Total: 4

Pockets / All-In-Two Diapers
Qty:1 AppleCheeks Envelope Cover (Size: 1)
Qty:1 SoftBums Omni (One Size)

Total: 2

Pocket Diapers
Qty:1 Alva Baby (One Size)
Qty:3 BabyKicks 3G  (One Size)
Qty:1 BumGenius 4.0 w/ Aplix (One Size)
Qty:2 Blueberry Bamboo Minky w/ Snaps (One Size)
Qty:1 Blueberry Minky w/ Aplix (One Size)
Qty:1 BumGenius 4.0 w/ Snaps (One Size)
Qty:1 BumGenius 4.0 w/ Aplix (One Size)
Qty:1 Charlie Banana (One Size)
Qty:2 FuzziBunz (One Size)
Qty:1 FuzziBunz Elite (One Size)
Qty:1 FuzziBunz (Size:Small)
Qty:1 Happy Heinys One For All w/ Aplix (One Size)
Qty:1 Kawaii Heavy Duty HD2 (One Size)
Qty:1 Kawaii Bamboo Minky Mom Label (One Size)
Qty:1 Kawaii Snazzy Minky (One Size)
Qty:1 LUXbutt (One Size)
Qty:1 Rump.a.rooz G2 w/ Snaps (One Size)
Qty:1 BumGenius 4.0 w/ Aplix (One Size)
Qty:1 Tiny Tush Elite w/ Snaps (One Size)
Qty:1 Tiny Tush Elite w/ Aplix (One Size)
Qty:1 Swaddlebees Econappi w/ Aplix (One Size)

Total: 25

Fitted Diapers
Qty:1 Baby BeeHinds Organic Bamboo Fitted (Size:Small)
Qty:1 GMD Cloth-eez Workhorse Fitted (Size:Small)
Qty:1 Green Scene (One Size)
Qty:1 Kissaluvs Cotton Fleece Fitted (Size:1)
Qty:5 RearZ Eco Kit Fitted (Size:Small)
Qty:1 RearZ French Velour Fitted (Size:Small)
Qty:1 Sustainablebabyish Organic Bamboo Fleece Fitted  (Size:Small)
Qty:1 Thirsties Duo Fab Fitted (Size:1)

Total: 12

Prefold Diapers
Qty:15 GMD Cloth-eez Prefold (Size:Small)
Qty:3 GMD Cloth-eez Prefold w/ DIY Extended Tabs (Size:Small)
Qty:3 BabyKicks Hemparoo Fleece Prefold (Size:Small)
Qty:4 DIY Upcycled Easy Winged Prefolds (Size:Small)

Total: 25

Covers
Qty:1 Baby BeeHinds Wool Wrap (Size:Medium)
Qty:1 Blueberry Coverall (One Size)
Qty:1 Disana Wool Cover (Size:Small)
Qty:1 Gen-Y Universal Cover (Size:Small)
Qty:1 RearZ Eco Kit Cover (Size:Small)
Qty:2 Thirsties Duo Wrap w/ Aplix (Size:1)
Qty:1 Thirsties Duo Wrap w/ Aplix (Size:2)
Qty:1 Weehuggers Cover (Size:1)
Qty:2 Longies (made by a friend)

Total: 11

GRAND TOTAL - 80 Diapers and 11 Covers

Friday, January 20, 2012

My Perfect Newborn Fluff Stash

Now that I'm done posting my Newborn Cloth Diaper Reviews (Part 1, Part 2, Part 3, and Part 4) it makes me wonder. What would my newborn cloth diaper stash look like if I was to do it all over again? Mind you I don't plan on getting pregnant again so Lincoln will be the one and only newborn I get to cloth diaper, but it's fun to wonder... What if ?

I'm not sure if you remember way back when I wrote a post titled "The Newborn Stash".  It went over all the diapers I planned to use during the newborn phase.  LOL!  I guess it changed a lot.  Yes, I ended up getting the diapers I listed ... but I also got a lot more.  Ok, "My name is Chana, and I'm a cloth diaper addict".  I wonder if I still would have been happy if I had stuck to my original plan.  I think I would have been.  Would it have been my perfect newborn stash?  No.  But it would have worked.  Here's a list of what I had planned on using for the newborn stage.

(Qty: 6) BumGenius AIO - Size: XS

(Qty: 12) Kissaluvs Cotton Fleece Fitted V2.0 - Size: 0

(Qty: 6) Thirsties Duo Wrap w/ Aplix - Size: 1

(Qty: 12) Green Mountain Diapers Cloth-eez Prefolds - Size: Newborn

(Qty: 12) Green Mountain Diapers Cloth-eez Prefolds - Size: Small

(Qty: 3) BabyKicks Hemparoo Fleece Prefold - Size: Small

Now that would have been all good and dandy, but having went through the newborn stage and knowing what I know now, I would have done things a little differently.  Although I tried to spread the love and use all my newborn diapers I definitely had my favorites that I always grabbed first.  Each diaper had it's specific purpose with a certain time of day I would use them or a certain activity that I preferred to use them during.  Having said that, here is my perfect newborn stash.  I only wish I was brave enough (or crazy enough) to have another baby so I could create this perfect stash and use it.  Boo!  Oh well.  Maybe one of you could use it and let me know how it works out.

(Qty: 4) Ragababe Easy AIO - Size: Newborn $26-$28
This would be my go to daytime diaper especially if anyone was going to see him in a diaper.  Love the look.  Love the fit. Love the absorbency.  Don't love the price, but they have a great re-sale value so I would anticipate on getting a lot of my money back.

(Qty: 3) Kissaluvs Newborn AIO - $14.95
This would be my go to out of the house diaper during the first week or two when the umbilical cord is still on.  I hate having a two piece system when out of the house.  I loved the fit of this diaper and the price was pretty good as well.

(Qty: 2) Happy Heinys Mini OS - $18.97
This would be one of my daytime diapers.  I love all the patterns that these come in and I love that they are so adjustable and last a long time size wise.  They fit nice and are super easy for dad to put on.  I also like that it's a pocket diaper and super easy to stuff.

(Qty: 4) Thirsties Duo Diaper w/Snaps - Size: 1 - $18.25
This would be one of my daytime diapers while I was still using my fitted diapers at night, but later turn into my go to night time solution in the later months.  I love the fit of these.  I love the inserts (especially when you add an extra hemp insert for the night).  The prints and colors are nice and you can't beat the durability and absorbency of these.  I'd pick snaps over aplix because I found it to hold up way better than the aplix.

Gotta love a One-Size diaper that works on a newborn.  I LOVE the Rump.a.rooz prints too.  This diaper works great and looks even better.  I like the snaps because even when your baby can use their hands, they'll have a hard time opening the snaps.  Snaps last longer anyways which is great when you have a OS diaper.  These will be great from beginning to end.

(Qty: 9) Kissaluvs Cotton Fleece Fitted V2.0 - Size: 0 - $13.95
I LOVED my Kissaluvs for nighttime on a newborn.  They were easy to put on, easy to take off, and oh so soft!  They also helped to contain everything including those messy newborn poops during the night.  I felt that because these contained so well, I didn't need that many covers.  I NEVER got poop on my covers.  I love that these have an umbilical cord snap down and fit on babies up to 15lbs.  

(Qty: 3) Thirsties Cover - Size: XS - $11.50
Love my Thirsties Covers!  These are great for those first couple of weeks.  The Duos are great in the long run, but I feel that the sized covers fit better on a bitti newborn and look nicer.  I'd only get three though because I'd want a couple covers to last past the newborn stage.

(Qty: 2) Thirsties Duo Wrap w/ Aplix - Size: 1 - $12.75
Love the economical value of the Duo Wraps.  They get as small as an XS Thirsties cover, but last wayyyy longer.  Although I think the snap version lasts longer, I wouldn't plan on using the wraps past the newborn stage so longevity isn't an issue for me with this one, thus I'm going for ease of use here.

(Qty: 12) Green Mountain Diapers Cloth-eez Prefolds - Size: Newborn - $2.00
Now, I'm not much of a prefold girl, but since I didn't like most of the newborn options with an umbilical cord snap down I would probably use these for the first week or two until the cord fell off (in addition to my Kissaluvs AIO's and Fitteds).  After that point they'll just be use for back up diapers, doublers, burp cloths, and covers to lay over my changing pad.

So there's my perfect newborn stash!  You'll probably notice I'm still a bit eclectic, but I think one type of diaper is just too boring.  I like to spice it up a bit.  Please note that when I selected my perfect newborn stash I took into consideration the size of my children when they were born.  They were all 7lbs or above so I never had a bitti baby.  If I had then my choices might be a bit different.  But for the average size to large size newborn, I think this is the perfect stash that takes into consideration style, price, durability, longevity, and of course function.  Hope this helps you in your newborn cloth diaper research.  Happy Fluffy Shopping!

If you would like to purchase any of these diapers for your little one, then please visit their website links above or help support this blog by visiting one of my affiliate stores: Sweetbottoms Baby BoutiqueKelly's ClosetDiaper Junctionor Thanks Mama. 

Thursday, January 19, 2012

Newborn Diaper Reviews (PART 4) - Prefolds and Fitteds

This is Part 4 of my Newborn Cloth Diaper Reviews series.  I've decided to do this part a little differently.  Normally I do my heart rating system, but I felt I was getting very repetitive in my writing on each of the options in this particular series so I've opted to just write a short synopsis of each one.  While with the All-In-Ones, Pockets, & Covers I tried to spread the love and try them all equally ... I did not seem to do the same with my fitted diapers and prefolds.  I quickly found my favorites and tended to stick to those.  For that reason I am sorry to say that I do not feel that my reviews on these options are as valuable as the others, but I've decided to post what I did notice with each option anyways.  I hope it helps in your selection of newborn diapers for your little one.

** Please note that while I aim to provide the most thorough and honest reviews possible, this review is based on my own preferences and experiences.  Each baby is different and each parent has different likes and dislikes.  What works for one may not work for another, so keep that in mind while doing your research.**


I LOVE the Kissaluvs Cotton Fleece Fitted diapers!  I used these every night during the newborn stage.  They are so soft and snuggly and fit Lincoln perfectly.  Because they have an umbilical cord snap down I was able to use these right from the start.  I found they actually fit better with the umbilical cord snap down so I left them that way for most of the time that Lincoln wore them.  They were very absorbent and paired with any of our covers we never had a leak.  They were especially great at keeping the newborn poop in.  We never had poop escape these fitted diapers so I never got poop on my covers let alone outside the covers.  I also found these diapers surprisingly very easy to use despite the snaps.  There is only one snap per wing so after two or three diaper changes I had the snap routine down perfectly.  As for the look of these diapers, I went for the colored option.  They're a dollar more per diaper, but I love the cute pastel colors and they looked so cute on my boy's bitti bum.

Thirsties Duo Fab Fitted (Size: 1) - $17.00 / 6-18 lbs

I like my Thirsties Duo Fab Fitted.  I love that it's a hook and loop closure therefore a quick change.  I love that it has a stay dry liner so that Lincoln's butt won't have a wet soppy feeling when I take it off.  I love that there's a pocket built in so I can not only stuff the diaper with additional inserts if needed, but it also helps the diaper get cleaner and dry faster than if the pocket was not there.  Another great feature of this diaper is the two size system with a snap down rise.  These diapers fit longer and give you more bang for your buck than a totally sized system or a standard newborn diaper.  The Fab Fitteds also come in super cute colors and a super soft texture.  So many great things about this diaper, but for some reason I never really reached for this diaper.  I always went for my Kissaluvs over this diaper.  It could be because I could use the Kissaluvs earlier due to the snap down rise so they became a favorite early on, but that still doesn't seem like a good enough reason.  I think it was the fit of the diaper.  Although they both did their job, I just liked the way the Kissaluvs fit Lincoln better.  The Thirsties were a little thicker and required a bigger cover.  Most likely this was due to the snap down rise.  Even now though if I use a fitted diaper (which is rare), I will use my larger size Kissaluvs or my Green Scene fitted.  I can't place why I don't favor the Thirsties ... I just don't.

Cloth-eez Workhorse Diapers (Size: NB) - $4.95 / Preemie - 10 lbs

These are fitted diapers made from GMD Cloth-eez Prefolds.  The concept of these is great and so is the price.  I like the trim fit and the absorbency is pretty good with room to spare for a doubler.  They're pretty basic looking, but then again what do you expect for this price?  Unfortunately they didn't fit Lincoln very well.  I had a hard time getting the perfect fit with their snaps.  I saw on GMD's website that they're going to start selling these snapless this spring though.  I would totally buy them snapless and use a snappi.  Then I'd be able to get a perfect fit.

If you've been following my blog for awhile then you'll remember my tutorial on how to sew your own Upcycled T-Shirt Winged Prefolds.  I created these after I found a tutorial for daddy flats and wanted to improve upon the design.  These turned out to be my favorite prefolds and I loved using them.  They're by no means a nighttime diaper, but for the day they are great!  I love the trim fit of these prefolds and I love the stretch of the fabric.  I could really get a great fit on the waist.  They were also very easy to put on and worked great with a Snappi.  I used these with my smaller covers like my Bummis.  If I needed more absorption I could add a small doubler without adding too much bulk.  I also loved that I could create really cute prints from t-shirts I had at no cost, or go out and buy knit fabrics and create even cuter diapers and a small cost.  In the end my greatest love for these diapers came from the fact that I made them myself and it was a great feeling to know that Lincoln was wearing diapers made by mommy with love.

In the beginning of my cloth diaper research I said I was not going to try prefolds.  They just seemed like too much work and cost was not a factor for us in cloth diapering.  Why bother I thought?  Well, I'm glad I tried them and especially glad I tried the GMD prefolds.  They were such great quality and turned out to be quite fun to master the various folds.  That being said, I didn't use my prefolds that often.  I mostly just used them to say I did, but in reality I found them to be more work and bulkier than my other options.  As for Cloth-eez (GMD) Prefolds vs other prefolds, I can't say much.  They are the only cotton prefolds that I used.  They do seem to be a great quality though.  They fluff up very nicely and absorb quite a bit of liquid.  The sizing also seemed to be true to what they said as far as baby weight.  So, am I glad I tried them? Yes.  Will I continue to use them?  Probably not.

DIY Extended Tab Prefolds (Size: NB) - $2.00 / 6-13 lbs **using GMD Prefolds**

While testing out my prefolds before Lincoln got here I realized that the wings were hard to wrap around my teddy bear model.  This sparked my DIY side to take over and I came up with the idea to sew Extended Tabs on my Prefolds.  I wasn't sure if they would really be better, so I only sewed tabs on half my prefolds.  I ended up loving them though.  They really made wrapping the prefolds around Lincoln's waist a lot easier and also extended the life of my prefolds.  It seems like prefolds always get too tight on the waist before they get too short on the rise.  This leaves an awkward size gap.  The tabs really solve this problem.  My only dislike with the extended tab prefolds was the fabric I chose to make them with.  While flannel worked ok, I think a knit terry would have been better.  The more I washed the flannel the better the Snappi worked with them, but I think a knit terry would have been nice to give stretch to the tabs and work better with a Snappi.


I'm not really sure I'm even qualified to write about these since I only used them once.  Honestly I just forgot that I had them.  The one time I did use one it worked very well though.  These can realllllly soak up some liquid and it didn't even feel that wet.  I'm definitely going to keep them around to be used as doublers.  That's the great thing about newborn prefolds.  After you're done using them as a prefold they have so many other uses.  They better have a lot of uses with this price though.  They're more than three times the price of a cotton prefold.  Worth it?  Yes, if you're going to use them as doublers later on.


_________________________________________________________________________________

If you would like to purchase any of these diapers for your little one, then please visit their website links above or help support this blog by visiting one of my affiliate stores: Sweetbottoms Baby BoutiqueKelly's ClosetDiaper Junctionor Thanks Mama. 


**This review is comprised of my own opinions and was not influenced by any outside source.  The products were purchased by myself and were not given to me or asked to be reviewed by any outside source.  No advertising was purchased in order to feature these products. **

Monday, October 3, 2011

Folding Prefolds - It's an Art Form

I remember when I first got the idea that I was going to use cloth diapers with our third child.  I said that prefolds were definitely not for me.  I wanted something cuter than prefolds and I definitely wanted something easier than prefolds.  I looked at all the AIO's, AI2's, Pockets, & Fitteds, and thought ... Why would anyone want to use prefolds?  I bet if I went back to my first post on here, I probably even said that I would not use them.  What's the point?  Then I started chatting with other cloth diapering moms.  I kept hearing over and over how great prefolds are to use in the newborn stage.  They kept saying how easy they are to clean.  They kept saying how much more economical they were.  They kept saying how easy they are to use.  You can only hear positive feedback so many times before you break and decide to give in.

I ended up buying a small stash of prefolds for the newborn stage.  I got mine from Green Mountain Diapers in the newborn size and size small.  I only bought six of each.  That should be enough to at least see if I like them and say I gave them a shot.  I prepped them and put them with my other newborn diapers ... and there they sat.  Finally one day I decided that I better learn to use these diapers before Lincoln gets here.  I went online, watched tutorials, looked at pictures, and then armed with a prefold, a snappi, and one of my girls dolls I set to work.  I was going to figure these things out!

To my surprise, putting on a prefold isn't that bad at all.  It's actually kind of fun.  I find myself wanting to try again and again to see if I can put them on faster and nicer each time.  I can still use some improvement and I know that having a real baby will present a whole new obstacle when it comes to mastering this art form, but I have to say that after some research and practice, I'm actually pretty excited to test these babies out!  Listed below are the most common folds that you can use and a few tricks of the trade that I learned from other cloth diapering parents.

**NOTE: All Prefolds Need A Diaper Cover**


TRIFOLD
Lay your prefold diaper out flat on the changing table with the absorbent section in the middle going length wise.  Fold one of the long sides in over the absorbent middle section.  Then fold the other long side in over the middle section.  You should now have one long rectangle.  Lay your prefold inside your diaper cover.  Lay baby on top of the prefold and diaper cover and fasten cover to the baby.  No snappi is required for this fold.  The great thing about this fold is that you can trifold all your diapers ahead of time to make diaper changes quick and easy.  You can even go so far as to have them already laid in your diaper covers.

ANGEL WING FOLD
Lay your prefold diaper out flat on the changing table with the absorbent section in the middle going length wise.  Lay your baby on top of the diaper so that the back of the diaper lines up with their belly button.  Trifold the front of the diaper while leaving the back of the diaper fully opened up.  Fold the front of the diaper up over the baby.  If the diaper is too big then fold the front of the diaper in towards the baby till it's the right size.  Pull the back wings forward around the baby and secure with a Snappi.

NEWSPAPER FOLD
Lay your prefold diaper out flat on the changing table with the absorbent section in the middle going length wise.  Lay your baby on top of the diaper so that the back of the diaper lines up with their belly button.  Fold the front section of the diaper in.  The amount you fold it up will depend on the size of your baby.  Fold it so that when you pull the diaper up over the front of your baby, the top of the fold just reaches the belly button.  Fold one side of the front of the diaper in over the middle section.  Fold the other side in and tuck it into the first side that you folded in (make sure it's tucked into the fold, not under the fold).  You should now have a nice a secure fold in the front.  The back of the diaper under the baby will still be fully extended out.  Fold the front of the diaper up over the baby.  Pull the back wings forward around the baby and secure with a Snappi.

JELLYROLL FOLD
Lay your prefold diaper out flat on the changing table with the absorbent section in the middle going length wise.  Lay your baby on top of the diaper so that the back of the diaper lines up with their belly button.  Take each side of the diaper and starting at the back wings of the diaper roll the sides in so they taper in closer and closer till they touch at the far front of the diaper.  Fold the front of the diaper up over the baby.  If it's too bulky in the front then you can flair the rolls out around the baby's belly.  Pull the back wings forward around the baby and secure with a Snappi.

BIKINI TWIST FOLD
Lay your prefold diaper out flat on the changing table with the absorbent section in the middle going length wise.  Lay your baby on top of the diaper so that the back of the diaper lines up with their belly button.  Crossing your arms, grab each of the front corners of the diaper.  Rotate the sides 180 degrees so you get a twist in the crotch of the diaper.  Fold the front of the diaper up over the baby.  Pull the back wings forward around the baby and secure with a Snappi.

TRICKS OF THE TRADE
For A Boy:  Diaper folds that include folding the front of the diaper in at the front of the diaper are great for a boy.  This will double up the absorbent layers in their wet zone (the front).

For A Girl: Try laying your diaper in the opposite direction before you start your diaper folding (with the thick soaker zone going sideways instead of length wise.  This will double up the absorbent layers right in their wet zone (in the middle) when you fold the diaper.

For The Super Pooper: Try folding the back of the diaper in before you lay your baby on the diaper and start folding.  This will create an additional poo pocket in the back.

For The Wetness Sensitive Baby:  If your baby is sensitive to being wet, then add a fleece liner on top of your diaper right before you fold the diaper up and fasten it to your baby.

For The Super Soaker: Try adding a doubler to your prefold along the soaker zone before you start folding the diaper.  If you need to fold the doubler to make it fit then fold it up front for a boy or in the middle for a girl.

For The Thick Waisted Baby: Try sewing some extended tabs onto your prefolds.  See my tutorial on how to do this.

For The Prefold Challenged: Try sewing some of my Easy Winged Prefolds, or even easier yet ... you can purchase them on my Etsy shop - Fluff N Stuff.


Now that I've got the folds down it's time to start practicing my speed.  The faster I get the less crying and pee geysers I will have to deal with.  I hope this tutorial helps you with folding your prefold diapers and makes them seem a lot less intimidating than they might look at first glance.  I really enjoy my prefolds now and can't wait to try them on Lincoln.  Till then keep checking back for more tips, tutorials, and giveaways on Adventures In Fluff ... and other mommy stuff.

Friday, August 19, 2011

How To Sew Extended Tabs On Your Prefolds

It's that time again ... Time for another project!  This one is really easy and will help you get a lot more use out of your prefold diapers.  Who wouldn't want that???  While researching cloth diapers and hanging out in the cloth diapering chat rooms I've heard of so many moms complaining that they're in between sizes on their prefolds.  One size is too small, the next size up is too big.  The problem usually isn't with the rise.  It's almost always with the wings.  They just don't extend out far enough to cover the belly so you have to size up ... but now the rise is too high and folding over just makes for a really bulky diaper.  What to do???

Enter the tutorial for How To Sew Extended Tabs On Your Prefolds.  The solution is so easy it's a wonder why they just don't sell all prefolds this way.  But then if they did we wouldn't have all these fun projects to do.  Extended tabs are basically just a strip of fabric sewn on the top of the diaper that extend out past the sides of the diaper by about 2-1/2".  You can use just about any fabric type that you want to as long as it will work with a snappi (or pins if you choose to use them).  That brings me to the second great thing about adding extended tabs to your prefolds.  Depending on the fabrics that you decide to use, you can turn a boring old prefold into a super cute accessory to your baby's wardrobe.  Time to get started!


What you will need:
Prefold Diaper (Prepped and ready to go.  Do not use an un-prepped prefold!)
Fabric to use for Extended Tabs (Make sure it will work with a snappi if you will be using one)
Sewing Machine
Thread to coordinate or contrast with your fabric
Pins
Scissors
Fabric Marking Tool (Marker, Pencil, Chalk, etc.)
2-1/4" Dia Circle Template
Iron

Step By Step:
- Cut out your fabric for the extended tabs.  The width of the fabric should be 4-1/2".  The length of the fabric should be 6" longer than the width of your prefold diaper.
- Fold your fabric piece in half lengthwise so that the right side of the fabric (the side with the pattern) is on the inside.  You should only be able to see the wrong side of the fabric on both sides.  Make sure the edges are nicely lined up and iron your fabric flat.
- Using your 2-1/4" Dia circle template (or you can freehand them if you want) and your fabric marking tool, trace out a half circle on each end of the extended tab.  Make sure that the edge of the template touches the edge of your extended tab so you don't lose any length to your tabs.
- Trim the edges of the extended tab along the half circle lines.
- Pin the open side of the extended tab closed.
- Sew a straight stitch a 1/4" in to seal up the open side of the extended tab.  Start at the far end of the tab until you reach 1/3 of the way across the tab.  Cut your thread.  Skip the middle third of your extended tab.  Start again and sew the last 1/3 of the extended tab.  You should end up with the center portion of the tab being open.  This will enable you to be able to turn the extended tab right side out.  **See picture with blue markings showing where to sew**
- Turn your extended tab right side out.  Smooth out the edges.  Turn the edges of the opening that was not sewn inward so that it matches the rest of the extended tab.  Iron the extended tab flat.
- Place the extended tab at the top of your prefold diaper lining it up with the edge.  I like to position the extended tab so that the opening is furthest away from the edge.  Make sure that the tabs are equal on both sides.  You should have about a 2-1/2" wing on each side of the prefold.  Pin the extended tab to the prefold along the top edge.
- Sew a straight stitch an 1/8" in from the edge of the extended tab all the way around (skipping the wings).  You should end up with a long skinny rectangle of stitching on the back side of the prefold.  Trim your threads close to the fabric.

Voila!  You're done.  Time to test out your winged prefold on your little one.  I'm sure you all remember that my little one is not here yet so I get to try my extended tab prefolds on my wonderful model, Teddy.  The end result?  A super cute prefold with a super awesome fit.
I hope you enjoyed this tutorial and go on to make lots of extended tab prefolds of your own.  If you do then make sure to post pictures of your creations on my Facebook page so I can take a look at them and see how great they turned out.  Thanks for sticking with me on my journey and I hope you'll join me again for more Adventures In Fluff.

Friday, August 12, 2011

How To Sew Your Own Upcycled T-Shirt Wing Prefolds

7/26/12 - This is a re-post for the July Upcycled Crafting Challenge.  This was one of my favorite upcycled crafting projects that I used all the time when Linc was a newborn.  I think it's time to make some more of these.  Won't you join me?

Ok, I’m itching for another project. Are you? What to do???? I got the idea for this next project from a friend of mine on Fertility Friend. She found the project on Diaper Swappers where a mom had created “Daddy Flats”. These are essentially flat cloth diapers made from old t-shirts that daddy doesn’t wear anymore. They are cut to have wings that easily fold in to create more absorbency in the center of the diaper.  Maybe that's another reason they call them Daddy Flats.  They are a flat diaper, but cut into a shape that makes cloth diapering easy for even the most origami challenged (aka ... Daddy).

Always trying to tailor projects to my needs, available resources, and my uncontrollable urge to experiment, I’ve decided to change up the original design. First, I'm going to turn and topstitch my diapers. If I had a serger machine I'd love to try a few that way as well since it would be faster, but I don’t and I do not like the look of a zig-zag stitch on the edge (although you could do it that way as well). Secondly, I am going to be adding a soaker pad into the center of the diaper turning it from a flat to a prefold diaper.  This will increase the drying time, but also the absorbency of the diaper.  Lastly, I'm going to change the pattern design a bit.  I wanted to be able to jellyroll the side flaps easily so I squared them out instead of angling them at the top.  I also squared out the tabs on the waist so they lay nicer when on the baby.

First thing is first. We need to gather up some old t-shirts. I gathered up a mixture of both my old t-shirts and Brian’s old t-shirts. The more fun the pattern on them the better. Brian’s shirts are of course much larger so I can get two or three diapers out of each of his shirts depending on the cut versus only one out of mine. I tried to find the shirts with the best quality of cotton and that were the thickest. I have some shirts that are REALLY thin and those just won’t do.  I also tried to make sure that they were all 100% cotton.

Next thing I needed to do was gather up an old towel that I could cut up for the soakers. Believe me. I have plenty of old towels lying around in my closet. Light colors are better so they don’t show through the fabric of the t-shirt.

Now it’s time to get down to business. Follow the step by step process below to create your own Upcycled T-Shirt Wing Prefolds.


What you will need:

Wing Prefold Pattern (Print both Pattern A and Pattern B to scale)

***UPDATE*** Here is a measurements pattern for those that can't get the scaled pattern to work for you.  Just take the measurements for the size you want and draw out your own pattern.

Old T-shirts (make sure there are no holes and they are not too thin)

Old Towel

Sewing Machine

Thread (in coordinating or contrasting color to your t-shirts)

Pins

Scissors

Fabric Marking Tool (Washable Marker, Washable Pencil, Chalk, etc.)

Iron

Upcycled T-Shirt Wing Prefolds – Step By Step:


- Cut out your Wing Prefold pattern along the cut lines in the diaper size you desire (NB,S,M,L).  Follow the directions on the pattern to set up the entire pattern (it's in two parts).
- Lay your T-Shirt out on a flat surface.  Make sure that the T-Shirt is turned inside out.  Completely smooth out the T-shirt.  Iron if necessary.
- Lay your pattern on top of the T-shirt making sure that it is straight.  If the T-shirt has a pattern, center it where you want it on the diaper.  Pin your pattern onto the shirt, or use weights to hold it down.  Trace your pattern onto the shirt.  Remove the pins and pattern from the shirt.  Leave the shirt sitting flat on the table.

- Pin all the way around the diaper INSIDE the cutting lines making sure to secure both sides of the T-shirt.  Cut out your diaper from the T-shirt.  Make sure you are cutting through both sides of the T-shirt.

- Using your old towel, cut out the soaker in the designated size.
Size: NB (8"x12")
Size: SM (9"x14.5")
Size: MD (9"x16.5")
Size: LG (10"x19")  
- Fold your soaker in half and lay it in the center of your t-shirt diaper cutout.  Pin the soaker to the diaper at the top and the bottom.
- Starting just to the right of the soaker at the bottom of the diaper (do NOT sew on the soaker at the bottom of the diaper), sew a straight stitch around the entire diaper a 1/4" in stopping just before you hit the soaker at the bottom of the diaper.  This will leave you with a 4-5" section of your diaper that is not sewn.  It will also make it so that the soaker is only attached at the top of the diaper.
- Trim the corners of your diaper so that they will not be bulky when you turn the diaper right side out.  Make sure not to cut into your stitching.
- Turn your diaper right side out by sticking your finger into each corner and pushing them through the pocket opening one by one.  Shake the diaper out so that it turns completely right side out.  Your soaker will now be on the inside of the diaper.
- Straighten the soaker out so that it is once again in the center of the diaper.  Flip the edges of the exposed soaker into the diaper as well as the edges of the t-shirt that are not sewn.  Iron this flat so it will be easier to sew closed.  Fasten with a pin if needed.
- Sew a straight stitch along the entire bottom side of diaper at 1/8" in to seal the opening closed.  (*If you want you can sew around the entire diaper to create an even cleaner looking diaper).  Trim your thread close to the diaper after sewing.
- Sew a straight stitch (or decorative stitch like a zig zag) along each long side of the soaker to seal it in place. Make sure to sew on the diaper soaker close to the edge.  This will keep your soaker from shifting and create a clear folding line for folding your diapers.  Trim your thread close to the diaper after sewing.

Voila! How did yours come out? I can’t wait to use mine. They look so cute. The best part is that I didn’t have to go out and spend any money to make these diapers to add to my stash. Cost = $0.00. Can’t beat that!


*SOME HELPFUL TIPS*
- Make sure to back stitch at the beginning and end of stitching so that your stitching won't pull out.
- When rounding corners, stop the machine at the corner, lower your needle, lift the foot, and rotate your fabric.  Lower the foot again and continue sewing.  This will create a nice clean corner.
- Use fun coordinating thread to really make a statement with your diapers.
- Knit fabric is really stretchy.  Keep a close eye on your sewing so you don't get off track and make sure your fabric doesn't get get sucked into the sewing machine causing it to jam.

*SOME FUN ALTERATIONS*
- Try one T-Shirt fabric on one side and another on the other side.  This will give you a fun reversible diaper.
- Try leaving a pocket opening where the soaker is so you can easily add additional inserts as needed.

*HOW TO USE YOUR UPCYCLED T-SHIRT WING PREFOLD*

- Trifold the side flaps in.  Flip the front of the diaper up over baby.  Close the wings around the baby's waist.  Secure with a Snappi or pins.  *For added absorption lay a doubler in the diaper before you trifold the side flaps in.

- Jellyroll the side flaps in.  Flip the front of the diaper up over baby.  Flair the front of the diaper out and around baby's tummy.  Close the wings around the baby's waist.  Secure with a Snappi or pins.  *For added absorption lay a doubler down the center of the diaper.

I hope you enjoyed this tutorial. Don’t forget to post pictures of your creations on my Facebook page so I can see how cute they all came out. Better yet … post a picture of your little bundle of joy wearing one of your Upcycled T-Shirt Prefolds. Who doesn’t love to see babies in fluff?


*This post is part of the Upcycled Crafting Challenge (#freefromtrash) hosted by Calley, The Eco Chic, and is part of a one month challenge to create from trash.  This challenge will hopefully open your eyes to the number of items that we still end up trashing every day that could be used by ourselves or our kids to create fun and useful items.  To find out more about the challenge and to see other projects click on over to Calley’s announcement post.*

Check out some of the other great posts from today below and be sure to link up your projects today too!!!  Just link to your blog post, Pinterest picture, Photobucket Picture, etc.  I'd love to see your t-shirt projects.

Wednesday, June 8, 2011

The Newborn Stash

I realized after I finished posting my Great Diaper Search series, that I didn't talk about what I'd be using for the newborn stage.  Most of the diapers that I selected in the Great Diaper Search series are One Size (OS) diapers or size smalls, and although they say they will fit a newborn, in reality they will most likely not fit till my baby is about 10 pounds.  That leaves me with about two to three months of the newborn phase that I need a diapering solution for.


I wanted to take a few things into consideration when choosing my newborn diaper stash...


FUNCTIONALITY
At the top of my list is functionality.  The last thing I want to do is buy a whole stash of diapers that don't work.  I know the newborn stage is going to be full of explosive poops and frequent diaper changes so I'm looking for a diaper solution that is going to contain all of that mess and contain it well.

EASE OF USE
Although this is baby number three for my husband Brian and I, we both know that those first months are tough and the last thing I want is to complicate my daily routine more than I have to.  For this reason, I want to make sure that whatever diapers we choose for this early stage are easy to use whether I'm conscious, or unconscious from lack of sleep.


COST
Obviously I don't want to spend a ton on diapers that I will only use for a very short amount of time.  I don't want to sacrifice all of my other deciding factors for cost, but it definitely is a consideration.

RESALE VALUE
With cost comes resale value.  In order to recoup some of the money I spend on these diapers so that I can buy more diapers for the later stages, I plan to sell my newborn stash.  For this reason I want to make sure that I buy well known brands that will be easy to re-sell.

AESTHETICS
At the bottom of my list is aesthetics.  Although I don't want them to look ugly, I just think that for this shortly used stash of diapers, looks are not my top priority.  You can't go too wrong with a fluffy butt though.  Newborns in cloth is going to be cute no matter what.

So where did all these requirements lead me to you ask?  Well they lead me all over the board and back again.  I first started out thinking I would just use disposables till our baby could fit into OS diapers and size smalls.  Then I realized that this could take up to three months.  I didn't want my baby in disposables for three months and if you compare the cost of disposables over three months at $300 to the cost of my selected newborn stash at $221 after I resell the AIO's, fitteds, & covers at 50% of retail (I can most likely get more than that, but 50% is minimum), it just makes sense to go cloth.  So I scratched that idea.

My next idea was to do a rental program.  A lot of sites have great newborn cloth rental programs where you pay a fee, but get half of it back in cash or credit when you return the diapers.  This sounded great till I talked with Brian and he didn't like the idea of putting our newborn baby in used diapers.  So I scratched that idea.

My next idea was to purchase fairly inexpensive cloth diapers and re-sell them.  This lead me to fitted diapers with covers.  As far as functionality I felt this solution was a slam dunk.  Nothing would contain breastfed poops better than the double protection of a fitted with a cover.  Then I started thinking about ease of use.  Maybe the two step process of a fitted with a cover would be too much work.  Time to re-think.

My next idea was to purchase half fitted diapers and covers, and the other half all-in-ones.  This would give me two options during the day and night.  I could use a very easy AIO diaper, or I could use a very functional fitted diaper with a cover.  I even added in 6 prefolds just to try them out because everyone said it was the way to go despite my skepticism.  Then the prefolds kept creeping into my mind and how inexpensive they are and it was time to re-think.

This brought me to my final newborn stash decision...

BumGenius All-In-One (AIO) - Size XS (Qty: 6)
The main reason I chose this diaper was for ease of use.  I wanted to make sure that Brian had a go-to diaper that he would feel comfortable with.  These diapers go on just like a disposable and just as fast with hook and loop closures instead of snap.  They're also a very well priced AIO diaper made by a well known company that will be easy to re-sell when we're done with them.  I hear their functionality is pretty good, but they do run really small so I only decided to purchase six of these.  These diapers retail for about $12.95 each.  Click HERE for more info.


Kissaluvs Cotton Fleece Fitted Diaper 2.0 - Size 0 (Qty: 12)
The main reason I chose this diaper was for functionality.  I feel after lots of research that nothing beats a fitted with a cover when it comes to breastfed baby poop.  I chose the brand Kissaluvs because it's an economical fitted diaper that is made by a well known company so it should be easy to re-sell.  They might not be the easiest solution to use since they have snaps, but I balanced that out by making sure that the cover had hook and loop closures.  These diapers retail for about $13.95 each.  Click HERE for more info.

Thirsties Duo Wrap - Size 0 (Qty: 6)
This wrap has a lot of good things going for it.  It's functional with it's inner leg gussets that keep messes in.  It's easy to use with it's hook and loop closures.  It's a fairly cost effective cover.  It is made by a well known company so they should be easy to sell.  And they come in several cute colors and patterns.  This diaper cover retails for about $12.75 each.  Click HERE for more info.

Cloth-eez Prefold Diapers (GMD) - Size Newborn (Qty: 12)
Originally I didn't plan on using prefolds because I didn't think they'd be the most functional or the easiest to use, and frankly they intimidated me.  After lots of research though I realized that many parents find these to actually be quite easy and functional in the newborn stage as well as your most economical solution.  After so many people told me to give it a try, I finally just had to break down and at least give them a chance.  The other great thing about newborn prefolds is that I can use them as doublers to increase the absorbency in my diapers later down the road.  These diapers retail for about $28.00 per dozen.  Click HERE for more info.

BabyKicks Hemparoo Fleece Prefold - Size S (Qty: 3)
Going along the lines of the fact that I can use newborn prefolds as doublers later down the road and that hemp is more absorbent than cotton, I decided to get just a few of these hemp prefolds to try out.  They definitely aren't the most cost effective prefold, but I think the functionality of them should outweigh the cost.  These diapers retail for about $5.99 each.  Click HERE for more info.

Cloth-eez Prefold Diapers (GMD) - Size Small (Qty: 12)
I know I already have some cotton prefolds on this list in the newborn size, but I wanted to make sure I had a transition diaper to use in case I have an in-between stage where the newborn diapers are too small and the OS diapers still don't fit.  Even if the second set of diapers does fit, I am not purchasing enough of them for a full stash till after I test them, so I'll need some filler diapers in the meantime.  That's where the size small prefolds come into play.  These diapers retail for about $33.00 per dozen.  Click HERE for more info.

So there is my newborn cloth diaper solution.  After several weeks of thinking about it, I feel very confident that this will be the best solution for our family.  I can't wait till this fall when our little boy is born and and I put him in his first cloth diaper.  He's going to look so cute!  Well, I guess it's on to more research of other things.  Hope this post has helped you out and hope you're enjoying my Adventures In Fluff.