Showing posts with label DIY Projects. Show all posts

Wednesday, June 4, 2014

Mickey & Minnie Mouse Book Baby Shower

Ok, it's been almost a month since the baby shower and I'm finally getting around to doing a formal post about it.  I'm sure most of you know that I'm a surrogate, carrying a baby for a wonderful couple that has been wanting a baby for so long.  Well the big day is almost here and to celebrate I decided to throw the mommy to be a baby shower.  Since she knows the sex of the baby, but the daddy does not, I decided to make the party gender neutral with both Mickey and Minnie instead of just one or the other.  It actually worked out great that way and I love the way it all came together.  I also decided to make it a book shower, where guests brought books instead of cards to help get the baby's library started early on.  Check out below to see how it all came out.

Baby Shower Sign - First I printed out the letters using a free "Walter" font and cut them into triangles.  Then I cut out red construction paper triangles slightly larger than the letter triangles.  Then I cut out newspaper triangles slightly larger than the red triangles.  Then I pasted them all together with the letters on top, the red in the middle, and the newspaper in the back.  I then punched holes in the top two corners so I could string all the letters together on black yarn.  I also added a red construction paper Mickey face in the middle.
Tissue Paper Pinwheels - I used white, red, black, and polka dot tissue paper, as well as newspaper, to make my pinwheels.  You can make your own using this Pinwheel Tutorial from Whimsical Wonderland Weddings.
Mickey & Minnie Mouse Ears - All guests got their own Mickey or Minnie ears to wear during the party.  They were easy to make and I scored by finding a 4th of July pack of headbands at the Dollar Store!  Perfect colors and very inexpensive.  You can make your own using this Mickey & Minnie Headband Tutorial from Becoming Martha.
Book Table Decorations - I gathered up all the books in our house and made book covers for them using white, red, and polka dot wrapping paper.  Here is a Bookcover Tutorial from Paper Source if you would like to make your own.
Signage - I printed out various signage like the Mommy To Be sign above, using the Free Mickey & Minnie Printables from Catch My Party.  Some I added my own text to, so I just made the changes in Microsoft Paint before printing them.
Party Favors - I included a bottle of red nail polish, a nail file, a custom made bookmark, and a Mickey or Minnie Mouse Oreo cookie pop in each favor box.  I got the boxes from the Dollar Store and printed out the labels using the free printable I mentioned above.  I also added a square of red tissue.  Voila!
Mickey & Minnie Oreo Pops - Yum!  I made these using double stuffed Oreos and mini Oreos.  I dipped them in melted white chocolate then dipped them in red sprinkles.  I added the white buttons and red bows using cookie decorator icing, and stuck a cake pop stick up the center.  To make your own, you can also use this Mickey Mouse Pop Tutorial from Vegetarian Gastronomy.
Custom Bookmarks - Using one of the free printables (link above) I created bookmarks with each of the guests names and a Disney quote on them.  I just made the changes in Microsoft Paint.  I then had them laminated, cut them out, hole punched at the top, and added a pom pom tassel to the end.  You can use this Pom Pom Tutorial from Eskimimi Makes to make your own.
Fabric Wrapped Pillows - I wanted some pillow decorations easy and fast, so I just bought some fabric, wrapped it around my pillows like a present, and tied them in the corners with ribbon to stay.  I also added safety pins on the back to keep them in place.  Mickey and Minnie were made with felt and glued on.  Here's another Easy No Sew Pillow Cover tutorial from Organize and Decorate Everything.
How Many Gumballs? - One of the games we played was to guess how many gumballs are in the bowl.  I found red and white gumballs to match the party.
Food - For the party I wanted bright colors with lots of red to go with the Mickey/Minnie Mouse theme.  I served strawberry, pecan, avocado, and blue cheese salad, a mixed fruit salad, a mini sandwich bar, chips, and veggies.  For beverages I served strawberry lemonade in mason jars with red swirly straws (not pictured).
Who Has The Sticker? - Another easy fun game we did was to see who had the Mickey Mouse sticker under their plate.  Before the party I stuck a sticker under one of the dinner plates on the table.  Whoever had the sticker under their plate won the prize, only guests didn't know this until they were already eating.  
Desserts - For desserts I went for a red, black, and white theme.  I served cherry jello with whip cream and chocolate chips on top, berry cobbler, and Mickey Mouse cupcakes.  The cupcakes were super easy.  I just used chocolate cake with white icing, then added mini oreos on top for ears.  If you wanted, you could also add bows with icing or fruit by the foot so some of them are Minnie cupcakes, but I ran out of time.  I also found the cupcake shells at Michaels.  I love the cute polka dots!  Check out this post from The Hunted Interior to see an example of the Minnie Mouse cupcakes.  
ABC Book - Our main activity for the party was to make an ABC book for the mommy to be and her baby.  I bought a red scrapbook and decorated the front with felt and white puff paint.  Each guest was given a scrapbook page with all the pieces needed to assemble their page (pre-printed letter, square to draw picture, and rectangle to write word).  Guests would cut out their letter, draw their picture starting with the letter, and write what their picture was.  They also wrote their name so that mommy and baby would know who created that page.  It all came out really cute!!!!  My only regret was that I didn't pre-prepare the pages more.  We ran out of time with all the cutting and pasting.  If I were to do it again, I would have cut out and pasted everything on the page myself and just had them do the drawing and writing.

Mommy, Baby, and I
Minnie Mouse Shirt - I got my Minnie Mouse Shirt on Ebay and paired it with a pair of white maternity pants that I got from Target.

Monday, October 29, 2012

A Spooktacular Halloween 1st Birthday Bash

It was almost a year ago that Lincoln entered this world just a day shy of Halloween.  We even made it home in time to dress up and pass out candy the day after he was born.  I'm pretty sure even at that moment I knew that I would celebrate his 1st birthday in spooktacular style.  Oh yes, a Halloween bash was already in the making.  If you've been following my Birthday Pinterest Board then you probably already know that I've been pinning party ideas for the past couple of months.  I'm so sorry if your Pinterest dashboard has been swamped with kids Halloween party ideas.  I admit I went a little bit crazy with the pinning, but it wasn't for nothing.  I actually used quite a few of my party pins to create this awesome event that I will never forget.  Check out my photos below to see just how spooky Linc's 1st birthday was.

Itsy Bitsy Spider  baby costume and spider web mom
The spider and the web.  I bought the skirt from the thrift store and used fabric puff paint to add the webs. The shirt was already in my closet and I added webs to that one too.  I borrowed the cute headband from my girls.  I got Linc's costume pre-packaged.  Idea Source: Martha Stewart

Baby spider Halloween Costume
Oh how I love this little spider!  I'm pretty sure he's the cutest in the world, and no I'm not just saying that because  he's stuck in my web.

Halloween party dessert bar
My dessert bar setup.  Instead of doing one big cake I did several different kinds of desserts.  I covered the entire house in spider webs.  It looked awesome!  I will say that my hubby did not appreciate me covering the TV with webs during the World Series Giants game though.  Haha!  Oh, and it was not fun taking all these webs down.

Cute Spider Cake
This is Linc's birthday cake.  I got the idea from a pinterest pin I had found.  Basically it's a huge cake pop ball (mix crumbled cake and icing till it's sticky and form in a ball) frosted in chocolate frosting (I tapped the frosting with a spatula to get the hairy spider look), then I added white icing and M&M's for eyes, chocolate icing for legs, and white icing for the spider web on the plate.  I filled a Ziploc bag with icing and cut a small hole in the corner in order to do all the detail work.  Idea Source: Hungry Happenings & 

Witch hat cookies
These are witch hat cookies.  They're basically striped fudge cookies with a Hershey kiss on top secured with a dollop of green tinted white chocolate. Idea Source: Explore Dream Discover

Purple oreo cookies
No rhyme or reason to these cookies.  I just iced Oreos with purple chocolate and topped with chocolate chips.  The fit the color theme.  I guess you could say they are 4 eyed monsters.  Yum!

Halloween Graveyard Brownies
These were the hit of the party!  I got the idea for these graveyard brownies off of Pinterest.  I only wish I would have got to try one.  I hear they were great though.  Ok, I searched high and low for the source of this idea but I can't find it.  You might find it on my Pinterest board.  It's basically a brownie with a cookie stuck in it that I wrote on with chocolate icing.  Oh!  and I sprinkled crumbled oreos over the brownies before baking them.  The worms were stuck on with icing.

Mummy & Spider Cupcakes for Halloween
Mummy cupcakes and spider cupcakes.  These were my fave.  I love cupcakes.  For the spiderwebs I just frosted in chocolate then piped white chocolate in circles (like a target), then used a toothpick to drag from the center to the outside creating a web.  The mummies were iced with white icing then I piped white icing in a zig zag pattern on the top adding M&M's for eyes.  So easy!  Idea Source: Skinny Taste & Bakerella

Mummy Pretzel Sticks for Halloween
Ok, I know what you're thinking... these do not look like mummy pretzel sticks. Well, sometimes Pinterest makes things look easier than they are.  Boo to my ugly mummy pretzel sticks!  A word to the wise... just buy the pre-made eyes.  Idea Source: The Idea Room

Healthy Candy Corn Desserts
For a slightly healthier option I decided to make these super yummy candy corn cups (no candy corn included).  On the bottom is vanilla pudding.  The middle is mandarin oranges.  The top is low fat whip cream.  I kept these in the fridge till dessert time so they were nice and chilled.  Idea Source: The Butterfly Jungle 

Pumpkin Apple Dip Tray
For party snacks I tried to lean on the healthier side.  The first snack I did was an apple dip tray.  My mom used to always make this apple dip.  It's just one package of cream cheese, one jar of marshmallow fluff, and 1/4 teaspoon of cinnamon.  So good!!!!!  I added the blueberries for color.  I also did a veggie tray similar to this one with carrots, celery, & orange bell pepper.  For the chip lovers I had tortilla chips in a black cauldron and salsa.  I love the pumpkin bowls!  Got that idea from Pinterest.  Idea Source: Martha Stewart

Halloween Party Treat Buckets
I found these super cute buckets in the dollar section at Target.  By the way... items in the dollar section at target cost more than a dollar.  Hmmmmm...  Anyways, I got the treats from the dollar store (actually a dollar).  I included stickers, spider rings, glow sticks, candy, straws, and more.  The babies got spooky rubber ducks, toddler breakfast bars, toddler fruit sticks, and some candy for mom and dad.  Hehe!

Pumpkin Decorating Table
Each of the kids got their own pumpkin to decorate.  I spread foam stickers over the table and put markers and crayons in the buckets for the kids to use.

Pumpkin Decorating Party
My daughter the artist.

Halloween Bat Decorations
I got this idea to do bats across the wall in different sizes.  I created the template myself and printed it on black paper.  It was VERY time consuming to cut them out but they looked AWESOME!!!!  I just stuck them on my sliding glass doors with a small folding piece of tape on the back.  You can even bend the wings so they look more 3D.

Happy Birthday Lincoln!!!!

Oh yes... gotta love getting messy.

Yum Yum!!!


Spiderweb skirt
Had to throw in a picture of my cute tights and shoes.  I really loved how my costume came out.

Items Not Picured:

  • I had a whole mess of awesome decorations from the dollar store.  Yes!  Don't count out the dollar store for great decorations!
  • I did a cute creepy haunted mansion on construction paper with 13 windows in it.  Each window had a picture of Linc from each month (including when he was born).  Adults had to guess what month each picture was taken.  I also did a Linc trivia game with questions such as what day he was born, what time, how much did he weigh, what was his first word... etc.
  • I had a spooky witches brew green lime punch bowl in a black cauldron.  Yum Yum!


Tips on creating your own awesome bash:

  • Start Setting Up EARLY!!!  I started setting up for this event 2 days early.  2 days before the event I decorated the entire house.  Yes it was hard keeping the kids away from the decorations, but it was totally worth it!  The day before the event I baked all the desserts & decorated the outside of the house.  I also build Linc's gift that night.  The morning of the event I set up the tables outside (should have done this the night before) and set all the food out.  The earlier you start the less stressed you will be at the party.  After all, you want to have fun too!
  • Don't over-think your party with games.  Half my kids were babies (10 in all).  They are totally happy just playing with toys on the floor or walking around with mom and dad.  Half my kids were 3-7.  Yes, you could do games with this age group, but they are more than happy to run around in the backyard.  I'm just saying don't stress about it because they'll have fun either way. I did have two games for the adults but realized I shouldn't have bothered.  Adults just want to hang out and have fun talking.  After all, how often do we all get together now that we have kids?
  • Know your time-line.  I like to plan out the party and keep a mental time-line in my head of what should happen when.  Guests arrive at 11, play and chat till 12.  Food from 12-12:30.  Cake at 12:30.  Desserts and gifts at 12:40.  Part is over at 1.
  • That brings me to my last tip... pair up desserts and gifts together.  Guests will be sitting there eating cake anyways so you might as well do gifts while they're all sitting there.

Tuesday, September 18, 2012

How To Convert a Prefold into a Fitted Diaper


Guest post written by Celeste from
Thinking About Cloth Diapers.


How to Make an Inexpensive Fitted Diaper


Fitted diapers can be fun to make! If you know the basics of sewing, and you have a sewing machine (or can borrow one!), you can make a simple fitted diaper following the steps outlined below in this photo tutorial.


By making your own diapers, you can save a lot of money, and get a one-of-a-kind design that fits your baby perfectly!


This tutorial shows you how to turn a prefold into a fitted diaper. Prefolds are workhorses in the cloth diaper world. Made of high quality cotton, they are absorbent and reliable diapers. But if you've ever tried to secure a prefold to a wiggly baby, you'll know that they are sometimes a challenge to use.


Fitted diapers are awesome for night-time use, and lots of families use them all day, every day. Combined with a cover, they are both reliable and affordable - and even more so if you make your own.


Materials Needed to Make a Fitted Diaper:

  • 1 pre-washed 100% cotton prefold diaper (if you are using new prefolds, be sure to prep them. You can buy used prefolds from diaper services, or check out the used cloth diaper section at your favorite cloth diaper retailer to find some at great prices).
  • 1 piece of woven cotton fabric such as flannel for outside layer, the same size as the prefold (be sure to pre-wash and dry this so it doesn't shrink later!)
  • Microfleece or suedecloth (optional)
  • 1/4" wide swimsuit elastic (available from Wazoodle)
  • Sewing machine with zigzag
NOTE: Prefold diapers come in several different dimensions. I used a newborn prefold to make a newborn fitted, but if you would like a larger fitted, choose a larger prefold.


Instructions to Make a Fitted Diaper

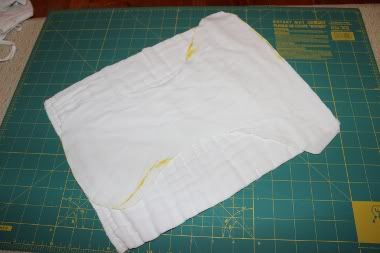
Center diaper pattern on prefold, and trace. As you can see from this picture, I selected a pattern where the 8 layer portion of the diaper was fully covered by the pattern, and the contours would trim away only the 4-layer portion of the prefold. The tabs for the diaper will not fit on the prefold, but we will add fabric to make the tabs later on.


make a fitted diaper from a prefold


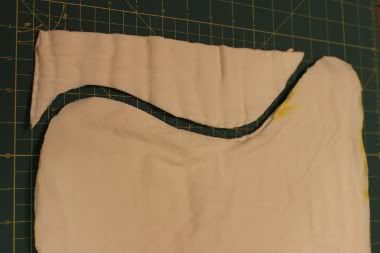
Cut out diaper, keeping side pieces as these will be used to make the insert.

tutorial to make a fitted diaper


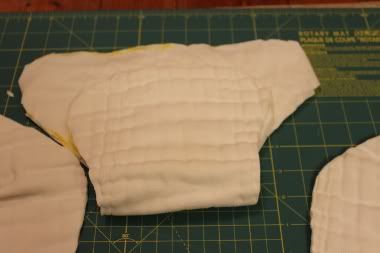
In this image, you can see the diaper starting to take shape.


turn a prefold into a diaper


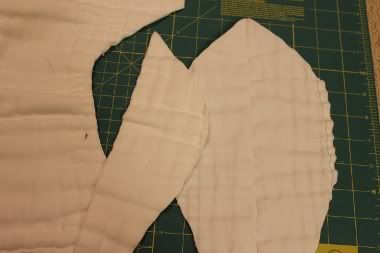
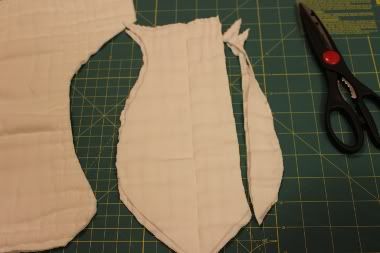
Unfold the cut-aways from the legs. These will be used to create the soaker layer for your fitted diaper. We will want to retain as much fabric as we can as we cut the soaker out, so that your fitted has the same absorbency as the prefold did!


Prefold fitted diaper tutorial


Stack the cut-aways together, and trim down to your preferred soaker shape.


prefold fitted diaper tutorial


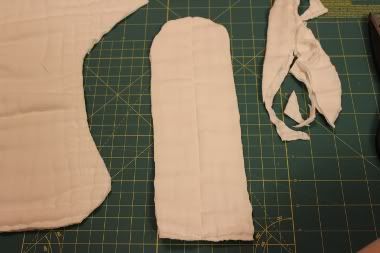
As you can see in the picture below, I made a long, straight insert. Depending on your diaper pattern and your personal preference, you may also be able to make an hour-glass shape.


prefold to fitted diaper


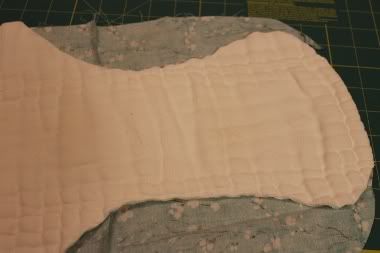
Since I don't have a serger, I will be turning this fitted, and top-stitching it for neatness. If you plan to turn and top-stitch, you will need to add another layer of fabric. This is where we will be using the cotton or flannel print. Lay the fabric out, and cut to the same shape as the prefold fitted pattern.


prefold to fitted diaper instruction


If your cotton print is wide enough, you can cut the diaper tabs at the same time. In this case, I used a smaller scrap of cotton I had left over from another project, so I will use smaller pieces to make the diaper tabs.


prefold to fitted diaper


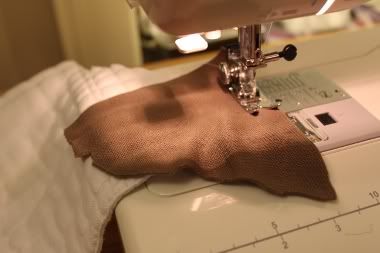
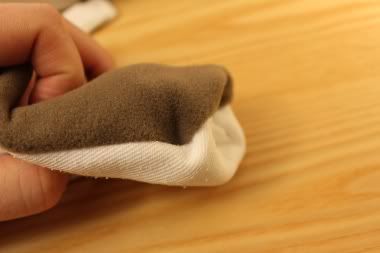
Here, I am attaching microfleece tabs to the prefold.


making a fitted diaper


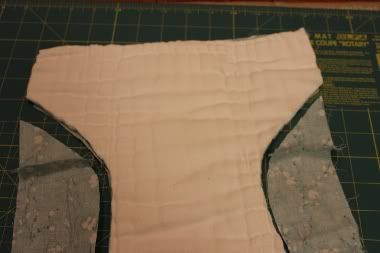
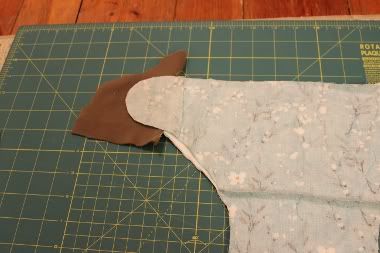
I also attached tabs to the outer cotton print layer using smaller pieces of the same cotton print. You could also make the tabs from a contrasting color or print! Lay coordinating print layer right-side down on top of the prefold, and trim both layers for the tabs down to match.


make a fitted diaper


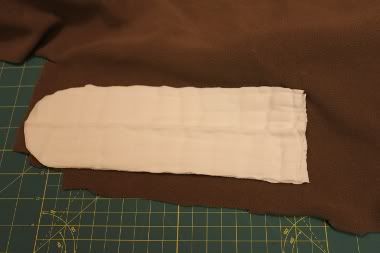
We will also need to finish the edges on the soaker layer. I prefer to turn and top-stitch the soaker too, so I will need another layer for this component as well. I opted to use a coordinating microfleece, which will provide a "stay dry" barrier between the absorbent cotton and your baby's bum, but you can use any fabric you want! Keep in mind, this is the fabric that will get soiled and wet, so you don't need to find anything beautiful if you don't want to!


make a fitted diaper


Placing microfleece right-side into the cotton soaker, sew both with a 1/4" seam allowance. You could also sew a 1/2" seam allowance, and then trim the insert back to 1/4" inch allowance after. Leave the end of the insert open for turning.


prefold fitted diaper tutorial


Next, turn the soaker right-side out, and then top-stitch all the way around except for the open end.


prefold fitted diaper tutorial


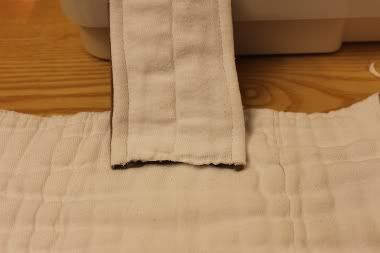
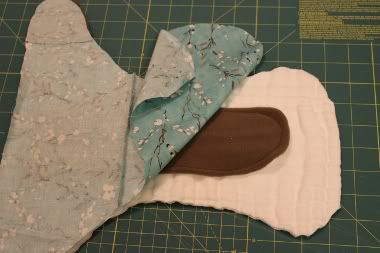
Next, we will be attaching the soaker to the diaper, before we sew the outer print on. To reduce bulk in the insert, I decided not to turn the edges at the end of the diaper. Instead, I placed it, pointing up away from the prefold diaper piece, with the right-side down, as shown below.


adding soaker to fitted diape


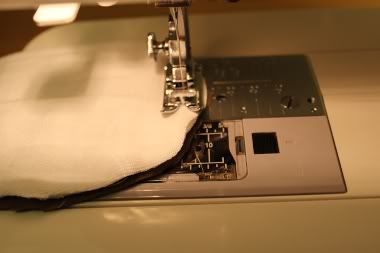
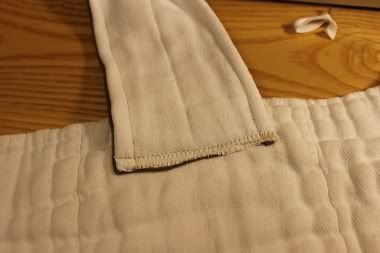
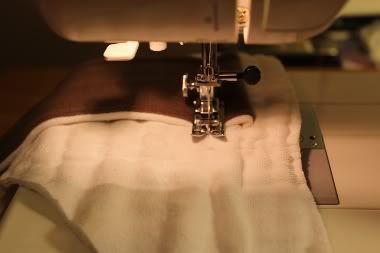
I secured the soaker to the diaper with a straight seam, and then a zig-zag stitch that overlaps the edge, effectively catching any loose threads from the raw end of the soaker.

prefold fitted diaper tutoria


Having a soaker layer will allow this diaper to dry faster than if the extra absorbency had been sewn right into the core of the diaper. Next, I fold the soaker down, and add a straight seam about 3/4 of an inch from the end, which will cover up and contain any loose threads.


prefold fitted diaper tutoria


Now, place the diaper soaker-side up, and lay the cotton print right-side down on top, as shown below, and sew with a 1/4" seam all the way around, leaving 4-6" open at the back to turn the diaper.


assembling a fitted diaper


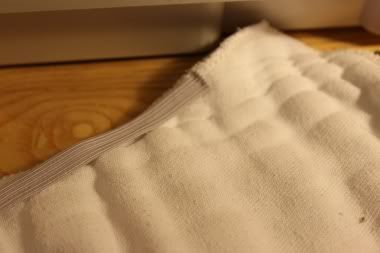
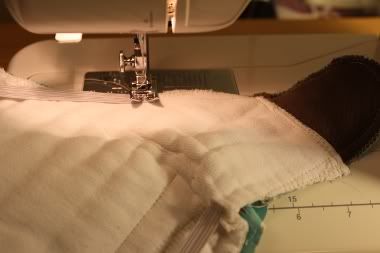
Using swimsuit elastic, or other performance elastic products made to withstand the acidic conditions from urine, stitch the ends of the elastic to the seam allowance area on the diaper.


sew a fitted diape


Be sure to pull the elastic snug across the legs and back.
Please note: I do not stitch the elastic in place all the way down the diaper. The reason for this is it can be very time-consuming to rip it out later for repairs or replacement if the elastic wears out before the diaper.


sewing a fitted diape


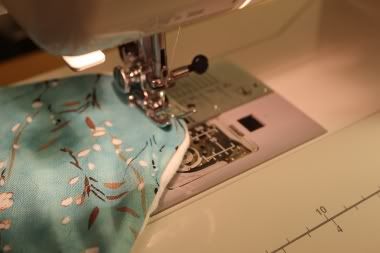
Almost finished! Now that the elastic is in place, the next step is to turn the diaper right-sides out. Pin the opening at the back of the diaper together, and then top-stitch around the diaper, using a 1/8" seam allowance.
For the pattern I used, I did not sew around the elastic at the legs. This helps the elastic to "roll in" toward the legs.


turn and topstitc


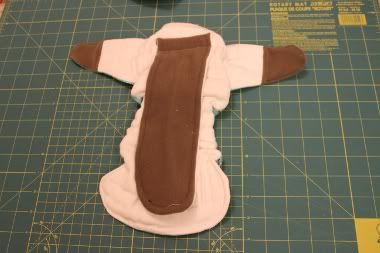
Congratulations! You have now finished turning a prefold into a fitted diaper! Here is a picture of inside of our finished diaper!


finished fitted diaper made from a prefol


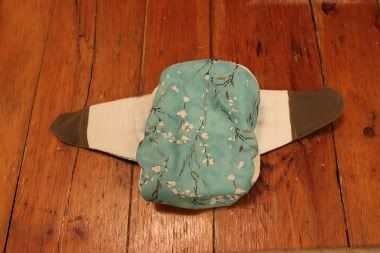
And now, for the beauty shot! Isn't it cute?


Make a fitted diaper from a prefold


I am planning to add snaps to this diaper, but you can also use a Snappi or Boingos to fasten your fitted diaper, in which case you don't need to add any closures.


Voila - a cute custom fitted diaper, and all for less than $5 in supplies! What do you think? Would you make your own diapers?


Thinking About Cloth Diapers
Guest post by Celeste Ireland, author of Thinking About Cloth Diapers , a cloth diaper information website designed for new parents. If you plan to make your own diapers, don't miss her "make your own" section. Plus, receive another free tutorial for a fitted diaper made from old t-shirts when you subscribe to her monthly cloth diaper newsletter !


So you can easily keep track of the September Fitted Diaper Event, I will add a link to each of the posts below.  No need to worry if you've missed one of the reviews.  I've got ya covered!

Monday, July 23, 2012

How To: Upcycle a Wine Bottle into a Yarn Wrapped Vase #freefromtrash

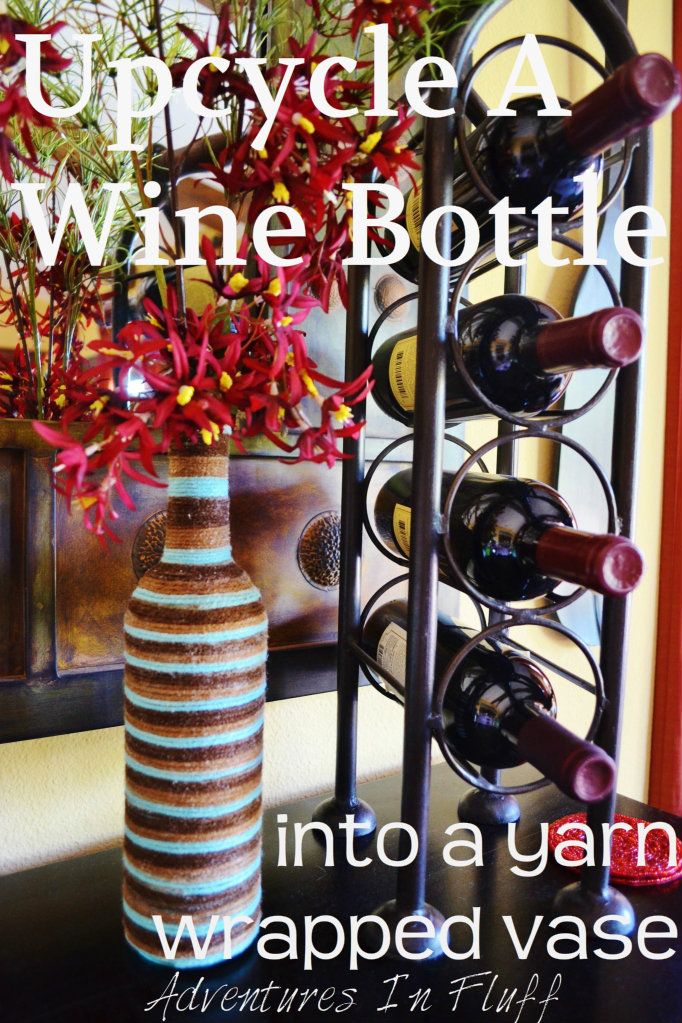
Upcycle a Wine Bottle into a Yarn Wrapped Vase

We’re almost to the end of our month long series of Upcycled Crafting Projects. Boooo! Aren’t you sad? I know my girls are. I guess we’ll just have to continue on and keep making treasures from trash in our household. Will you? Today we’re going to be creating beautiful yarn covered vases from wine bottles. You could also use beer bottles or even glass root beer bottles if that’s what you drink in your household. My daughter had such a good time creating her vase and loves showing it to everyone that comes over to our house. It’s now sitting on her craft table in her room and I have to say that it really brightens up the space. Check out my tutorial video below to see how to create your very own yarn wrapped vase. Ok, I really should call it Riley’s tutorial video since she’s the one that did it for me. This is my favorite video by far. She cracks me up! Don’t you just love kids on film? 

What You Will Need:

Wine Bottle (or any other glass bottle)

Yarn (or rope, twine, etc.)

Glue

Scissors

Live or Fake Flowers For Your Vase

Step By Step:


Voila!!!! You’ve just created your own work of art. Use different bottle sizes and/or yarn colors to create a wonderful vase grouping. I just love how easy this project is for anyone to do and the results are so beautiful. Riley can’t wait to make her next vase. Guess it’s time to drink another bottle of wine. Haha!

Riley is proud of her yarn wrapped vase project

*This post is part of the Upcycled Crafting Challenge (#freefromtrash) hosted by Calley, The Eco Chic, and is part of a one month challenge to create from trash.  This challenge will hopefully open your eyes to the number of items that we still end up trashing every day that could be used by ourselves or our kids to create fun and useful items.  To find out more about the challenge and to see other projects click on over to Calley’s announcement post.*

Check out some of the other great posts from today below and be sure to link up your projects today too!!!  Just link to your blog post, Pinterest picture, Photobucket Picture, etc.  I'd love to see your wine bottle projects.