Wow! I've been working on the design of this room since last summer, and the actual transformation of the room since the first day of 2014. It's been a labor of love and worth every ounce of energy I've put into it. The girls LOVE their new room!!!!!! We've went from a tomboy styled Cars room, to a hip surfer girl room that they're excited to show all their friends when they come over. What more can two little big girls ask for? Sorry it's taken me so long to post pictures. We've been go go go lately.
If you'd like to see the planning that went into this room and the before pictures, please see my previous post ... A New Year, A New Room. And yes, you might notice that the slide did not happen. Boo!!!!! Brian thought it would make the room too much of a play place instead of a sleep place. Kill Joy! Haha! The girls love it anyways ... although they do bring up the slide now and then.
So without further ado, here are some pictures of the girls new room!
The bed was existing. I really couldn't tell you who made it, but I did buy it at USA Baby if that helps. The bedding is from the "Surfs Up Tropic" bedding collection. I got my set off of Ebay, but you can find it several places online. The curtains and blue accent pillows on the bed are from Anna's Linens. The blue rug (I cut up to fit the loft and floor) is from Target. The grass window valances are from Shindigz.com. They were table skirts that I cut up and glued to a curtain rod. The surfboard sign is custom cut by a friend of ours and I painted it myself. The surfboard decals on the wall are from Pottery Barn Kids. Sorry, can't remember where the clock is from, but I did use nail polish to paint the numbers on it.
The same friend of ours that cut out the surfboard made this awesome loft for us!!!! Isn't it awesome?!?! I did all the painting on it. The little table and chairs under the loft and the stuffed animal storage hanger are from Ikea. The Hello Kitty wall decal is from Fat Head. The bed sheets are from Pottery Barn Kids.
The dresser is from Ikea. The bookshelf on top of the dresser was a companion piece with the bunk beds. The light under the bunk bed and under the loft are from Ikea. The star knobs are from Rejuvenated Creations on Etsy. Please feel free to ask me if I forgot to list the source of anything. I'm happy to answer any questions you might have.
This past weekend my little girl turned 5. Can't you believe it?!?! I'm still in shock. She's growing up wayyyyyy too fast. Not only did she just turn 5, but she also just started Kindergarten. Sniff Sniff... Linc is now my only baby in the house. I've now got a first grader and a kindergartner. Where has the time gone? Well, to celebrate this big day for my big girl we threw her a party with 13 of her closest friends. Add in my three kids, a few more babies, and a whole lot of adults and you have quite the event! It just so happened that Gutzy Gear contacted me to hold a party to present one of the newest back to school products on the market and what better time to present this product than at my daughter's birthday party after their first week at school! The party ended up being a little bit Hello Kitty (my daughter's selection), a little bit of water fun (thanks to our 109 degree heat), and a whole lot of Gutzy (thanks to Gutzy Gear).
The Kids Are Putting On Their Gutzy Gear Straps
We started off the party with a coloring competition. Each kid at the party got to create and color their very own patch design. We had everything from rainbows and cats, to robots and Egyptians. It was quite the art display. My daughter (the birthday girl) then got to pick two of the pictures to be winners. The winning pictures got an extra patch for their Gutzy Gear patch sets (but we'll get to that later). So who were the winners? Maggie drew a beautiful picture of a cat, and Sophia drew a picture of a girl and boy in a meadow.
Gutzy Gear Patch Selection Time!
After our patch drawing competition the kids grabbed their backpacks and we got started with the decorating fun. Gutzy Gear was so nice to supply each child with a starter set of Velcro backpack straps that includes one patch as well as a set of two additional patches. I ended up opening all of the double patch sets and laying all the patches individually on the table. The birthday girl got to pick her two patches first. Then the winners of the design contest got to pick their patches plus their additional winning patch next. After that all the kids just dug in and picked whichever patches matched their personality. There were tons to choose from, from hearts and flowers, to fast food and monkeys. The kids had a blast and they can't wait to show them off at school on Monday. They were even excited to see all the additional patches that were available on the back of the packages. There really are a lot out there to choose from.
A Little Water Play To Wrap Up The Party Day
After our fun time with the patches we set the kids down for some pizza, cake, ice cream, presents, and then some fun water play out in the back yard. Her favorite gifts were her nighttime slippers from her Aunt Lisa and the stars nightlight that we got her for her room, but I think she's really the most excited about showing off her new backpack bling when she gets back to school. Thanks Gutzy Gear for letting us test out your products and giving my daughter and her friends such a great birthday party!!!
MY REVIEW:
So Many Gutzy Gear Patch Choices
How It Works - Each starter set comes with two black Velcro straps that you just apply over the strap(s) of your backpack or satchel (or anything else you can think of such as on your guitar strap, bike rails, etc). You also get one Velcro on patch to get you started. You then buy additional Velcro on patches (they come in sets of two), to further decorate your straps. For even more fun you can swap patches at school with your friends so your straps are always changing.
What I Like - I love the concept of Gutzy Gear. I know I loved patches on my backpack when I was a kid and my girls love decorating anything they can get their hands on. The bad part about regular patches is getting them to stay on. You have to sew, pin, or iron on most patches. Not only that, but you're usually stuck with them forever because it's permanent. I LOVE that Gutzy Gear is not permanent. They can easily change the look of their straps by just un-Velcroing one patch and putting on another. I also love how secure the Velcro is. These patches will not fall off. They are totally secure when applied to the strap. The full back side of the patch is covered in hook fabric instead of just one little square. The straps are also wrapped in a very soft velour loop fabric so they aren't itchy on your arms. Last, but certainly not least, is that I love the patch options. They have so many to choose from. You can go online to get them (GutzyGear.com, Amazon.com, etc.), or you can find them in your local stores such at Toys R Us or KMart. I couldn't find them at our K-Mart, but our Toys R Us had them.
The Birthday Girl w/ Her Gutzy Gear
What I didn't Like - Although the concept is great, I do wish the price was a little less. Starter sets go for $10 and a set of two patches goes for $5 so it can get to be quite a pricey hobby. After saying that though I guess I would say this is pretty close to being a Disneyland Pin collector and we all know those aren't cheep, so if you look at it that way these prices are pretty reasonable. Maybe if they removed the included patch from the starter set, then they could knock $2 off. I found that most kids wanted to choose their own patches and didn't care for the included one.
In Conclusion - Despite the price, I still love the concept and I plan on taking my girls down to Toys R Us so they can pick out another set of patches for their backpacks. I know how much kids like to express their style and this is a great way for them to do it! They've already been scoping out all the patch options available. Oh yes, I see a patch collection obsession coming on.
WANT A CHANCE TO WIN !!!
Gutzy Gear is giving away 101 gift cards to Toys R Us. All you have to do is visit Gutzy Gear on Facebook and let them know, "Where do you Go Gutzy?". This contest will end September 7th, so you better hurry! Here's what they're giving away:
1 - $500 Gift Card
10 - $100 Gift Cards
20 - $75 Gift Cards
30 - $50 Gift Cards
40 - $25 Gift Cards
Also, check out this deal on how to get a FREE, Rare Gutzy patch. This promotion ends on September 30, 2012.
**This product was given to me for the purpose of a review, but the review is comprised completely of my own opinions and was not influenced by any other outside source.**
As you all my know I have three kids. My oldest, Riley, is 6 years old. My middle child, Reagan, is 4 years old. My youngest, Lincoln, is 7 months old. Riley was a pacifier girl. Until the age of two she had to have a pacifier at all times. Reagan on the other hand was a blankee and bear type of girl. To this day she still has to have her blankee and bear (yes she's sitting on the couch watching cartoons with them right now) with her at nap-time and bedtime. I think it is soooooo cute because I too was a blankee and doll type of girl when I was little. I love to watch how she strokes the fabric feeling it's texture, or smells her blankee without even knowing she's doing it. I too did the same things. Now that Linc is here I wonder what type of comfort items he will go for. He does use a pacifier, but not as often as Riley used to. Being the blankee & doll kid that I was I hope that he will adopt a blankee and bear like his sister. Since he was born I've been trying to find the perfect blankee and stuffed animal. They keep changing as I'm always finding a better one. I think I've went through about four or five blankets already looking for the perfect one. In the end I guess it isn't really up to me, but I can't help it. I have a blankee addiction.
That being said I was very intrigued when I was asked to review the itti bitti Minkee Blankee. I didn't even know that itti bitti made blankees. All I knew was that I LOVE the feel of my itti bitti tutto diaper and I hoped that the blankee was just as nice. When I got it in the mail I was instantly in love! The feel of the Minkee Blankee is to die for! Yes, I know I'm a blankee aholic so I'm slightly strange like that, but seriously this blanket is so soft. They should make these in a bigger size that I can wrap around myself. I'd be up for one.
Product Features:
Materials: Super soft minkee on both sides
Size: 39" x 29.5" (mine is actually 38.5" x 30" if you want to get technical)
Colors/Prints: There are 8 different colors/prints to choose from. Each blanket has a print on one side with a small accent solid color strip. On the other side of the blanket there is a solid color with an accent strip of the print.
Price: $39.97
What I Like:
I LOVE the feel of this blanket of course!!! The minute I touched it I fell in love. How could you not love it? It's even softer than Linc's Taggies blankets and they're pretty soft. The minkee is soft in all directions instead of just one direction and seemed to get even softer after the first wash. Sometimes minkee is stiffer in one direction. If you have one of the itti bitti diapers you know what I mean though. Sooooo soft!
I love the size of the blanket. It's just big enough that I can wrap him up in it to keep him nice and cozy, but not so big that I have to carry around this huge blanket. These blankets are the perfect size for a carseat, stroller, baby carrier, or just wrapping them up in. It's even big enough to use as a blanket when you convert their crib to a toddler bed. It's just perfect. I also like that it's a good size to lay on the ground for them to sit on, although it's so nice I'd never do that outside. I'm sure it would wash up fine, but I don't want to chance it.
I love the weight and thickness (more like the lack of thickness) of the itti bitti Minkee Blankee. It's only two layers of minkee (no filler layer in between) so it's very light and thin. This is great when you want to fold it up to take on the go. I can easily fit it in my diaper bag... as long as I don't have it overstuffed with too many diapers. This also means it won't take up much storage in his closet, but I'm sure we'll have it out all the time so no need to store it.
I love that it's great for the winter AND the summer! Minkee seems to have a feel to it that keeps you both warm in the winter, yet cool in the summer. I don't know how it does it, but it does. All the rest of Linc's blankets are designated summer or winter, but this one swings both ways.
What I Would Change:
The itti bitti tag is not so itti bitti. Haha! It's kind of big actually. I know I could just cut it off, but it's such a nice looking tag that I feel bad cutting it off. I just wish it was a little smaller. I'm all for branding, but this tag is a bit much.
I'd come out with some new prints. itti bitti seems to be hit and miss with their prints. Some are SUPER cute, but some I just don't know why they picked it. I'm not sure if it's because they're an Austrailian company and they have different tastes than Americans do or what, but I'm not loving all the prints. Yes, it could just be me. That being said I do love most of the prints so I guess you could say it's more a plus than a negative... I'm just picky with prints. I can't wait to see what their next batch of prints will be!
I would make a bigger size so that us mommies (and daddies) can have a minkee blankee for ourselves. Haha! Maybe I should say so us blankee aholics can have one for ourselves.
In Conclusion:
I'm in LOVE with the itti bitti Minkee Blankee and I hope that Linc picks it for his favorite blankee. Right now I use it while he's breastfeeding, napping next to me, sitting in his car seat, or just about anything else, so I'm sure it's going to stick with him for a good while. I would totally recommend this blanket to anyone stocking up for their next baby... or even those that already have a baby or toddler. It's a great addition and I'm tempted to say necessity for any child.
** Please note that while I aim to provide the most thorough and honest reviews possible, this review is based on my own preferences and experiences. Each baby is different and each parent has different likes and dislikes. What works for one may not work for another, so keep that in mind while doing your research.**
If you would like to purchase one of these blankets for your little one, then please visit theitti bitti US website to find a retailer near you or help support this blog by visiting my affiliate storeKelly's Closet. You can also get the latest info by "Liking" itti bitti on Facebook or "Following" itti bitti on Twitter.
**Just a heads up. itti bitti is sponsoring an awesome prize for the Fluffy Butts Cloth Diapering Giveaway Hop. Check back here from June 4th - June 15th for your chance to win.**
**This product was given to me for the purpose of a review, but the review is comprised completely of my own opinions and was not influenced by any other outside source.**
This week Riley is turning six years old. Can you believe it !?!? SIX !!! What happened to my little girl? It seems like only yesterday that she was still sleeping in my bed with me and teetering around the house just barely learning to walk. How time flies.
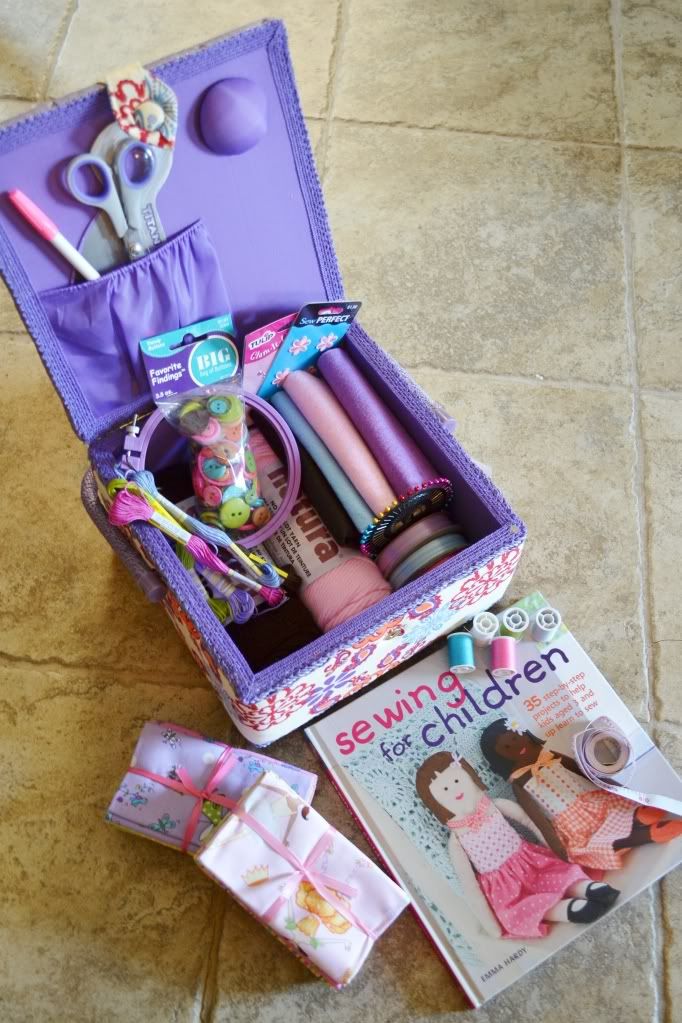
Some people I have a hard time shopping for, but not Riley. She's my little mini me and LOVES to do craft projects. She could do them all day long. So when it came time to go shopping I had the perfect gift in mind for my little Do-It-Yourself'er and I just knew that she would be excited. It all started with a book I found at Hancock Fabrics a few months ago titled "Sewing For Children". It was full of fun and easy sewing projects for kids aged 3 and up. Dolls, purses, pillows... it was all in there with fun bright colorful photographs. Riley was going to love it!!! Then I got to thinking. This book would be perfect if it was paired with a sewing kit for her to get started on her projects. Not just any sewing kit, but one made with love by myself with all items hand selected just for her.
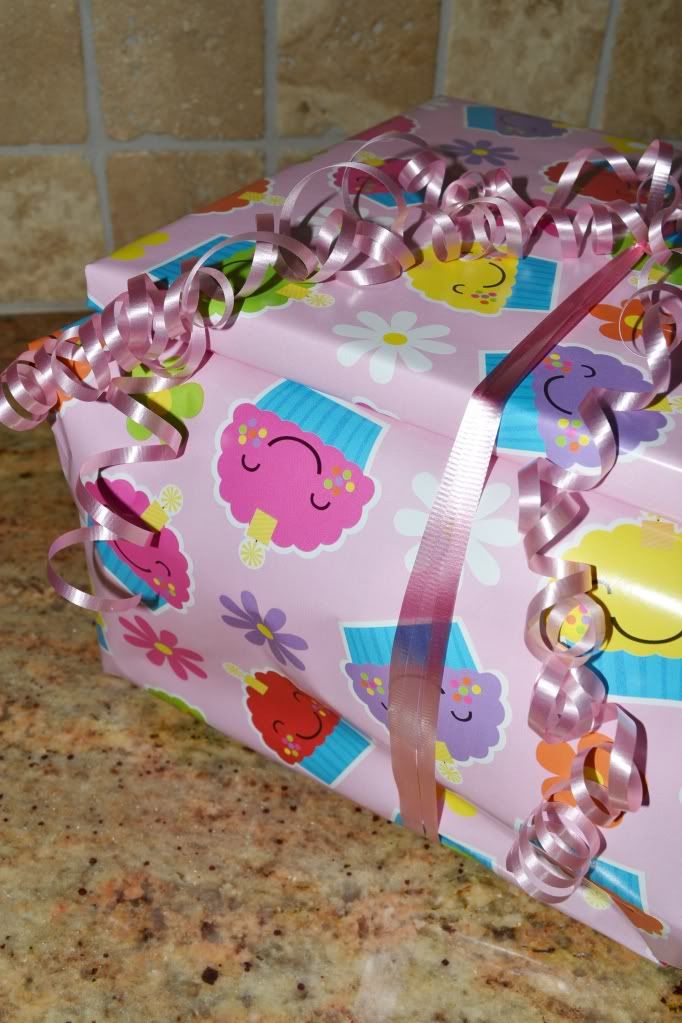
The first thing I did was scan through the book to see what kind of projects were in there and what she might need. The book conveniently had a list of items in the back that helped me get started. Next, I headed to the store to gather all her goodies. I like to create gift bundles that have a coordinated theme so I started with the book design. It was most perfectly designed with pinks and purples (Riley's favorite colors) so I started from there. The next item I chose was her sewing basket. I found a super cute purple basket with a paisley flower pattern on it. So cute!!! The rest of the items just fell into place. I just went down my list and picked colors that coordinated with the theme. When I got home I packed everything together in her little sewing basket (how lucky was I that it all actually fit) and then I wrapped it up in some pretty pink flower paper and pink ribbon. Luckily her birthday party was the next day because I just couldn't wait to give the gift to her. I just knew she was going to jump up and down with excitement.
Listed below is what I put in her sewing kit.
Tutorial Book - I got the book Sewing For Children" by Emma Hardy. It's geared towards children 3+ with lots of fun projects, easy instructions, and bright colorful pictures that will attract your child's eye. Sewing Basket - I purchased a 12x12 basket/box made by Dritz. It had a fun design in Riley's favorite colors. Knitter's Needles - I selected these over standard sewing needles because they are much more blunt than regular needles. I didn't want Riley pricking her fingers a million times. Pins - The pins on the other hand are sharp so I'll keep a close watch with these. I selected long pearlized pins in a rainbow of colors. Make sure your pins have a large bright head on them so they're easy to find if they hit the floor. Thread - I just purchased cheap thread in fun bright colors. When she gets more experienced I'll start getting the better thread. Scissors - I found some small craft scissors that were sharp enough to cut fabric. I didn't want them too large and hard for her to handle. Tape Measure - I just got a basic white fabric tape measure. Air Erasable Marking Pen - This will be great not only for tracing patterns, but also in the beginning to trace lines for her to sew on so she creates straight lines. I got hers in a fun pink color. Embroidery Floss - This will be great when creating large detail work on her projects. I picked out pinks and purples to match the theme of the basket. 5" Embroidery Hoop - I just got a small hoop for fine detail projects. Now she can embroider words and pictures onto her projects. I love the bright purple color hoop that I found. Yarn - This will be perfect for making pom poms on projects, braided straps for purses, or hair on puppets. Fabric Bundles - I originally was going to get fabric cut off of bolts, but was excited to find little fabric bundles of coordinating fabrics pre-cut and tied with a ribbon. Felt - Fun and easy to use, I got a few sheets of felt in various colors. I like the pre-cut squares. Buttons - Buttons are great for all projects. I got a large bag of buttons of several sizes and lots of bright colors. Ribbon - I just got some simple 1/8" ribbon in colors that would match the theme of my gift box. Iron-On Appliques - These will be great for her to iron onto shirts, pants, or a purse.
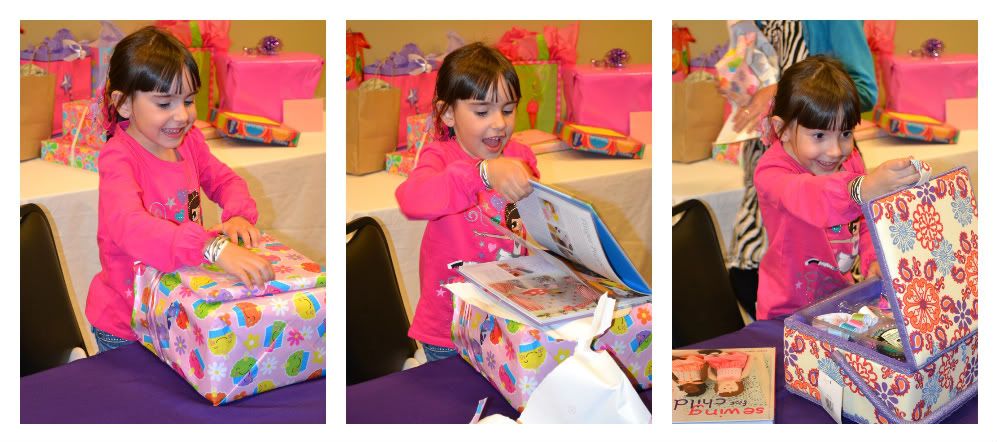
The next day was Riley's birthday party. She picked our gift to open first and normally I'd have protested and have her open it last, but I was just so excited for her to open it that I just grabbed the camera and waited for the look of excitement on her face. I was not disappointed. She was soooooooooo excited. She wanted to go through it all right then and there, but with other presents waiting we hand to set it aside. It was definitely her favorite gift of the party in addition to the little kids sewing machine that her Auntie Lisa got her. That's my little crafty girl. I predict that she'll be a famous designer one day creating beautiful items for the world to see ... maybe cloth diapers? Haha! Probably not since she thinks my obsession with fluff is pretty kooky. She's probably right. : )
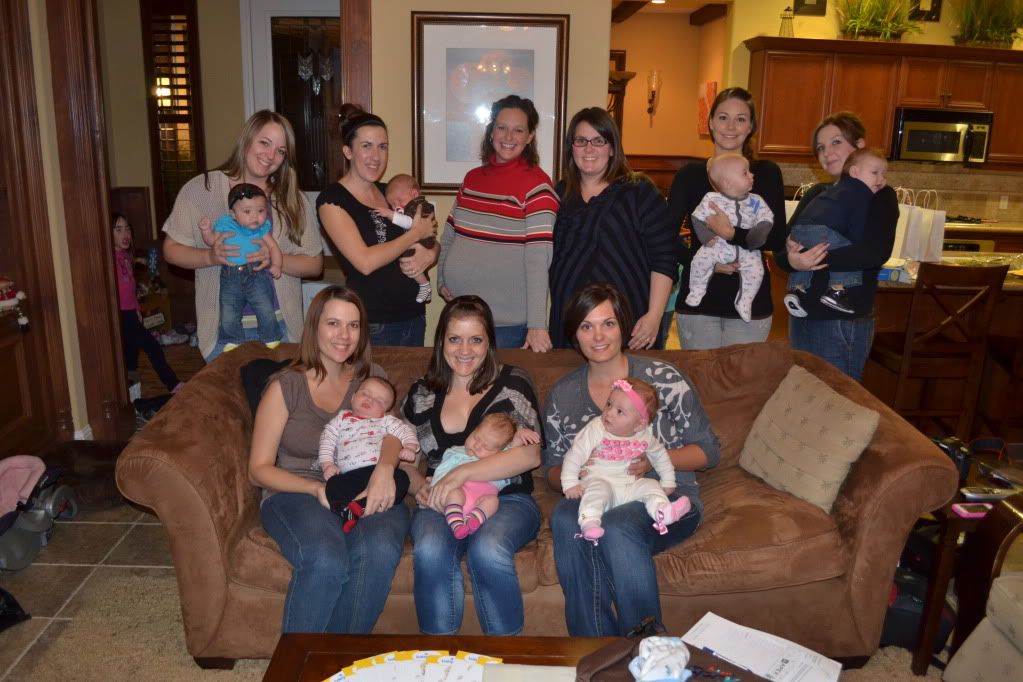
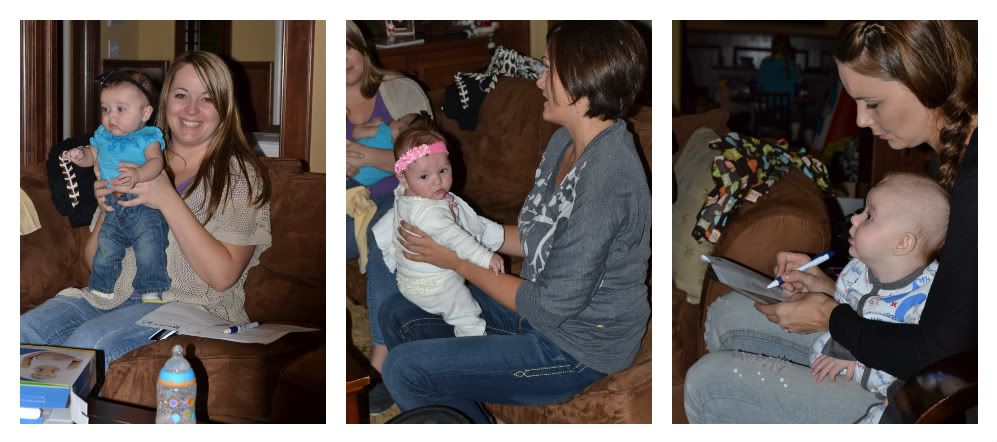
This past Saturday I was honored to to host a MommyParties - Pregnancy 2.0 party. I was so excited! I love throwing parties and it was perfect timing for me being that I just had Lincoln and I have so many friends that also are expecting or have just had babies as well. What better way to get us all together than to throw a mommy party. So what are MommyParties you ask? They are parties where real mom's like myself get to throw a party for 10 of our closest friends to test out products that we might like to use in our everyday mommy lives.
My Mommy Party was sponsored by Pregnancy 2.0, a website that helps new moms and mom's-to-be by providing product information and reviews on various baby and mothering products. This time we were the testers and reviewers. We got a first hand look at the various products and I can't wait to share with you all what we found. MommyParties and Pregnancy 2.0 provided us with various products from Britax, Baby Plus, Snuggle Buddies, & Xlear/Spry. In addition to testing products MommyParties supplied me with some great recipes to try out and serve to all my guests. I made almost all of them which included sandwhiches with hummus and cucumber, cheese tortellini with pesto dipping sauce, peach tea, and lemon mousse. There was also a fruit salad, but being I have a newborn, that was just too much work for me. Instead I bought a yummy broccoli salad. They also supplied me with some games to play. I selected the baby items memory game. The top winners got prizes which included a re-usable grocery bag, a diaper bag, two Snuggle Buddies, and the Britax Baby Carrier. I love seeing my party people go home with fun prizes.
Listed below are the items we tested and what we thought of them.
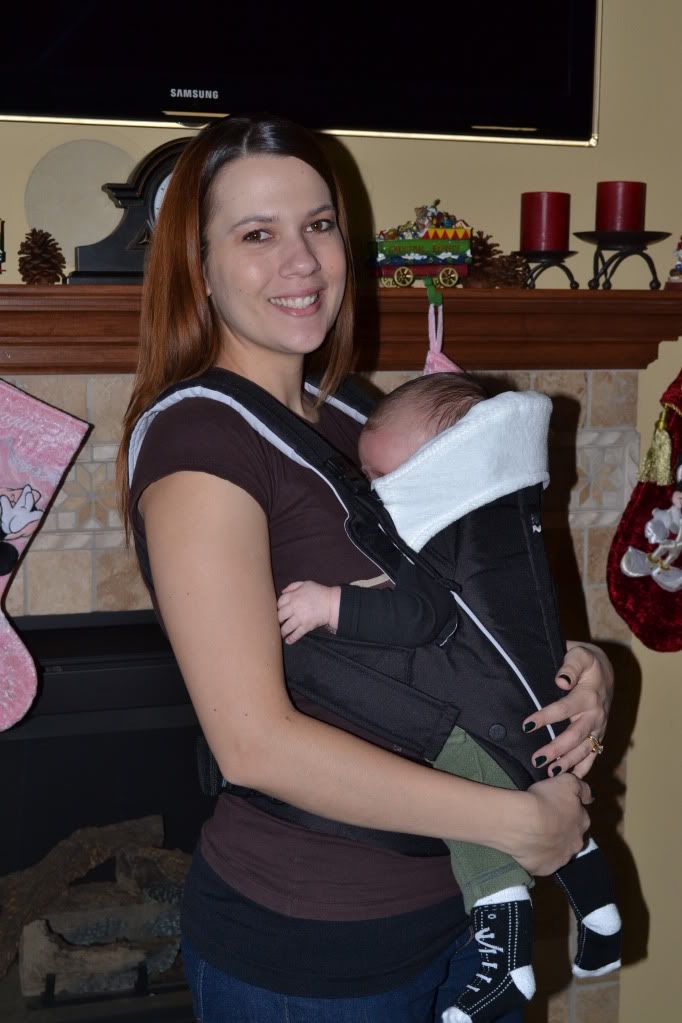
Britax Baby Carrier & Baby Carrier Seat Extender Insert
Before the party I tested out the Britax Baby Carrier. I wanted to make sure I knew how to use it before everyone got there and be able to demonstrate it's features at the party. This was the first item we broke out at the party. The first thing that we all noticed is that it seems like a hybrid of the Baby Bjorn and the Ergo Baby. It was definitely intriguing. Several of us had each of those brands and it was interesting to see how this carrier measured up to those. There were a few features we liked, a few features we didn't, and a few features we couldn't test out with our itti bitti babies. We loved the newborn insert for the carrier. It really made the carrier versatile so that both a newborn and an older child could be comfortable and well supported in the carrier. It was very easy to install and take out the newborn insert as well. We also loved the extra back support provided by the waist band, as well as the attached burp cloth. The main feature that we did not like about the carrier was that you had to pull it over your head. This made it impossible to take the carrier off without putting your child down. It also might mess up your hair if you had it done nicely. Unfortunately we didn't get to test out the seat extender since all of our babies were too small to use it, but the idea definitely intrigued us. Overall we were so-so on this carrier. It was a nice carrier, but wasn't our favorite. I would still recommend it and my sister who won the carrier at the party is ecstatic to use it with her son.
Britax B-SAFE Infant Car Seat
The next item that we tested out was the Britax B-SAFE Infant Car Seat. I love taking car seats out of boxes because they're ready to go with no assembly required. The look of this car seat is very clean looking. I love how the black, red, and silver look together. It's a very modern look. As for the function of the car seat, I feel it's very similar to the Graco Snugride that I already have. Both weigh about the same and function very similar to each other as far as the seat belt and how they secure into the car. A few moms had the Baby Trend car seat and some moms preferred the straight handle of the Britax, while others preferred the triangle of the Baby Trend. I would say it was about 50/50. Overall we felt it was comfortable and easy to use though. The main feature that we loved was how easy it was to click into the Britax stroller. We also loved how many levels of adjustment there were for the shoulder straps. This car seat would fit a VERY small baby as well as a large baby. The features we didn't like were that the sun shade is semi-attached at the back so it's hard to rotate the shade to the front. We also didn't like that the seat belt guides are hidden under the seat padding. Occationally I like to use my car seat in a car that does not have the base installed and I can't imagine having to lift up the padding each time to install it. Overall we were so so on the car seat as well. I would like to add though that after examining the car seat even more after the party, I've grown to love it and have decided to switch out my Graco Snugride for the Britax.
Britax B-Agile Stroller
The next item we brought out was the Britax B-Agile Stroller. Britax asked us to assemble the stroller at the party, so that's just what we did. For some reason I could not find the instruction book when we took it out of the box, but it was so easy to assemble that we didn't even need it. Of course we found the instruction book right as we finished putting the stroller together. This item was the hit of our party. We loved the size of the stroller. It definitely could fit a larger child as well as a small baby. We also loved the large sun shade. Most stroller shades are so small and useless, but this one will definitely block the sun. Another great feature was the wheel lock. It was so easy to use and you only needed to lock in one place instead of several wheels. The biggest feature that we loved was how easy it is to fold up and how compact it folded up. It was AMAZING!!!! The stroller is slightly heavy, but not so heavy that we would have trouble putting it into our cars. Overall we loved this product and I can't wait to use it with Lincoln! I have to admit that after reviewing this product I did go on the Britax website to check out their other strollers and I secretly (or maybe not so secretly) long for a Britax B-Scene.
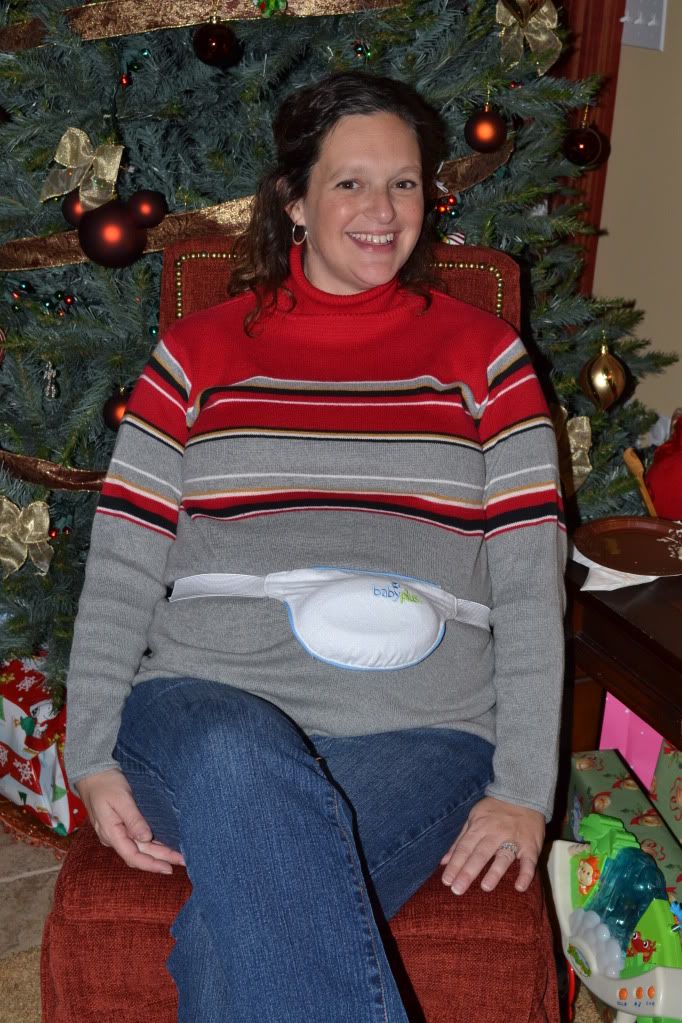
Baby Plus PreNatal Educational System
I received the Baby Plus system a few days before I had Lincoln and I wish I had it for my entire pregnancy. The idea of it is so amazing and I really wish I had a chance to test it out longer. The main function of the unit is to encourage your baby's congnitive development while still in the womb. The way it does this is through a 16 lesson program where you play a sequence of heartbeats for two hours each day from about the 18th week on. Babies that use the system are noted to more redily nurse at birth, display an increased ability to self-soothe, are more interactive and responsive, and much more. As for the time I did test it out I didn't notice any changes in Lincoln's behavior, but one of the pregnant mommies at our party tried it out and her baby was drawn to the sound. He would move to the side of the belly that the unit was placed on each time we moved it. It was quite amazing. There were two downsides to the unit though. The first was that the heartbeat is quite loud and it bothered my husband. I didn't mind though. The other downside that did bother me as well as the other mommy were the clips on the back of the unit. They seemed to dig into my belly. I would reccomend to Baby Plus that they not put these clips on the unit. Otherwise I thought the idea was very cool and I would totally buy this product.
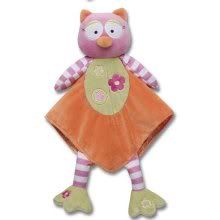
Rashti & Rashti Snuggle Buddies
These little baby toys were so cute! Snuggle Buddies are basically a toy and a blanket all in one. We received the monkey and the owl, and everyone thought they were so cute! We loved how silky they were on the inside and how incredibly soft the fabrics were on the outside. Not to mention the whole collection is irresistibly cute.
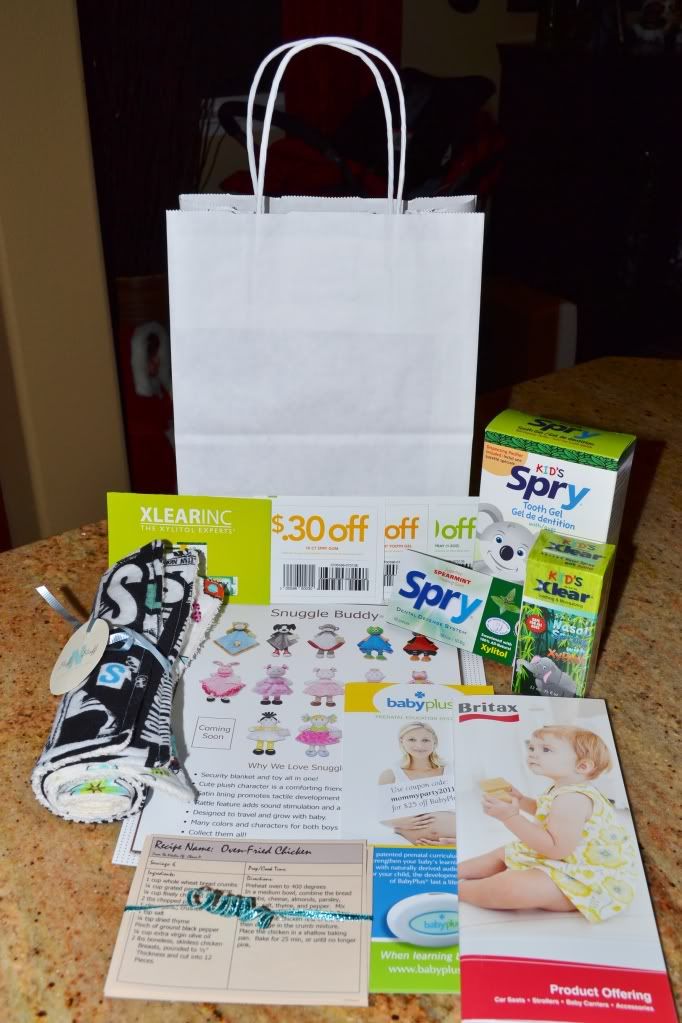
We also received some nice product gift bags for each of my mommy testers at the party. They included a package of Spry Gum, KID'S Xclear Saline Nasal Spray with Xylitol, and KID'S Spry Tooth Gel. I've yet to try the products yet, but can't wait to test them out in the future. What great party gifts to receive. I also added a personal gift from myself for each guest by making them a burp cloth and two washcloths each. In addition each guest was asked to send me a quick, easy, healthy, and yummy recipe before the party. I compiled each of these recipes and added them to each of the gift bags as well. Here are links to the recipes. Page 1 & Page 2.
Overall we all had a great time at the party. It was fun testing the products and it was even more fun getting us all together. We had 7 babies at the party and two pregnant moms. It was definitely the cutest bunch of party guests you could have. I hope we can have an opportunity to host another event for MommyParties in the near future so we can all get together again. Till then keep checking in for more great information, reviews, DIY projects, and giveaways, as I keep on with my Adventures In Fluff.
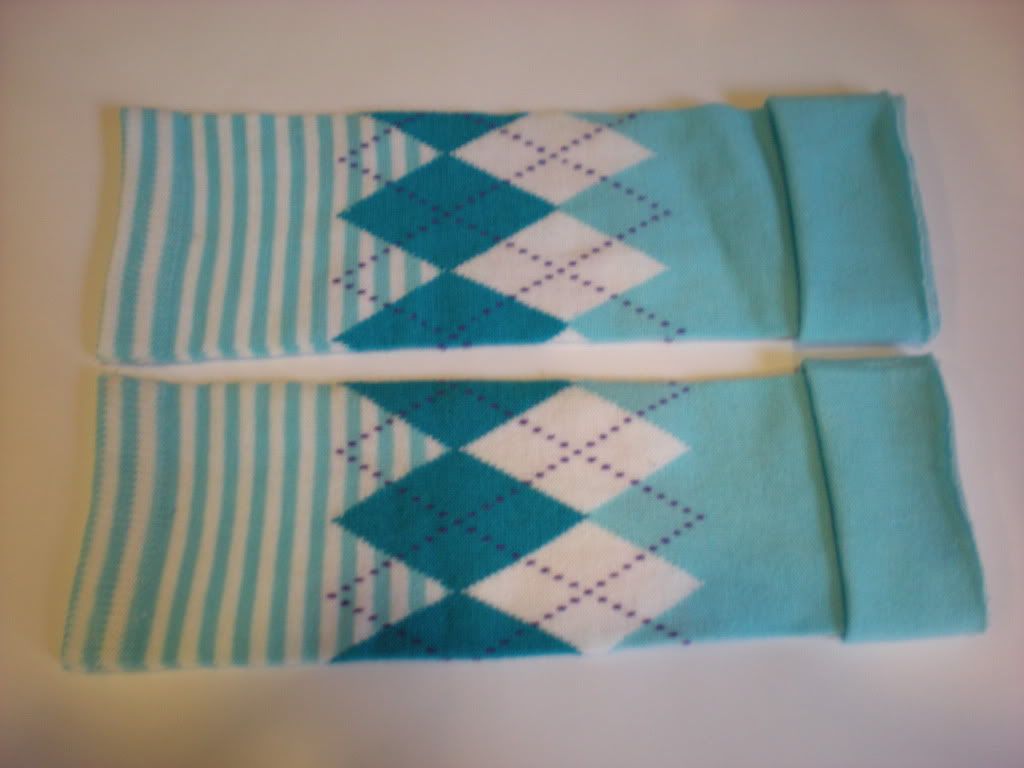
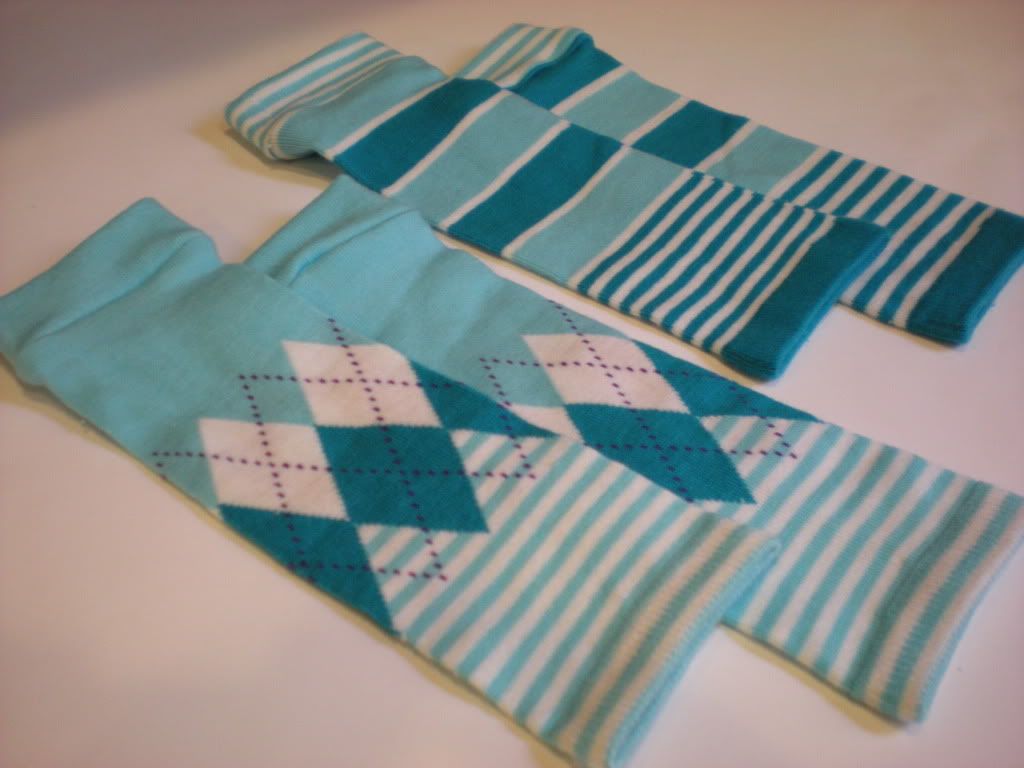
What's not to love about Baby Legs??? They are sooooo cute! They make diaper changing easier! They show off all of our cute baby fluff ! Enough said. Baby Legs are a must for any cloth diaper collection. I did buy a couple Baby Legs online from Sweetbottoms Baby Boutique (Affiliate Link) since they have such great pricing on theirs, but the DIY girl in me couldn't help but find a way to make my own.
My first set came out a bit wonky at the top and they were different lengths, but by the time I hit the second set it was pretty easy. Here is an easy tutorial so you too can make your own set of baby legs for your child.
What You Will Need:
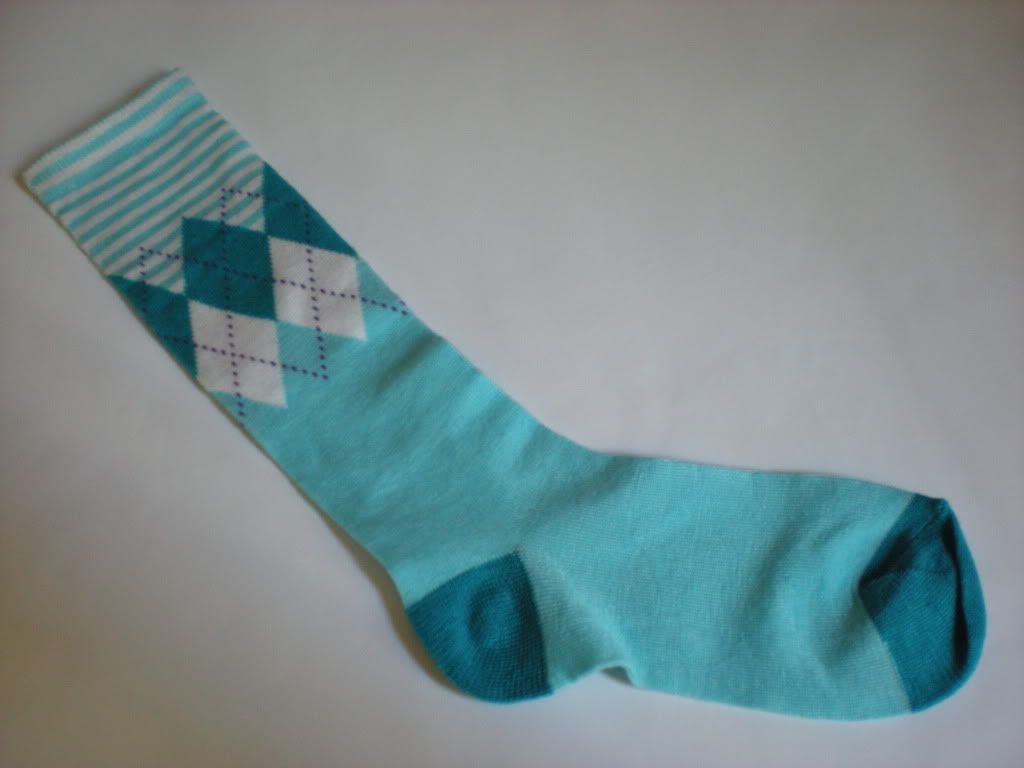
Tall Socks (I used kids knee high socks)
Scissors
Thread
Sewing Machine (optional)
Pins
Step By Step:
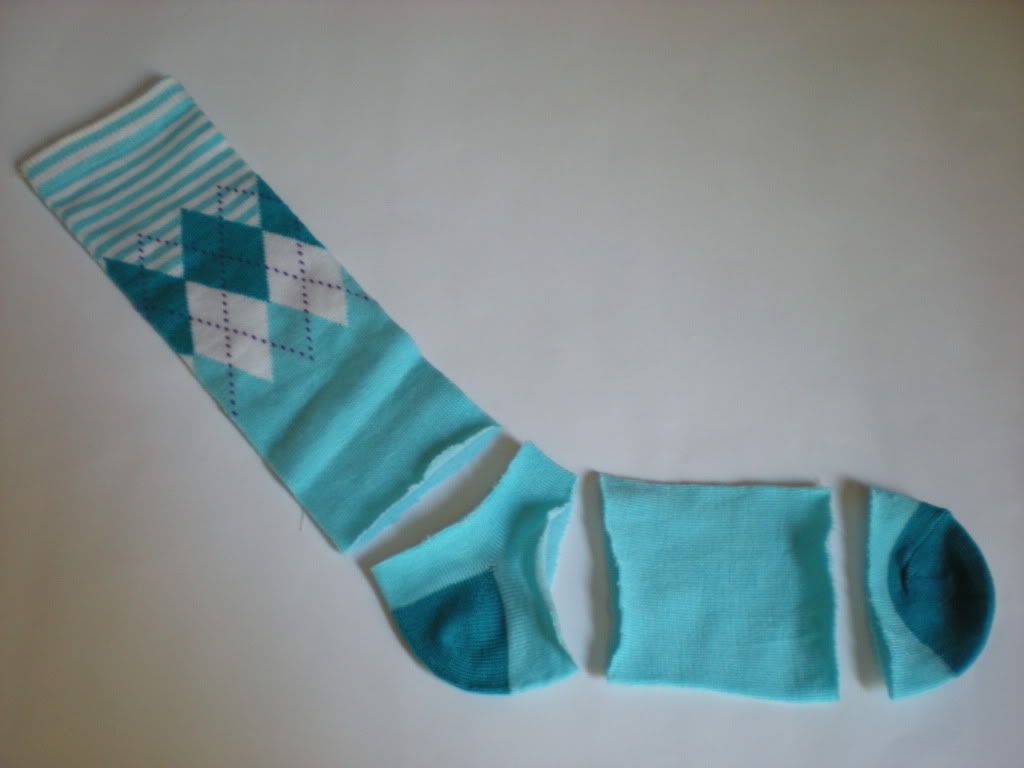
- Take your sock and cut it into four parts. Cut it right above the heel. Cut it right after the heel. Cut it right before the toe. Make sure that your sections are rectangular and not angled on the ends. Discard the heel and the toe.
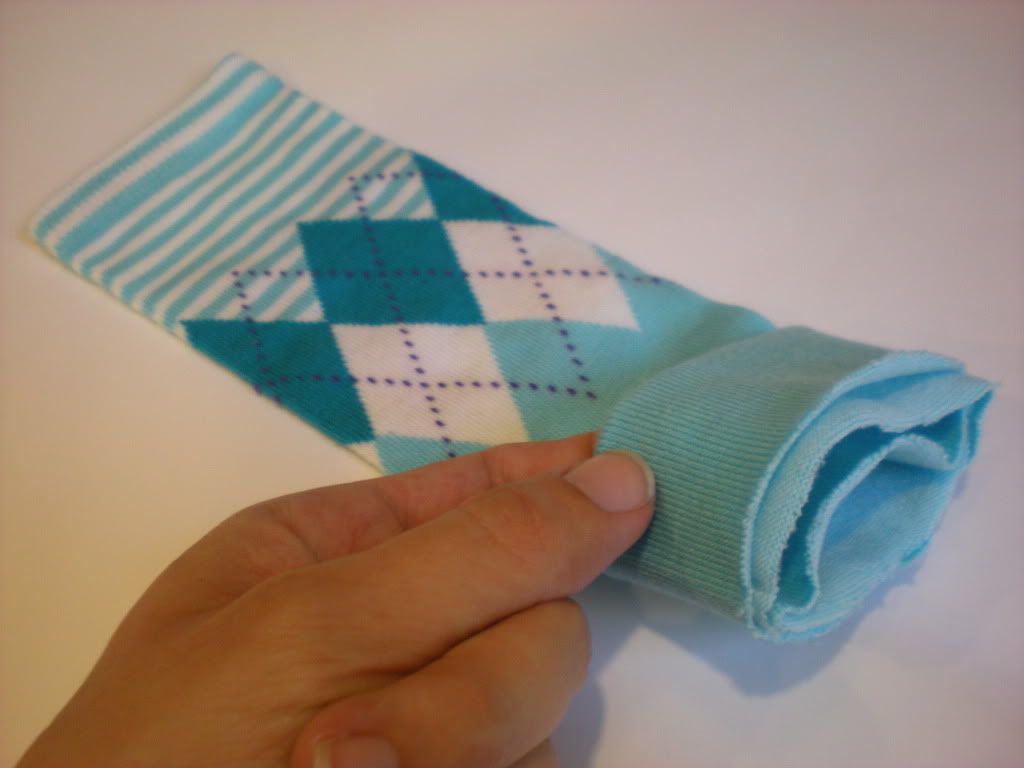
- Take the foot portion that you just cut out and fold it inside of itself so that you see the good side of the sock on both the outside and the inside.
- Stick the long portion of the sock inside the smaller foot of the sock that you just folded in half. All cut edges of the sock should be on the same side (the very end). The folded side should be closer to the middle of the long section of sock. Line up the edges so they are straight and the cut edges are all lined up. Make sure that if you have a pattern that it lines up as well.
- Repeat the above steps with your second sock. Make sure they line up before you pin and sew the tops onto your baby legs.
- Pin the long sock to the short folded sock. Only pin three pieces of fabric together. Make sure that there is still a hole to put your baby's leg into when you are all done. Don't sew all 6 layers together or you won't have a leg hole.
- Sew the long section to the short folded section about a 1/4" in from the edge. You can do this with a sewing machine or by hand. I used my sewing machine and set the stitch to a straight stretch stitch. You could also just use a regular straight stitch set to the longest stitch ~4 or you could use a narrow zig zag stitch with the width at 2 and length at 3. Sew completely around your sock edge making sure to go slow and make sure to periodically check that your edges have not rolled under on any of the three layers. Make sure to back stitch at the begining and end of your stritch.
- Trim your thread and extra fabric on the inside.
- Flip the short folded portion up.
Voila! You have your baby legs!!!! Aren't they so cute? Mine only cost me $2.50 to make two pairs of baby legs and probably only 15 min of sewing time. I got my socks on clearance from Target. You might want to try the Dollar Store too, or your own sock drawer. I know I have a few socks that will work out great.
Hope this tutorial was helpful and has inspired you to make your own pair of baby legs ... or two ... or three. Feel free to contact me if you have any questions and I will modify this post to make it clearer. I'm sure if one person has questions then there are others that have the same question. Don't forget to post pictures of your baby legs creations on my Facebook Page too. I love to see how all of your projects come out. I'll be posting mine on there and you know I'll be back very soon with another one of my Adventures In Fluff... and other mommy stuff.
This week was the girls first week back to school. Riley started kindergarten this year and Reagan moved up to the big kids class (4-5 year olds) at preschool. Brian and I have always made a big deal about school, how important it is, and how fun it can be to both of our girls. This has created a really positive outlook on school with both our girls. They both love learning and look forward to going to school each day. With that said my girls couldn't wait to start the new school year and of course they wanted to start the year off in style. That meant new cloths, a new backpack, and with a little help from my friend Amanda at Karis Kisses, some new hair accessories to tie their whole outfit together.
Ever since Karis Kisses opened up for business I've been dying to try out their exquisite hair pieces on my two girls. Unfortunately my girls are not the girly type and normally will not let me fix their hair in any way except with a brush ... if I'm lucky. Sad as it was I tried to accept the fact that I would not get to use all the cute hair accessories that other girls adorned in their hair. With our recent pregnancy I had new hope that we would have a girl and I would start her off in bows and headbands from the beginning. No such luck. We're having a boy (don't get me wrong ... we couldn't be happier to even out the hormones in our house and stray away from the pink). I thought all was lost ... until ... the girls both agreed and were psyched to dress up nice for the first day of school, and that included going all out with a little bling and elegance in their hair. Squeeeee!! I can't wait to dress up my girls!
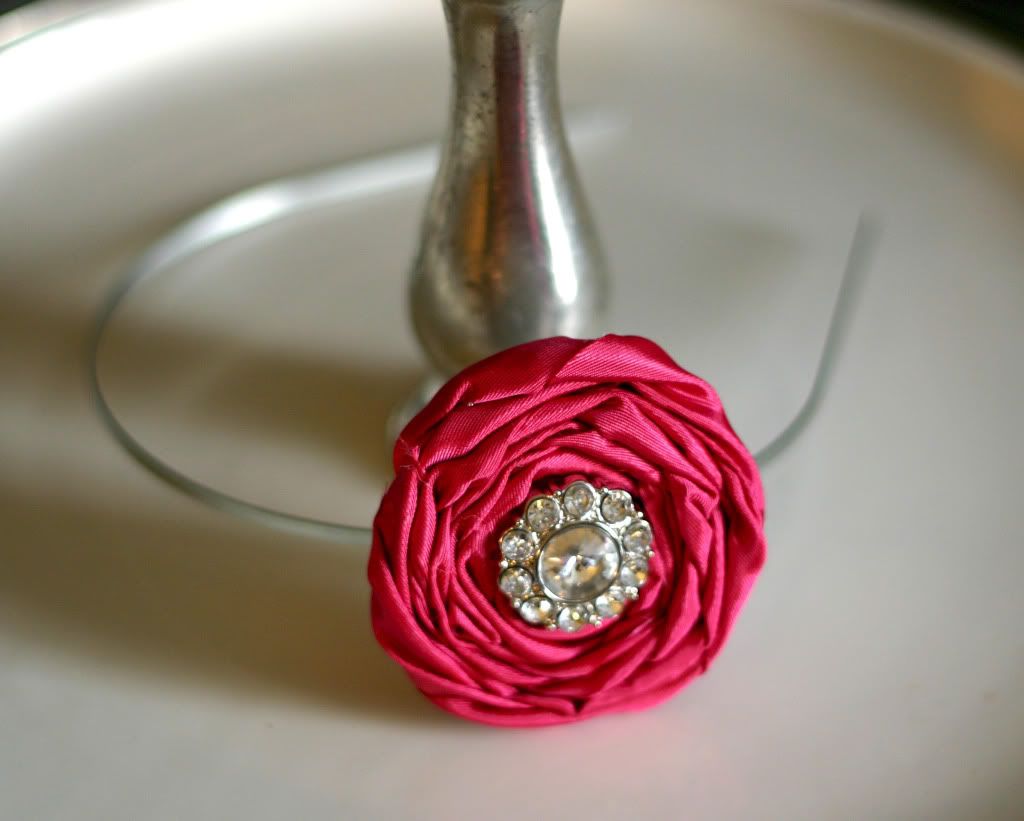
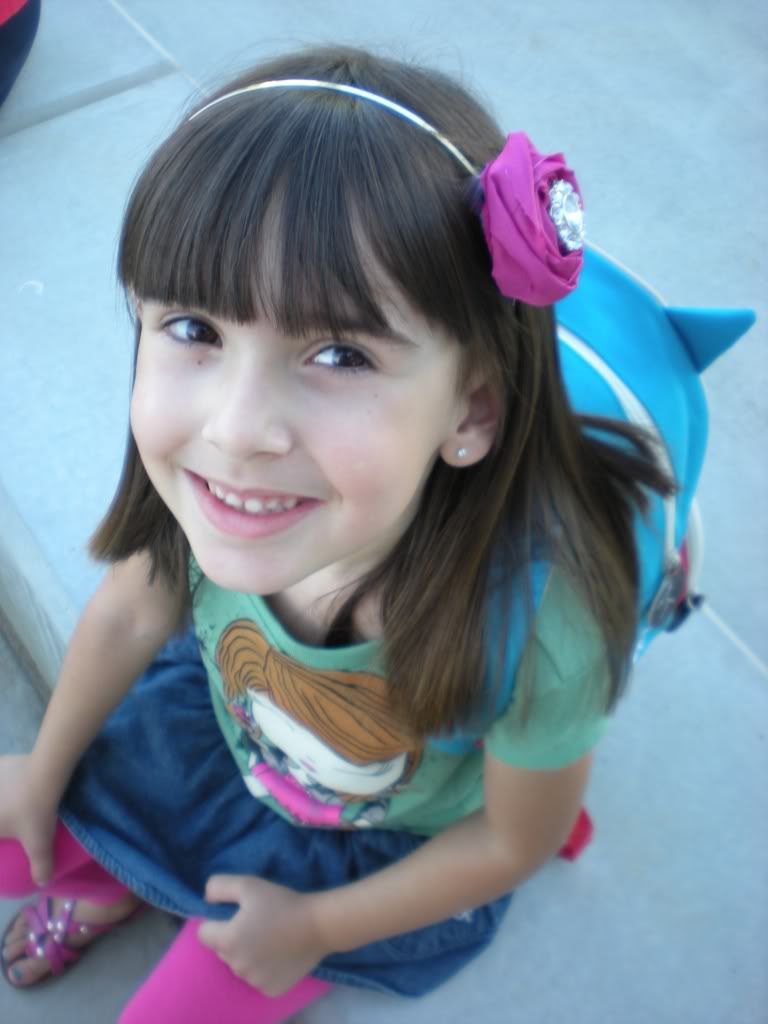
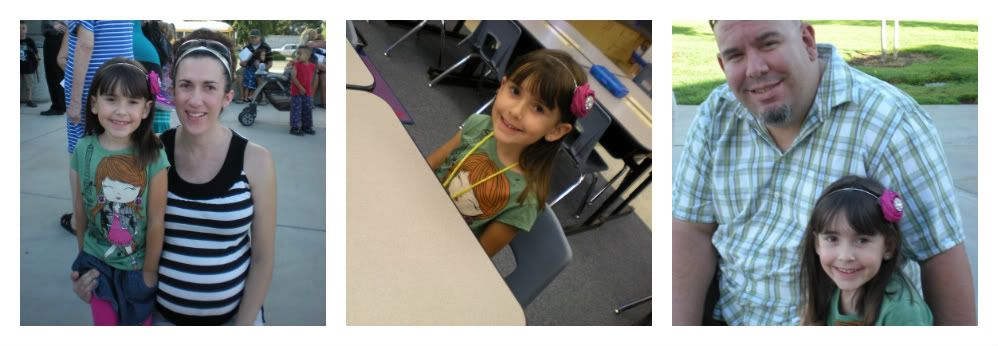
For RILEY I chose an elegant pink hand rolled chiffon flower with a glitzy rhinestone center mounted on top of a silver metal headband. Pink was a no brainer. It's been Riley's favorite color forever. She instantly lit up when we she first saw it and wanted to wear it immediately. No no though. She'd have to wait a few more days till the first day of school. Monday finally came and she was so excited to finally sport her new clothes, backpack, and Karis Kisses headband of course. She looked too cute! The headband fit perfectly and held up perfectly throughout the entire day. The flower is just velcro'ed on so you could theoretically get different colors of headbands, clips, or ponytail holders and move the flower to each one. I think I'll get a soft elastic headband to switch the flower out to. The elastic would be a lot more comfortable to wear for long periods of time. The metal one would be great for going out to dinner and taking photographs. Overall Riley had a great day at school and she looks forward to each day to come.
Riley was all smiles and ready for Kindergarten ! ! !
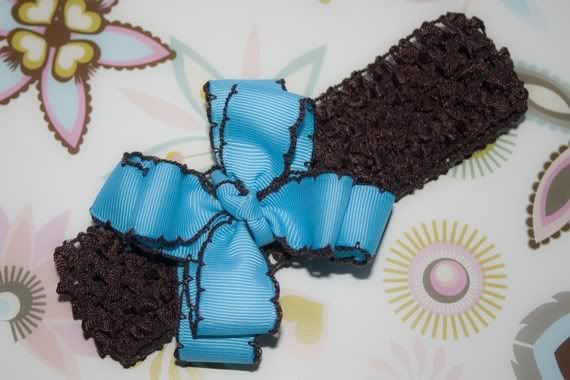
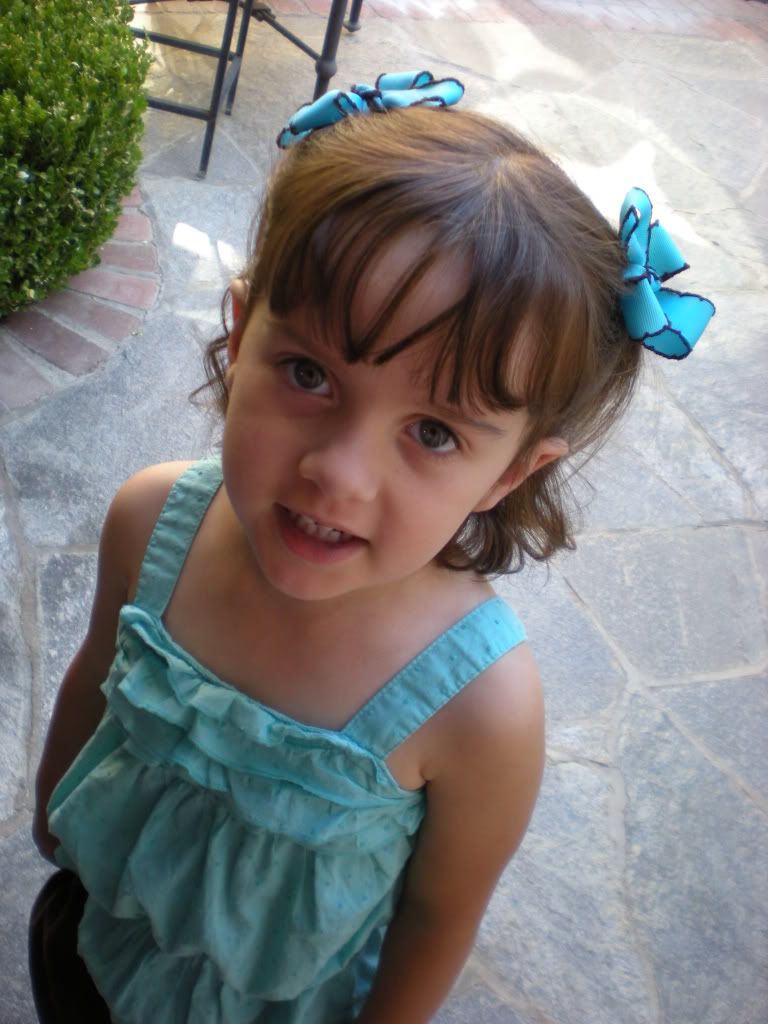
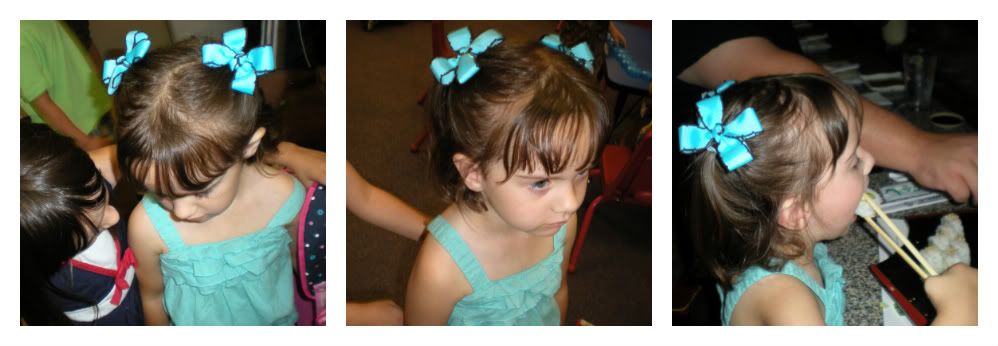
For REAGAN I chose a duo of moonstitch double bows in turquoise with a contrasting chocolate brown accent. Blue is Reagan's favorite color so I just knew she would love them. I had them mounted on alligator clips since if I'm doing Reagan's hair she prefers it to be pigtails. Just like Riley, she was totally excited when she saw them. Even a girl that never wears hair accessories would get excited looking at bows this cute. For Reagan's first day in her new class I picked out a turquoise ruffle top, brown balloon skirt, and brown leggings to match her Karis Kisses bows. Even her pink backpack had hints of turquoise in the polk a dots. She looked too cute. Unfortunately Reagan didn't take her first day at school quite as well as Riley did as you can see by the pictures. Riley tried to comfort her as we dropped her off. Luckily by the end of the day she was all smiles and nothing cheers her up more than Sushi for lunch. Through it all her hair still looked perfect when I picked her up. Not a strand of hair escaped the alligator clips. Now that's a strong hold!
Reagan needed a little pep talk from her sister but she was happy by the end of the day with her sushi.
Now that I know the girls will let me doll them up I can't wait for the next big event that I can shop Karis Kisses for more cute designs. I'm thinking our Christmas family photo will be the perfect opportunity to break out the big guns of cuteness. Be sure to check back again this fall to see what super cute hair accessories we pick out next time. Too bad Lincoln won't be able to join in on the fun. I'll have to think of something extra special for him to wear. That's something to think of later though. I'll shelf that idea for another day and another one of my Adventures In Fluff ... and other mommy stuff.
**This review is comprised of my own opinions and was not influenced by any outside source. The product was purchased by myself and was not given to me or asked to be reviewed by any outside source. No advertising was purchased in order to feature this product. **