Showing posts with label Misc. Show all posts

Wednesday, May 15, 2013

Geocaching - My New Found Obsession


Ok, as I promised in my last post on Monday, I'm going to let you in on my new found obsession - Geocaching.  I first heard the term Geocaching on my virtual friend Mandy's blog, A Baby to Share.  She's also a surrogate who's decided to blog about her whole journey and I love reading her posts with all her wit and humor.  It was last month when she was blogging about her potential IP's match meeting in L.A. that she mentioned caching.  I wasn't familiar with the term, but was instantly intrigued and had to know what this "caching" was.  That's when she sent me the link and unleashed my newest obsession... which I'm sure after reading this post will be your newest obsession as well.  Hehe!

Our first geocache find
Geocaching is basically a free real-world outdoor treasure hunt.  Players try to locate hidden containers, called geocaches, using a smartphone or GPS.  The players can then share their experiences online for other players to see.  Currently there are 2,075,092 active geocaches and over 5 million geocachers worldwide.  Players are the ones that hide the caches, manage the caches, and find the caches.  Caches vary in size, shape, and contents.  Some caches are super small like a medicine pill bottle.  Other caches are very large like a 5 gallon paint bucket.  By this point I think I may be losing you though, so let me just tell you how our whole Geocaching experience got started.

As soon as Mandy gave me the link to the Geocaching website, I read all their rules and created an account.  I searched for geocaches close by my home and there were tons!  The kids, Brian, and I ended up taking a morning walk to the nearby neighborhood that had the two geocache locations I had chosen.  I picked them because they were close and they had been found within the last week so I figured they were still there.  Using the Geocache free starter app on my iPhone I followed the tracking system to the designated location.  Tracking only gets you so far though so after that we had to just rely on the provided description and clues to find the cache.  Unfortunately we weren't successful.  We searched and searched but couldn't find anything.  I think this killed my husband's and the kid's spirit a bit and we headed home.  I wasn't about to give up though.  Riley was still on my side and we headed out to a local park to find another.  Success!!!!  Luckily this was a pretty easy one that we were sure to find.  It was a camouflaged pill bottle with nothing more than a log and a pencil inside.  We signed the date and our team name to the log, and replaced the cache right where we found it in a bush.  Riley was so excited she wanted to find another right away!  We didn't have luck on the second one, but we did run home and log our find on the website.  Whoo Hoo!!!  We were just getting started.

Then Brian and I headed out to Oahu and I brought my new obsession with me.  There were so many geocaches showing up on the map in Oahu, but I limited my searching to a few so I wouldn't drive Brian crazy.  We found most of them at the Lost TV show filming locations and in the woods by our hotel.  With each find I was more and more hooked.  In total I found 7 caches in Oahu and I can't wait to find more now that we're home, and on all our future vacations.

Some of the many finds I had on Oahu.  The rat has the cache container hidden inside of it.  The bug is a trackable that I took back home to drop in another cache.  The canteen is just another form a cache can take.
So why do I love Geocaching so much?  Let me count the ways...
My first find on Oahu
  1. It's FREE!!!  Ok, I did pay $10 to get the Official Smart-Phone Application so that searching would be easier, but it's not necessary.  They also sell some extras on their site, but totally not necessary to join in the fun.
  2. It gets our whole family out of the house.  These days all my girls and even Linc want to do is watch TV and play on the iPad.  Geocaching gets them outside.  It's also a family activity so Brian and I are also outside spending time with our kids.
  3. It helps the kids learn about maps, reading a compass, and distance.  Ok, it helps me too.  Hehe! I admit I'm map challenged at times.
  4. It helps the kids learn about the world.  This week I'll be purchasing trackables for the girls.  It's a little token that we can leave in a cache that another geotracker can pick up and take with them.  They then leave the tracker in another geocache noting the location they leave it on the website.  The girls can then track all the places their tracker goes.  Over time it can travel all over the world!  Players will also often take pictures with the tracker or of the surroundings that the tracker is left in.  This is a way for the girls to see the world as their little tracker travels.  I think Riley is going to get one that looks like a unicorn and Reagan wants a seahorse.
  5. It's a treasure hunting game!!!  Who doesn't love treasure hunting?  
Our most recent Geocaching adventure
Just thought I'd throw in the pictures above last minute.  This was our most recent Geocaching adventure yesterday.  It just goes to show you can find time to search for caches morning, noon, or night.  I picked up Riley from school and the first thing she asks is, "Can we go find treasure?"  Of course!  There just happened to be a cache nearby that I wanted to go check out.  This cache is about 10 years old!!!!  It was so awesome to read the log inside of it and see all these names from 2003 way before Riley was even born!  She was so psyched too because there were little trinkets in it to trade.  She ended up trading a Minnie Mouse hair tie for a little dragonfly.  Later that day we went to Reagan's swim classes.  Of course Riley asked while we were there, "Can we go find treasure???"  You don't have to ask me twice.  I found one on the site that was only 400 feet away, just behind the swim school on a bike trail.  We went walking and found the little yellow tube tied up to a tree.  Easy find!  Then later that night after dinner Riley and Reagan both asked if we could go find treasure again.  Sure enough there was a cache just over 400 feet away.  This time it was a family affair including the in-laws.  My father-inlaw ended up finding this one.  It was his first find!  So that was our crazy busy day of Geocaching.  You can do it anywhere!

So there you have it!  That's my new found obsession.  We've only just gotten started, but we can't wait to find more.  We've got a few trips planned to Shaver Lake, Disneyland, Conneticut, and Pismo Beach, and you can bet we'll be searching for more caches while we're there.

To find out more information visit the Geocaching website.  Don't forget to add our team as a friend while you're at it.  We're the "3Amigos+2".  

Monday, October 29, 2012

A Spooktacular Halloween 1st Birthday Bash

It was almost a year ago that Lincoln entered this world just a day shy of Halloween.  We even made it home in time to dress up and pass out candy the day after he was born.  I'm pretty sure even at that moment I knew that I would celebrate his 1st birthday in spooktacular style.  Oh yes, a Halloween bash was already in the making.  If you've been following my Birthday Pinterest Board then you probably already know that I've been pinning party ideas for the past couple of months.  I'm so sorry if your Pinterest dashboard has been swamped with kids Halloween party ideas.  I admit I went a little bit crazy with the pinning, but it wasn't for nothing.  I actually used quite a few of my party pins to create this awesome event that I will never forget.  Check out my photos below to see just how spooky Linc's 1st birthday was.

Itsy Bitsy Spider  baby costume and spider web mom
The spider and the web.  I bought the skirt from the thrift store and used fabric puff paint to add the webs. The shirt was already in my closet and I added webs to that one too.  I borrowed the cute headband from my girls.  I got Linc's costume pre-packaged.  Idea Source: Martha Stewart

Baby spider Halloween Costume
Oh how I love this little spider!  I'm pretty sure he's the cutest in the world, and no I'm not just saying that because  he's stuck in my web.

Halloween party dessert bar
My dessert bar setup.  Instead of doing one big cake I did several different kinds of desserts.  I covered the entire house in spider webs.  It looked awesome!  I will say that my hubby did not appreciate me covering the TV with webs during the World Series Giants game though.  Haha!  Oh, and it was not fun taking all these webs down.

Cute Spider Cake
This is Linc's birthday cake.  I got the idea from a pinterest pin I had found.  Basically it's a huge cake pop ball (mix crumbled cake and icing till it's sticky and form in a ball) frosted in chocolate frosting (I tapped the frosting with a spatula to get the hairy spider look), then I added white icing and M&M's for eyes, chocolate icing for legs, and white icing for the spider web on the plate.  I filled a Ziploc bag with icing and cut a small hole in the corner in order to do all the detail work.  Idea Source: Hungry Happenings & 

Witch hat cookies
These are witch hat cookies.  They're basically striped fudge cookies with a Hershey kiss on top secured with a dollop of green tinted white chocolate. Idea Source: Explore Dream Discover

Purple oreo cookies
No rhyme or reason to these cookies.  I just iced Oreos with purple chocolate and topped with chocolate chips.  The fit the color theme.  I guess you could say they are 4 eyed monsters.  Yum!

Halloween Graveyard Brownies
These were the hit of the party!  I got the idea for these graveyard brownies off of Pinterest.  I only wish I would have got to try one.  I hear they were great though.  Ok, I searched high and low for the source of this idea but I can't find it.  You might find it on my Pinterest board.  It's basically a brownie with a cookie stuck in it that I wrote on with chocolate icing.  Oh!  and I sprinkled crumbled oreos over the brownies before baking them.  The worms were stuck on with icing.

Mummy & Spider Cupcakes for Halloween
Mummy cupcakes and spider cupcakes.  These were my fave.  I love cupcakes.  For the spiderwebs I just frosted in chocolate then piped white chocolate in circles (like a target), then used a toothpick to drag from the center to the outside creating a web.  The mummies were iced with white icing then I piped white icing in a zig zag pattern on the top adding M&M's for eyes.  So easy!  Idea Source: Skinny Taste & Bakerella

Mummy Pretzel Sticks for Halloween
Ok, I know what you're thinking... these do not look like mummy pretzel sticks. Well, sometimes Pinterest makes things look easier than they are.  Boo to my ugly mummy pretzel sticks!  A word to the wise... just buy the pre-made eyes.  Idea Source: The Idea Room

Healthy Candy Corn Desserts
For a slightly healthier option I decided to make these super yummy candy corn cups (no candy corn included).  On the bottom is vanilla pudding.  The middle is mandarin oranges.  The top is low fat whip cream.  I kept these in the fridge till dessert time so they were nice and chilled.  Idea Source: The Butterfly Jungle 

Pumpkin Apple Dip Tray
For party snacks I tried to lean on the healthier side.  The first snack I did was an apple dip tray.  My mom used to always make this apple dip.  It's just one package of cream cheese, one jar of marshmallow fluff, and 1/4 teaspoon of cinnamon.  So good!!!!!  I added the blueberries for color.  I also did a veggie tray similar to this one with carrots, celery, & orange bell pepper.  For the chip lovers I had tortilla chips in a black cauldron and salsa.  I love the pumpkin bowls!  Got that idea from Pinterest.  Idea Source: Martha Stewart

Halloween Party Treat Buckets
I found these super cute buckets in the dollar section at Target.  By the way... items in the dollar section at target cost more than a dollar.  Hmmmmm...  Anyways, I got the treats from the dollar store (actually a dollar).  I included stickers, spider rings, glow sticks, candy, straws, and more.  The babies got spooky rubber ducks, toddler breakfast bars, toddler fruit sticks, and some candy for mom and dad.  Hehe!

Pumpkin Decorating Table
Each of the kids got their own pumpkin to decorate.  I spread foam stickers over the table and put markers and crayons in the buckets for the kids to use.

Pumpkin Decorating Party
My daughter the artist.

Halloween Bat Decorations
I got this idea to do bats across the wall in different sizes.  I created the template myself and printed it on black paper.  It was VERY time consuming to cut them out but they looked AWESOME!!!!  I just stuck them on my sliding glass doors with a small folding piece of tape on the back.  You can even bend the wings so they look more 3D.

Happy Birthday Lincoln!!!!

Oh yes... gotta love getting messy.

Yum Yum!!!


Spiderweb skirt
Had to throw in a picture of my cute tights and shoes.  I really loved how my costume came out.

Items Not Picured:

  • I had a whole mess of awesome decorations from the dollar store.  Yes!  Don't count out the dollar store for great decorations!
  • I did a cute creepy haunted mansion on construction paper with 13 windows in it.  Each window had a picture of Linc from each month (including when he was born).  Adults had to guess what month each picture was taken.  I also did a Linc trivia game with questions such as what day he was born, what time, how much did he weigh, what was his first word... etc.
  • I had a spooky witches brew green lime punch bowl in a black cauldron.  Yum Yum!


Tips on creating your own awesome bash:

  • Start Setting Up EARLY!!!  I started setting up for this event 2 days early.  2 days before the event I decorated the entire house.  Yes it was hard keeping the kids away from the decorations, but it was totally worth it!  The day before the event I baked all the desserts & decorated the outside of the house.  I also build Linc's gift that night.  The morning of the event I set up the tables outside (should have done this the night before) and set all the food out.  The earlier you start the less stressed you will be at the party.  After all, you want to have fun too!
  • Don't over-think your party with games.  Half my kids were babies (10 in all).  They are totally happy just playing with toys on the floor or walking around with mom and dad.  Half my kids were 3-7.  Yes, you could do games with this age group, but they are more than happy to run around in the backyard.  I'm just saying don't stress about it because they'll have fun either way. I did have two games for the adults but realized I shouldn't have bothered.  Adults just want to hang out and have fun talking.  After all, how often do we all get together now that we have kids?
  • Know your time-line.  I like to plan out the party and keep a mental time-line in my head of what should happen when.  Guests arrive at 11, play and chat till 12.  Food from 12-12:30.  Cake at 12:30.  Desserts and gifts at 12:40.  Part is over at 1.
  • That brings me to my last tip... pair up desserts and gifts together.  Guests will be sitting there eating cake anyways so you might as well do gifts while they're all sitting there.

Monday, August 6, 2012

Scarlet's Naturals SunBlock and SunStick Review

Scarlet's Naturals SunBlock & SunStick
Summer is here and so is the sun.  Here in California (Central California to be exact), that means it's hot, hot, hot!  It's a good thing I like the heat and I love the sun.  The girls, Linc, and I still try to get out on a daily basis despite the heat but my poor little guy is white as can be so he needs lots of protection.  Without sunscreen he burns in minutes.  That being said I was so excited when I found out that Scarlet's Naturals carried SunBlock.  I always hate the idea of putting sunscreen on babies because they love to suck on everything (hands, arms, toes, etc.) and they don't care if they're slathered in a thick chemical laced cream.  Ewwww!  I'm sure you remember my review of Scarlet's Hiney Honey Cream (diaper rash cream), Honey Lotion, Honey Wash, and Honey Bites (wipes solution).  I love that all her products are all natural and I don't have to worry about any of them irritating Linc or getting him sick if they get in his mouth.  I also Love, Love, Love, the smell of her products!  YUM is the first word that comes to my mind.  

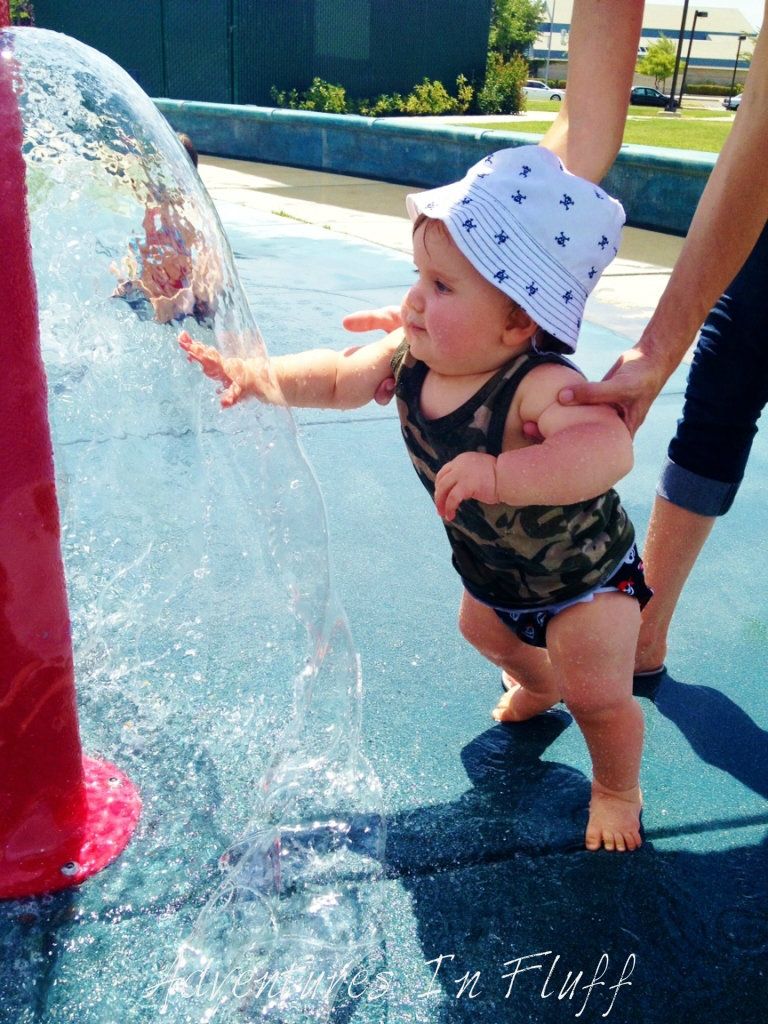
Linc and I at the splash park.
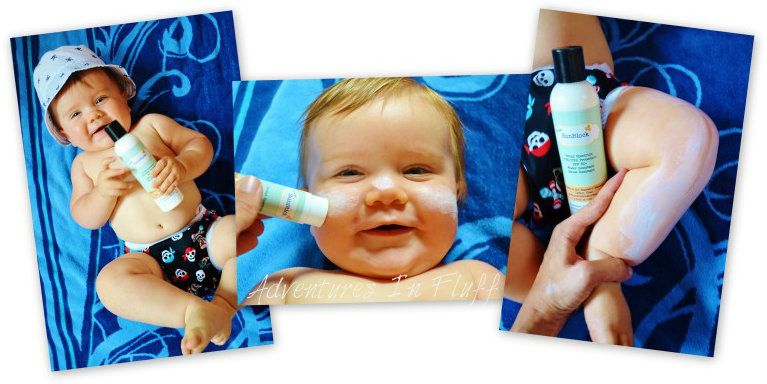
So back to the SunBlock and SunStick.  Scarlet's Naturals was awesome enough to send me a sample of her SunBlock and SunStick to test out on our little man and yesterday we put it to the test.  It was a pretty nice morning so the whole family headed out to out local splash park for some good water fun.  If you haven't check out your own local splash park then you really should.  It's a lot of fun ... for FREE!  Before we left I lathered Linc up in the SunBlock.  You want to make sure that you apply your SunBlock about 15 minutes before sun exposure.  This will give the SunBlock time to soak in and fully saturate the skin.  I was given the unscented version of the SunBlock to test out, but it also comes in a coconut scent that I'm sure smells heavenly based on what her other products smell like.  Opening up the bottle I noticed the cream is very thick.  This is a 50spf water/sweat resistant formula so the consistency is about what I expected.  This is another reason it's good to apply 15 minutes prior so your child doesn't look like a ghost all layered in white. You want to give this stuff some time to soak in.  By the time we got to the park he was back to his normal baby white self.  I also applied the SunStick to his face.  I found it easier to use the stick on such small areas as his nose, cheeks, and forehead.  It's also a lot easier to get out of the bottle than the SunBlock since all you have to do it twist the stick up like chapstick instead of sqeaze the tube.  I love that the stick is lot less messy if you're just going out for a quick day trip and you only need to cover up a small area of their body.  I will say the SunBlock is a bit hard to get out of the bottle since it's thicker.  Maybe it's the shape of the bottle?  I'm not sure.  Anyways...  We got to the park and we were ready for some water fun.  I noticed right off how the water beaded up and rolled off of Linc.  Water was not going to wash this SunBlock off.  Linc also got tons of water in his face and he did not cry from SunBlock getting into his eyes.  I'm thinking this is because of the water resistant feature and because it's so thick that it wasn't running off his skin into his eyes.  That's a total bonus for me because I HATE sunscreen in my eyes.  Now the true test.  Two hours later we left the park and Linc was sunburn free.  Yay!  My little white baby gets to stay white for another day.  Haha!  
Scarlet's Naturals SunBlock & SunStick on Linc
So all in all I really like the Scarlet's Naturals SunBlock and SunStick.  My only recommendation would be to find an easier container to get the SunBlock out off.  It's not impossible to get out.  I just find it difficult, like getting shampoo or conditioner out of a hotel sample bottle.  The pricing is also very reasonable compared to other similar products, only I bet the scented version smells way better than the other brands.  I would totally recommend this product and will probably be getting more for myself in the coconut scent.  Yum!


***ATTN: If you would like to win a Scarlet's Naturals Summer Trio (SunBlock, SunStick, & BugBEE Gone), then head over to my Just For Baby Giveaway going on right now.  Hurry fast!  This giveaway ends on August 10th.***

Thursday, May 31, 2012

itti.bitti Minkee Blankee - Review

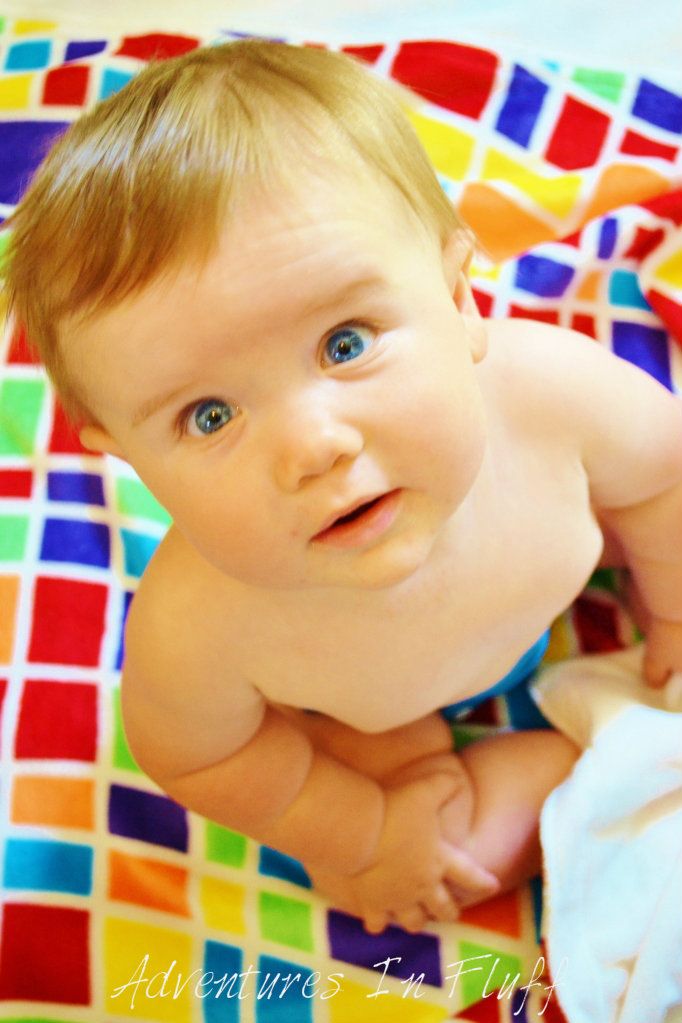
Lincoln with his itti bitti Minkee Blankee
As you all my know I have three kids.  My oldest, Riley, is 6 years old.  My middle child, Reagan, is 4 years old.  My youngest, Lincoln, is 7 months old.  Riley was a pacifier girl.  Until the age of two she had to have a pacifier at all times.  Reagan on the other hand was a blankee and bear type of girl.  To this day she still has to have her blankee and bear (yes she's sitting on the couch watching cartoons with them right now) with her at nap-time and bedtime.  I think it is soooooo cute because I too was a blankee and doll type of girl when I was little.  I love to watch how she strokes the fabric feeling it's texture, or smells her blankee without even knowing she's doing it.  I too did the same things.  Now that Linc is here I wonder what type of comfort items he will go for.  He does use a pacifier, but not as often as Riley used to.  Being the blankee & doll kid that I was I hope that he will adopt a blankee and bear like his sister.  Since he was born I've been trying to find the perfect blankee and stuffed animal.  They keep changing as I'm always finding a better one.  I think I've went through about four or five blankets already looking for the perfect one.  In the end I guess it isn't really up to me, but I can't help it.  I have a blankee addiction.

That being said I was very intrigued when I was asked to review the itti bitti Minkee Blankee.  I didn't even know that itti bitti made blankees.  All I knew was that I LOVE the feel of my itti bitti tutto diaper and I hoped that the blankee was just as nice.  When I got it in the mail I was instantly in love!  The feel of the Minkee Blankee is to die for!  Yes, I know I'm a blankee aholic so I'm slightly strange like that, but seriously this blanket is so soft.  They should make these in a bigger size that I can wrap around myself.  I'd be up for one.

Product Features:

Materials: Super soft minkee on both sides

Size: 39" x 29.5" (mine is actually 38.5" x 30" if you want to get technical)

Colors/Prints: There are 8 different colors/prints to choose from.  Each blanket has a print on one side with a small accent solid color strip.  On the other side of the blanket there is a solid color with an accent strip of the print.

Price: $39.97

What I Like:

I LOVE the feel of this blanket of course!!!  The minute I touched it I fell in love.  How could you not love it?  It's even softer than Linc's Taggies blankets and they're pretty soft.  The minkee is soft in all directions instead of just one direction and seemed to get even softer after the first wash.  Sometimes minkee is stiffer in one direction.  If you have one of the itti bitti diapers you know what I mean though.  Sooooo soft!

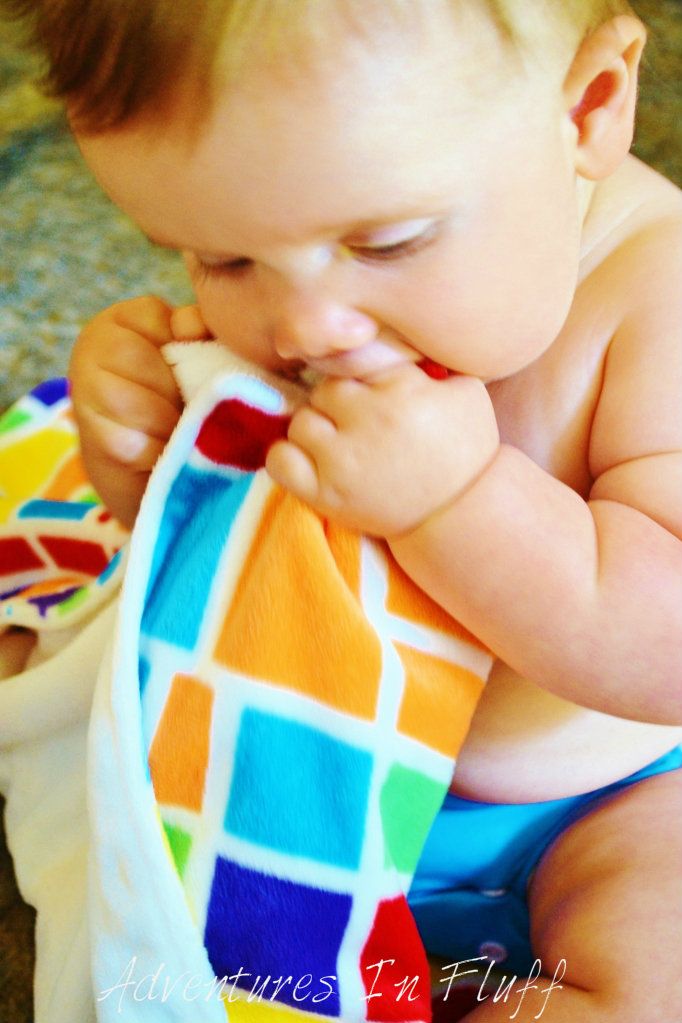
Lincoln eating his itti bitti Minkee Blankee
I love the size of the blanket.  It's just big enough that I can wrap him up in it to keep him nice and cozy, but not so big that I have to carry around this huge blanket.  These blankets are the perfect size for a carseat, stroller, baby carrier, or just wrapping them up in.  It's even big enough to use as a blanket when you convert their crib to a toddler bed.  It's just perfect.  I also like that it's a good size to lay on the ground for them to sit on, although it's so nice I'd never do that outside.  I'm sure it would wash up fine, but I don't want to chance it.

I love the weight and thickness (more like the lack of thickness) of the itti bitti Minkee Blankee.  It's only two layers of minkee (no filler layer in between) so it's very light and thin.  This is great when you want to fold it up to take on the go.  I can easily fit it in my diaper bag... as long as I don't have it overstuffed with too many diapers.  This also means it won't take up much storage in his closet, but I'm sure we'll have it out all the time so no need to store it.

I love that it's great for the winter AND the summer!  Minkee seems to have a feel to it that keeps you both warm in the winter, yet cool in the summer.  I don't know how it does it, but it does.  All the rest of Linc's blankets are designated summer or winter, but this one swings both ways.

What I Would Change:

The itti bitti tag is not so itti bitti.  Haha!  It's kind of big actually.  I know I could just cut it off, but it's such a nice looking tag that I feel bad cutting it off.  I just wish it was a little smaller.  I'm all for branding, but this tag is a bit much.

I'd come out with some new prints.  itti bitti seems to be hit and miss with their prints.  Some are SUPER cute, but some I just don't know why they picked it.  I'm not sure if it's because they're an Austrailian company and they have different tastes than Americans do or what, but I'm not loving all the prints.  Yes, it could just be me.  That being said I do love most of the prints so I guess you could say it's more a plus than a negative... I'm just picky with prints.  I can't wait to see what their next batch of prints will be!

I would make a bigger size so that us mommies (and daddies) can have a minkee blankee for ourselves.  Haha!  Maybe I should say so us blankee aholics can have one for ourselves.

In Conclusion:

I'm in LOVE with the itti bitti Minkee Blankee and I hope that Linc picks it for his favorite blankee.  Right now I use it while he's breastfeeding, napping next to me, sitting in his car seat, or just about anything else, so I'm sure it's going to stick with him for a good while.  I would totally recommend this blanket to anyone stocking up for their next baby... or even those that already have a baby or toddler.  It's a great addition and I'm tempted to say necessity for any child.  

blankee ayannahblankee carnivale
blankee ponderblankee zeebra
blankee daquiriblankee eton
blankee gerryblankee wobott
_________________________________________________________________________________
** Please note that while I aim to provide the most thorough and honest reviews possible, this review is based on my own preferences and experiences.  Each baby is different and each parent has different likes and dislikes.  What works for one may not work for another, so keep that in mind while doing your research.**

If you would like to purchase one of these blankets for your little one, then please visit the itti bitti US website to find a retailer near you or help support this blog by visiting my affiliate store Kelly's Closet.  You can also get the latest info by "Liking" itti bitti on Facebook or "Following" itti bitti on Twitter.


**Just a heads up.  itti bitti is sponsoring an awesome prize for the Fluffy Butts Cloth Diapering Giveaway Hop.  Check back here from June 4th - June 15th for your chance to win.**

**This product was given to me for the purpose of a review, but the review is comprised completely of my own opinions  and was not influenced by any other outside source.**

Monday, April 2, 2012

The Perfect Cloth Diapering Jeans!!!

When I first started researching cloth diapers I remember several moms telling me that when it came to clothing I should stick with stretch pants and forget about the jeans.  Then when I finally got the chance to start using cloth diapers on Lincoln I realized exactly what they meant, and if you cloth diaper then I'm sure you know exactly what they were talking about too.  Despite the advice I had several pairs of jeans for Linc.  Every time I put them on him ... let me rephrase that.  Every time I TRIED to put them on him I tugged.  I pulled.  I bounced Linc up and down and tried to squeeze his big fluffy butt into those tight unforgiving jeans.  Yes, I did get them on, but not without a lot of work.  Why couldn't there be an easier way????  I'm a jeans type of girl and I just know Linc was meant to be a jeans type of boy.

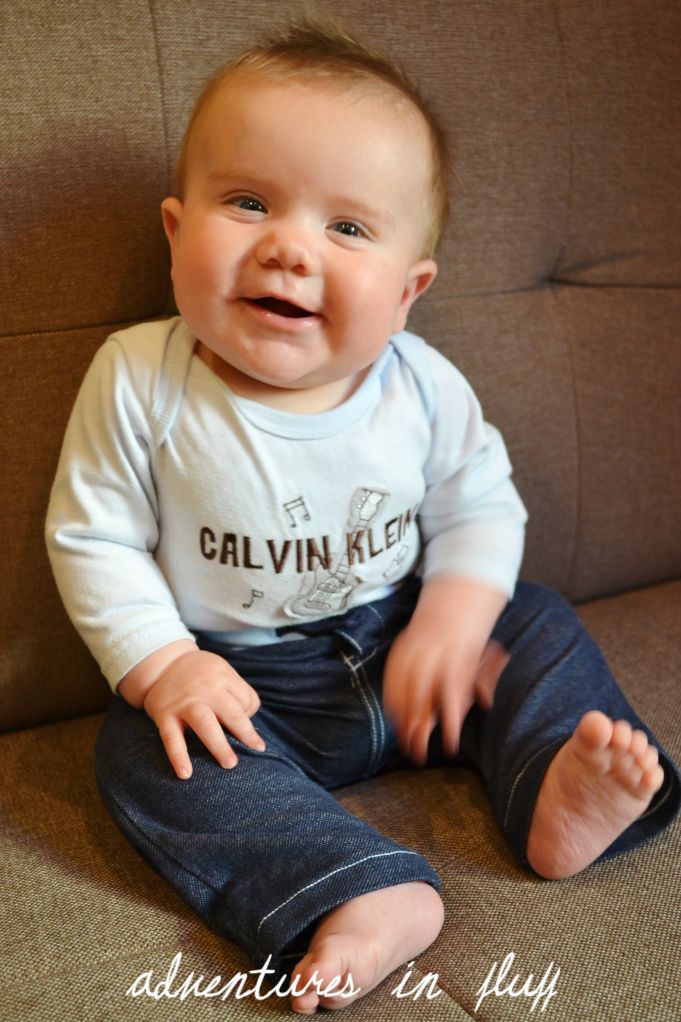
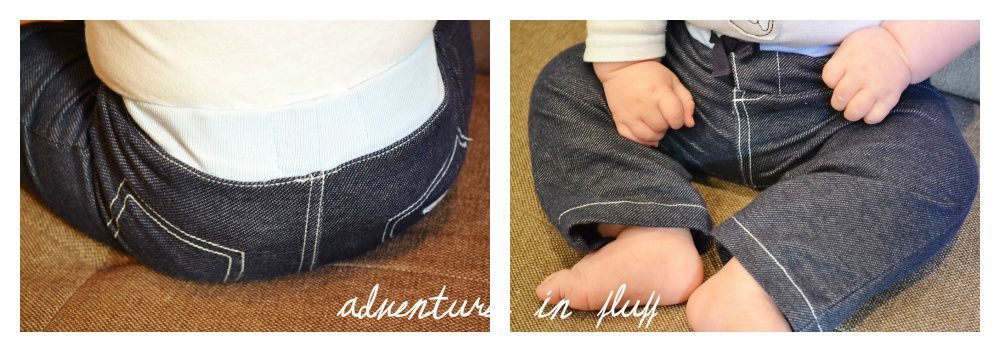
Fast forward a couple months.  My sister in-law got Linc the cutest little outfit for Christmas.  It was a light blue shirt with sneakers on it and a pair of GUESS jeans.  "Oh no!" you think?  "Not jeans!" you say?  Well let me tell you these are no ordinary jeans.  These are AMAZING jeans!!!  These jeans were meant for a cloth diaper booty.  Think pajama jeans (the infomercial jeans), but in mini form.  They're jeans that look like blue jeans, but feel like stretchy pants.  They're oh so soft, oh so stretchy, and oh so cute!  These jeans fit Linc sooooo perfectly and I wish I had a million pairs.

BUT ...

I wish I had told you about them a month or two ago.  I just went on their site and although they still have a few of the boys jeans outfit, the boys sweatshirt jeans outfit, and the girls sweatshirt jeans outfit, they don't have all the sizes anymore.  I'm bummed because I really would have loved to get bigger sizes for Linc.  I searched high and low online and can not find any pants that compare to them.  I think it's time for someone to capitalize on this great idea.  We need jeans for the cloth diapered booty!  Anyone up to the task?  I did find a tutorial on the blog Running With Scissors that showed How To Make Baby Jeggings (Jeans+Leggings) that looked somewhat similar, but not quite.  If you're the crafty type then it's worth a shot to test them out.  Let me know how it goes.  Maybe Linc will give me a few hours free time to make him a pair, but till then I hope he never grows out of his GUESS jeans.  I just had to tell you about them!  If you have a little one that can fit into the sizes that they still have available I would run over there and scoop up as many as you can get.  You won't regret it!

Friday, March 30, 2012

6 Ways To Help Your Baby When They Have A Cold

Most people would say that winter is the time for colds, but I disagree. I think springtime is way worse. First off the weather is wacky. One day it's cold. The next day it's hot. Then it's back to cold. Extreme weather changing is notorious for bringing on colds. Not only that, but springtime brings flowers and pollen which in turn brings allergies. Put both of these together and what do you have? Lots of snot!

Everyone in our house has been sick at least once, if not twice this year already. Oh yes, we've went through tons of tissues and have had our share of snotty sleeves. What about babies though? What do you do then? Good question because there isn't a whole lot you can do when it comes to modern medicine.  Instead we need to rely on natural remedies that are safe for our wee ones.  I've listed below some baby safe remedies you can try the next time your baby gets sick as well as exactly what products we use during those hard times here in our home.


#1 Bring On The Moisture
Adding moisture to the air will help loosen your baby's mucus and sooth irritated nasal and throat passages.  You can do this a few different ways.  One way is through shower steam.  Turn your shower on hot, shut the door to your bathroom to lock in the steam, and sit with your baby in the steamy room for 10-15 minutes (not in the shower).  Repeat a few times a day.  Along the same lines, giving your baby a warm bath or taking a warm bath with them will also help to moisten their nasal passages.  Yet another way to create moist air is with a humidifier or cool mist vaporizer.  Run the unit on a table next to them while they sleep.  Make sure to aim the mist away from your baby so they don't wake up drenched.
*What do I use?*  I've tried both a vaporizer and a humidifier and I find that the humidifier creates a much more moist environment.  I also frequently take baths with Lincoln to help moisten the air as well.  I don't generally use the steam shower method though since we have wallpaper on our walls.  I don't want to do anything that might cause it to start peeling.  Otherwise I think the shower sounds like a great option.

#2 Loosen & Suction The Mucus
First thing you want to do is lay your baby on their back.  Tilt their chin back and insert a few saline drops (salt water) into each blocked nostril.  Wait 5 min for the saline to work its magic and loosen the mucus.  At this point you can use a nasal aspirator or bulb syringe to suck the snot from their nose.  If they still have a lot of mucus 15 min later then repeat.  Don't repeat more than a few times a day though or you will just irritate their nose even more.
*What do I use?* I used to use the typical blue bulb syringe that you get at the hospital, but I found it usually didn't work very well, my kids screamed, and one wrong move and my babe got a pointy nub pushed a little too far in their nose. That's when I heard about the NoseFrida Snotsucker. Everyone swore by it, but to tell you the truth I was a bit leery about sucking snot out of my kid's nose with my mouth.  After trying it out though I found it to be totally hygienic, and very easy to use.  Since I'm sure a lot of you have the same concerned and questioning looks that I had when I first heard of this device, I've created a video for you to see just how great these little Snotsuckers are.  On another note, I have not used saline drops on Lincoln. This stems from my own fear of water in my nose.  Stupid I know, but true.


#3 Keep Their Head Elevated
Keeping your baby's head elevated will help your baby's mucus naturally drain and keep those nose passages clear.  This is not only important while sleeping, but also while feeding.  While sleeping try placing a small wedge under the head of their mattress.  Never place pillows in their crib though.  You can also have them sleep in a chair of some sort.  Most swings, bouncy seats, car seats, etc. will keep your baby at a good angle while sleeping.  Just remember to buckle them in so they don't fall out.  When breast or bottle feeding try to keep their head elevated as well.  Try putting an extra pillow under your arm, or if breastfeeding the football hold works great.
*What do I use?*  For sleeping, I put Linc in his Fisher Price Zen Collection Cradle Swing.  The seat comes completely off the swing and I can just set it next to my bed at night.  It has two angle options and when he's congested I usually have him on the more inclined position.  To tell you the truth he sleeps in this thing all the time.  I just change the angle depending on if he's congested or not.  For breastfeeding I do as I said above and either put a larger pillow under my arm to prop him up more, or use the football hold.

#4 Lots Of Fluids
When you're baby is sick you definitely want to make sure that they're getting plenty of liquids.  This might be breast milk, formula, water (after 4 mos), or juice (after 6 mos).  Fluids will help to thin their secretions & prevent dehydration.  If they're really congested they might not be interested in drinking due to their inability to breath well.  To help you can offer shorter feedings throughout the day and/or saline drops and suction before feedings.

#5 Lots Of Rest
As hard as it might be to get your little one to rest when they are miserable, all of the advice above should help.  They're going to need as much rest as they can get to fight the battle of the snot.

#6 Lots Of Love
Lots of hugs and kisses (on the forehead so you don't get sick too) is just what the doctor ordered.  Show that little babe that you will always be there for them through thick and thin ... mucus that is.

**I am not a medical professional.  Please consult your doctor if you have any questions or concerns.**
**One of the above products was given to me for the purpose of a review, but this post is comprised completely of my own opinions  and was not influenced by any other outside source.**

Monday, January 16, 2012

Pinterest - My New Found Obsession

If you haven't tried Pinterest yet then you're really missing out. If you haven't even heard of Pinterest yet then you must be hiding under a rock somewhere because every 5 minutes I see someone post their Latest "Pin" on Facebook. I admit it took me awhile to cave and join yet another social site since I hardly have time for the ones I use already, but I finally joined up last month... Didn't get it... And never used it.

My First Pin!!!! I'm totally going to make this!
Early this month I was skimming the internet and came across a DIY project that I was totally excited to try. Now normally I would add it to my favorites bar where I have several groups of mismanaged folders (I really should organize those one day), but then I saw the little "Pin It" button that I added to my favorites bar last month. Hmmmm... I decided to "Pin It". It was easy enough. I just picked a picture on the page I wanted to pin, picked a category to pin it to, then clicked "Pin It". I even posted it to my Facebook page. Whoo Hoo! I'd just done my first Pin. I still wasn't hooked yet. I pinned some baby legs that I wanted to buy, but what else was I going to Pin?
Can You Say Yummy!!!!
Fast forward to last weekend ... I started checking out the Pinterest site again. There had to be some reason this site was so cool. I then realized that I had followers and I was following friends. I vaguely remember when I signed up that it said that they would start me out following a group of people. I checked out who I was following and then realized that I could see their pins. Then I noticed a great button labeled "Repin". Sweet! I don't even have to find all the cool stuff on the web. All my friends can find it for me and all I have to do is Repin what they Pinned. So I did. Repin Repin Repin! Fun! But there had to be a way to search Pins from everyone on Pinterest. Then I found it... I can search all the recent Pins from everyone on Pinterest (that labels their stuff public) by category. Awesome! This just keeps getting better! All I'm really interested in is DIY projects, Kids stuff, and Food so that's what I searched... Well I tried to at least. It's a little hard to find time to search when you have two kids and a newborn but my best time is when I'm nursing Lincoln. Pinterest definitely sparked my interest.


Never Would Have Thought Of This.  Thanks Pinterest!
Fast forward yet again to this past weekend. I was on my phone adding the Blogger application because I thought it might be faster to write posts on my phone rather than one handed on my laptop (I'm writing this post on my phone as we speak but that's another story). The girls have been using my laptop for learning games a lot lately anyways so I never get to use my laptop anymore.  Well while I was in the iPhone app store I wondered if they had an application for my newest obsession, Pinterest.  They did! (Click here for Pinterest Application for iPhone)  Unfortunately it got bad ratings for freezing all the time.  Booo!  I downloaded it anyways.  It did freeze on me the first time, but has yet to do so since.  It's awesome!!!!!!  I can Pin all day long!  It just keeps re-loading the newest Pins on Pinterest and I just keep Pinning and Pinning and Pinning.  Whoo Hoo!  I've found my new obsession.  I'm Hooked On Pinterest!!!!!

So if you too want to join the obsession that is Pinterest, don't forget to add the "Pin It" button to your browser toolbar.  Don't forget to add your friends.  Don't forget to get the phone application.  Don't forget to add me to your follow list.  And don't forget to Pin Pin Pin!!!!

Saturday, January 7, 2012

Blogging With A Newborn

Let me just start by saying I am amazed by the moms that can keep up with their blog posts, interact on Facebook, chat on Twitter, and still have time to take care of a newborn.  My hat's off to you!  I am struggling.  At this moment I'm typing with one hand while breastfeeding my little man (a talent I've yet to master).  I still need to do a video review today, but finding an hour of free time is nearly impossible.  Yes it takes me at LEAST 60 minutes with my terrible public speaking skills to do these videos.  I probably start over at least 20 times.  At the same time I'm trying to remember that I have diapers in the wash that will need to be moved to the dryer soon, and I have NO food in the fridge so a trip to the grocery store is a must.

...

Fast forward 8 hours.  Well, I finally got Lincoln down to bed for the night and have time to write again.  I did get my video done today, but not in time to post it.  Guess it will have to wait till Monday.  I did remember to move my laundry to the dryer, but it's still in there.  Guess I'll take it out and put it all away tomorrow.  I did go to the grocery store, but Lincoln was crabby so I just ran in and got the bare necessities.  One day I'll get around to doing some REAL shopping.

So I ask again ... or maybe I never asked... I'm not sure because I'm so tired.  How do you blogging moms with a newborn do it ? ! ? !  Hopefully in another month or two I'll get my routine down.  Till then bear with me and my sporadic posts.  One day I will get a full night's sleep.  One day I'll get back to taking showers everyday ... or at least every other day.  One day I'll plan real meals for dinner (oh wait ... did I ever do that???).  One day I'll be able to write a blog post in one sitting with two hands.

One day ...

Monday, January 2, 2012

Make It Monday - My Side Project "SkyWalk - Trampoline Arena"

2012 is bringing a few new things to Adventures In Fluff and one of those new things is "Make It Monday".  Every Monday I'll be feature a new DIY project ... 

This week is a little different though.  Technically I made it, but it's not what you'd call a DIY project.  I haven't really talked about my real work life on here before.  In addition to being a blogging addict, cloth diaper freak, and mommy around the clock, I'm also an interior designer with my own company called Shanna Lynn Interiors (yes I spell my name differently for my company).  I do some residential design (I LOVE doing kids rooms), but my main focus lately has been commercial work (non-residential design).  Brian, the girls, Lincoln, and I had the opportunity to visit one of my projects today and we had so much fun that I just had to run home and tell you all about it.

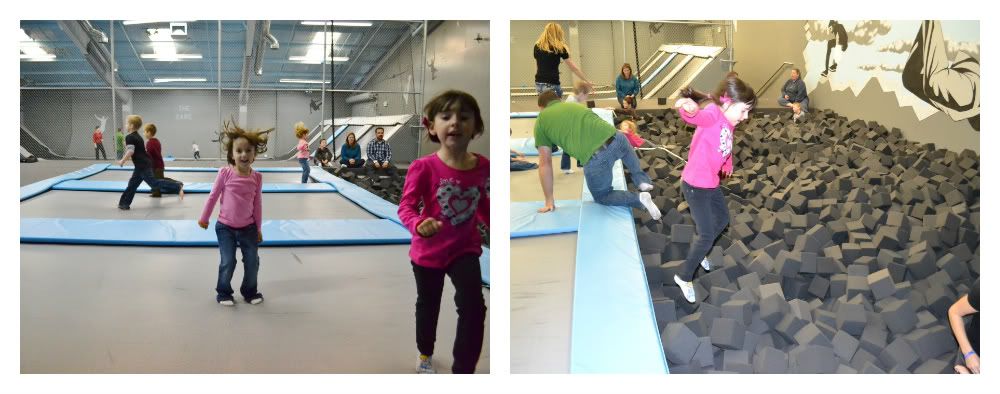
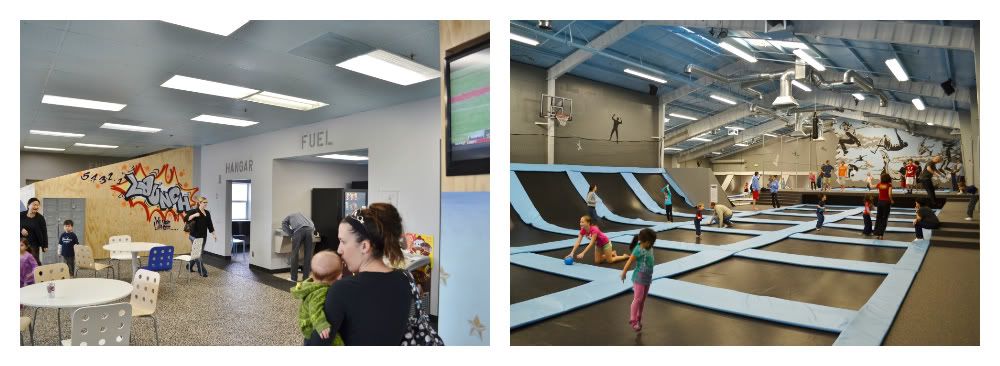
My most recent project that I completed right before having Lincoln in October was SkyWalk.  SkyWalk is a trampoline arena that just started up with their first location in Madera, California.  Before SkyWalk I was designing hip, modern, office buildings called OfficeBay, but SkyWalk was an exciting project that I could really break out and have fun with.  We started out with a pretty bare warehouse building so the possibilities were endless on what we could do with the space.  In the end we came up with an over the top fun, industrial, and hip design that kids, teens, and adults alike could come to hang out and get their jump on.  This isn't a place where you just do your typical bounce, bounce, bounce (although you certainly can if you want to).  This is where you can pound your friends down in a fast flying game of dodge-ball.  You can leap into a vast pit of foam blocks (although my girls called it the jello pit).  They also do parties and work functions here.  How fun would that be to have a work meeting at a trampoline arena???  Something about the thought of a whole bunch of business men and women in suits jumping all over the place like kids cracks me up.  All I know is that we're definitely going to have one of the girls birthday parties here this year.
My Crazy girls taking on the foam pit
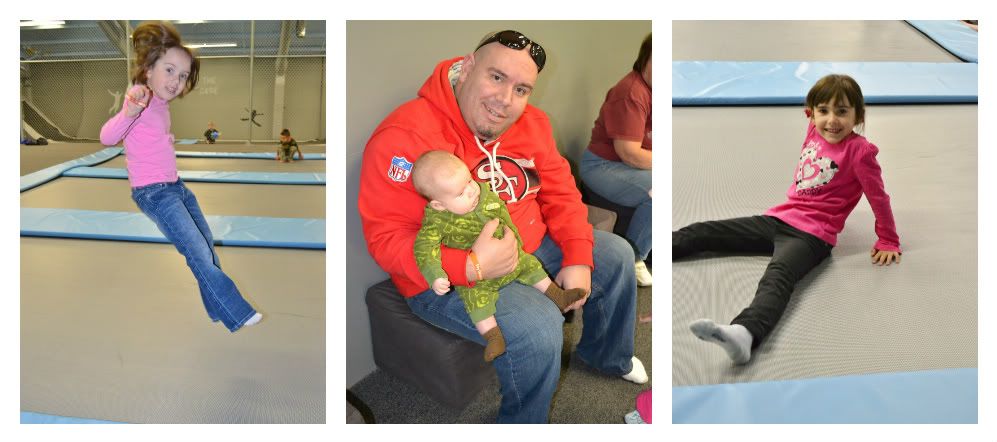
Today was the first day that I brought the girls down to SkyWalk.  When we realized this morning that today was the last day of winter break, we jumped in the car to make it down there for Kids Jump.  I thought that would be the best time to have the girls go since it was just for kids 6 and under.  My girls get pretty timid and I thought they'd be less scared if it was just kids.  No such luck though.  Both girls freaked out a bit at the vast arena of trampolines.  Riley was the first to cave in as I sneakily pulled her out to jump without her knowing it.  She instantly lit up and that was it.  I couldn't pull her off after that.  Reagan took a bit more coaxing.  She got so upset at one point that she started to break out in spots (oh yes, my girl is that much of a chicken).  Finally she eased herself onto the first trampoline and just like Riley her eyes instantly lit up.  It was on after that!  She was a crazy woman bouncing off the walls.  

Check out our pics below to see how much fun the girls had and the design of my own personal DIY project.  I'm totally bummed that I forgot to get a picture of me jumping into the pit like I was Tony Hawk or something.  Oh well.  Next time I guess.  I promise next week I'll do a real DIY project that I just know you're going to love.  I've already gotten started on it and I'm sure I'll make tons of them.  Ohhhhh the suspense.  : )

My two little jumping beans and my not ready to jump bean with Brian
The lobby and the trampoline arena (yep, that's me and Linc on the left)

Check out these sweet ass videos too!  Makes me want to go flying off the walls.  Might have to try one of these bounce boards out.