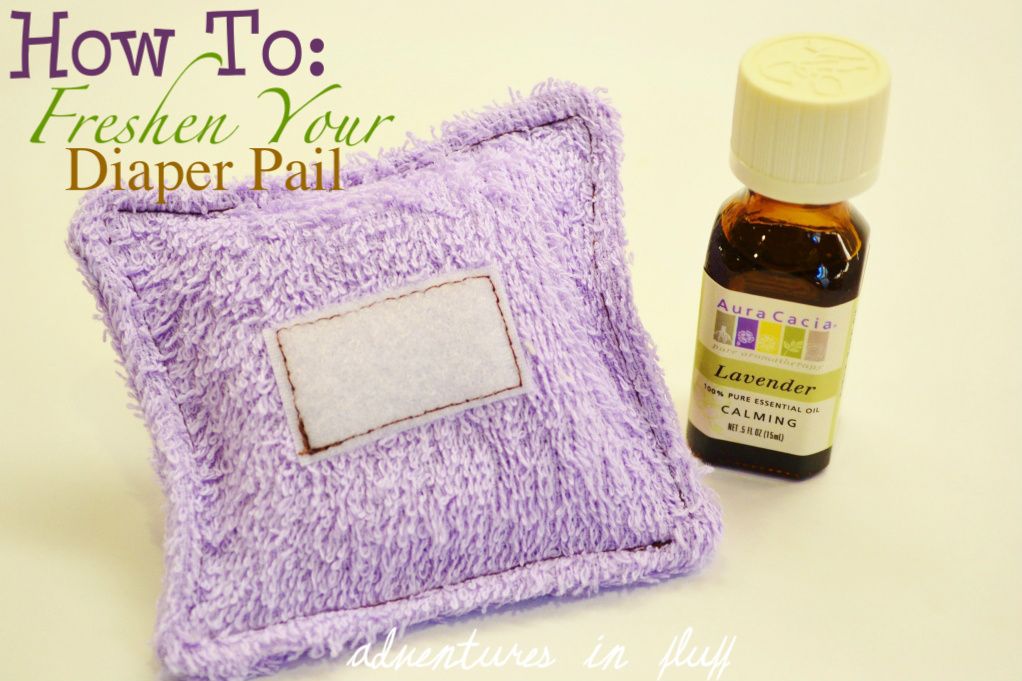
Does your diaper pail smell less than luxurious? Does it lack the smell of roses and lavender? Is that a stupid question? Sure it is. I mean it's a pail that stores a whole load of pee and poo. Why would it smell luxurious? I know we've talked about a few ways you can help to keep the stink away. Make sure your pail has good air flow. Spray off poopy diapers. Sprinkle some baking soda in your pail. Wash your diapers at least every other day. All of these sujestions can really help to minimize the stink. But what about the roses? What about the lavender? Is that too much to ask? I don't think so. Below I'm going to show you a tutorial on How To Make Your Own Diaper Pail Essential Oil Diffuser Pillow. Attached to the inside of your diaper pail this diffuser will freshen your nursery and keep those stinkies at bay.
WHAT YOU WILL NEED:
(2) 4"x4" Fabric Squares (I just used some terrycloth fabric scraps I had)
(1) 4"x8" Fabric Rectangle (I just used some terrycloth fabric scraps I had)
(1) 1/2"x1" Sew On Velcro Loop
(1) 1/2"x1" Stick On Velcro Hook
Essential Oil (I used lavender)
STEP BY STEP:
- Sew the Velcro loop strip to the center of one of the 4"x4" pieces of fabric. Sew a straight stitch as close to the edge as possible. Make sure the Velcro is sewn on with the loop facing out on the "right" side of the fabric.
- Lay the two 4"x4" fabric squares on top of each other. Make sure that the "right" sides of each fabric are facing each other. The Velcro should be on the inside as well.
- Sew a straight stitch 1/4" in around the squares. Make sure to leave about 2" open so you can turn the pillow right side out.
- Cut the extra fabric off the three sewn sides and the corners. Leave the extra fabric on the side that you did not sew shut.
- Take your 4"x8" fabric piece and fold it in half... then fold it in half again... then fold it in half again... till you have a little square.
- Turn the pillow right side out. Make sure to fully push out each of the corners.
- Stuff the pillow with the folded up piece of fabric.
- Fold the ends of the fabric in on the open section of the pillow.
- Sew around the entire pillow with a straight stitch an 1/8" in. Make sure that you seal the opening closed.
- Add some Essential Oil to your pillow. Start with about 5 drops. Don't overdo it! I didn't think it was getting enough and put way too much on. Let's just say that the room smelled a little "too good". If you accidentally put too much just throw it in the wash (with towels or something not cloth diaper related). If it's not enough just add more. You can add any fragrance you want. I'm using lavender right now.
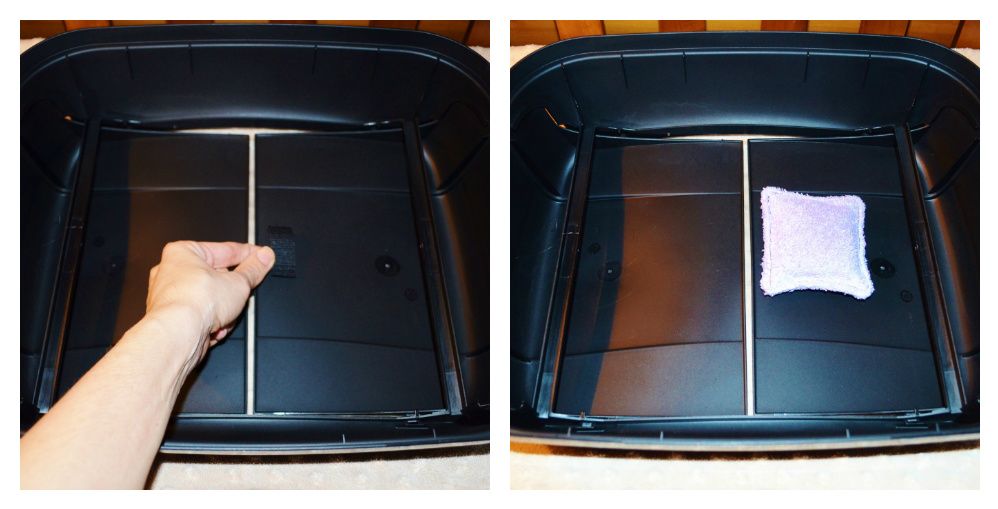
- Stick your sticky back piece of Velcro hook onto the underside of the lid of your diaper pail.
- Stick your pillow to the Velcro on the diaper pail.
Voila! You're done. Now sniff the air and know that it will not burn the hairs from your nose... unless you put way too much essential oil on your pillow like I did. You can use these little pillows anywhere. If you don't need to stick it on a surface then just eliminate the Velcro. You can put these in your lingerie drawer. You can put them in your shoe closet. You can put one in your gym bag. Freshen up your life with a little essential oil. {Snifffff} Ahhhhhhhhhhhhh! Smells so good.
Showing posts with label Make It Monday. Show all posts
Showing posts with label Make It Monday. Show all posts
Monday, March 19, 2012
Monday, February 13, 2012
Make It Monday - A New Year ... A New Look
Well, I'm a little late on the new blog design... and not quite done, but it's getting there. I'd had a few helpful comments that my blog was hard to read due to the colors so I decided to give my blog a face lift. I went back and forth on how I was going to go about vamping up my blog. At first I was going to do it myself. Then I realized I didn't have the time (or ability to Photoshop one handed with Linc on my boob) so I was going to hire someone to do it for me. Then I realized that Brian would probably flip his lid if he knew I was paying someone to vamp up my hobby blog, so I went back to doing it myself (one handed with my boobie muncin' companion). As with all great tasks I needed a great plan. Ok, it's not great, but here it is.
1. Research Blog Designs
First thing's first. I needed to get a general idea of what direction I wanted to go with on my blog design. I scoured the internet looking at other blogs and finding what style appealed to me. I found that I was much more drawn to the simple clean looking designs than the bright colorful ones. Listed below are a few of the blogs that really caught my attention.
Whiskey In My Sippy Cup
Attack Of The Redneck Mommy
I Am Momma Hear Me Roar
I Spy With My Little Eye
Made
A Nut In A Nutshell
Go Graham Go
Little Miss Momma
The Feminist Breeder
2. Re-Work Header Design
Step two was my header design. I wanted something simple and modern with some pictures thrown in there. I ended up keeping the original design (can't get anymore simple that that) and working from there. I tried a few different color combos and ended up with basically the same colors minus the orange. Gosh, didn't I say I was doing a blog re-design? Why am I just ending up with what I had before??? Oh well. Eliminating the orange gave me the perfect spot for pictures of the kids. Aren't they soooo cute?!?! Ok, I might be biased. I like that I can easily change out the pictures now and then with some updated pics of the kids. Check out how much better the new header looks. Do you think it looks cluttered with pics of the kids?
3. Re-Work Button Design
Ok, this one was easy. I eliminated the orange and added the taupe border. Voila! Done.
4. Re-Work Blog Body
We're not talking my body. That's a whole different blog post. I'm still working on my post baby belly. We're talking about the blog body. I changed up a few things to fit the new color scheme. Link color, gadget header size and color, etc. I had a hard time with the link color because I tend to be drawn to neutral colors, but I ended up with red to stand out.
So anyways, that's the great and awesome story of how I ended up with a blog re-design that looks strangely similar to my old design. Maybe one day I'll break down and have someone else re-design my blog, but till then I'm liking how the new Adventures In Fluff looks. I still have a bit to do such as re-design the special day buttons (Super Sunday Giveaway Linky & Silly Saturdays), change my signature, and add an "about me" section on the side, but we're getting there. Let me know what you think about the new design and if you have any ideas of how to make it better. Don't worry. My feelings won't be hurt if you hate it. It's all just another part of my Adventures In Fluff.
1. Research Blog Designs
First thing's first. I needed to get a general idea of what direction I wanted to go with on my blog design. I scoured the internet looking at other blogs and finding what style appealed to me. I found that I was much more drawn to the simple clean looking designs than the bright colorful ones. Listed below are a few of the blogs that really caught my attention.
Whiskey In My Sippy Cup
Attack Of The Redneck Mommy
I Am Momma Hear Me Roar
I Spy With My Little Eye
Made
A Nut In A Nutshell
Go Graham Go
Little Miss Momma
The Feminist Breeder
2. Re-Work Header Design
Step two was my header design. I wanted something simple and modern with some pictures thrown in there. I ended up keeping the original design (can't get anymore simple that that) and working from there. I tried a few different color combos and ended up with basically the same colors minus the orange. Gosh, didn't I say I was doing a blog re-design? Why am I just ending up with what I had before??? Oh well. Eliminating the orange gave me the perfect spot for pictures of the kids. Aren't they soooo cute?!?! Ok, I might be biased. I like that I can easily change out the pictures now and then with some updated pics of the kids. Check out how much better the new header looks. Do you think it looks cluttered with pics of the kids?
 |
| The OLD Look |
 |
| The NEW Look |
3. Re-Work Button Design
Ok, this one was easy. I eliminated the orange and added the taupe border. Voila! Done.
 |
| OLD Button |
 |
| NEW Button |
4. Re-Work Blog Body
We're not talking my body. That's a whole different blog post. I'm still working on my post baby belly. We're talking about the blog body. I changed up a few things to fit the new color scheme. Link color, gadget header size and color, etc. I had a hard time with the link color because I tend to be drawn to neutral colors, but I ended up with red to stand out.
So anyways, that's the great and awesome story of how I ended up with a blog re-design that looks strangely similar to my old design. Maybe one day I'll break down and have someone else re-design my blog, but till then I'm liking how the new Adventures In Fluff looks. I still have a bit to do such as re-design the special day buttons (Super Sunday Giveaway Linky & Silly Saturdays), change my signature, and add an "about me" section on the side, but we're getting there. Let me know what you think about the new design and if you have any ideas of how to make it better. Don't worry. My feelings won't be hurt if you hate it. It's all just another part of my Adventures In Fluff.
Labels:
Blogging,
Make It Monday
Monday, February 6, 2012
How To: Sew Your Own Infant Car Seat Strap Holdbacks
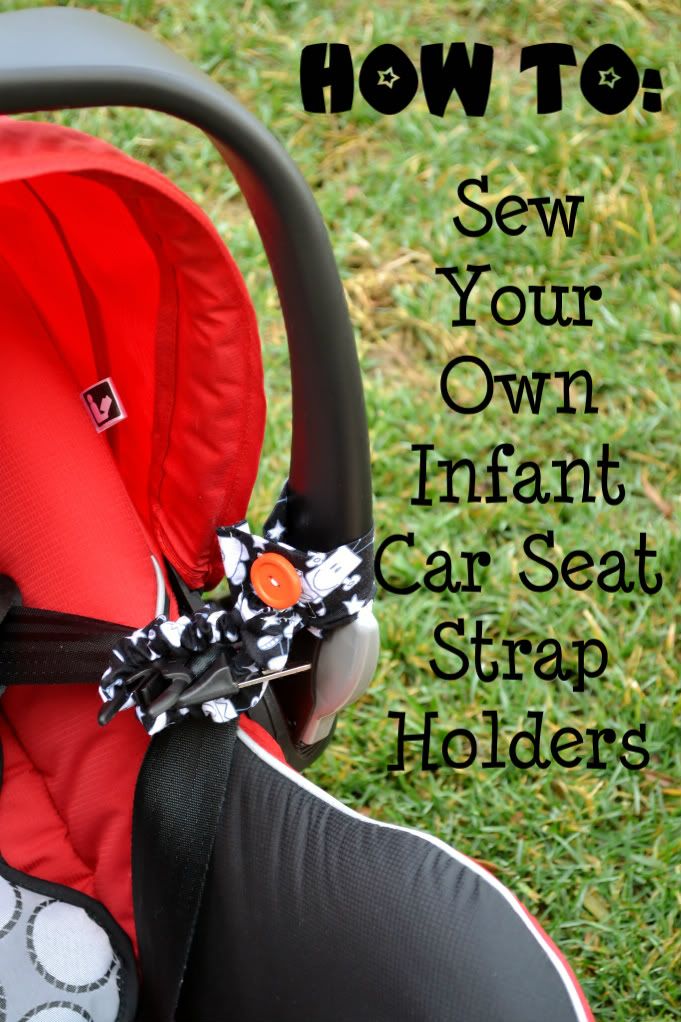
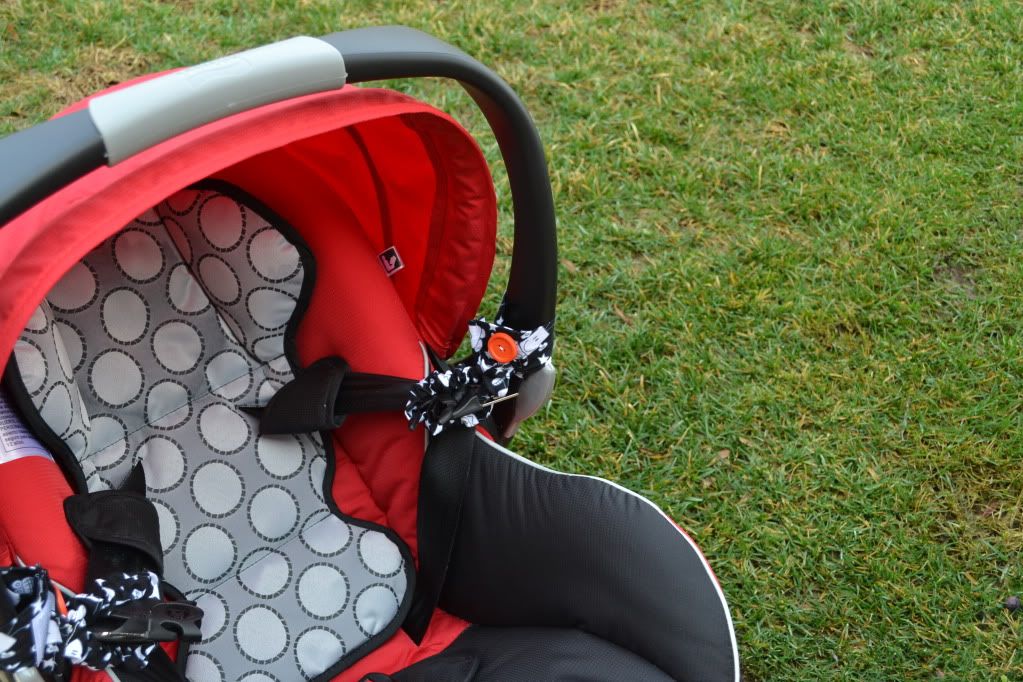
Ok, I had a hard time naming this post because I wasn't sure what to call these little gizmos. All I know is that I hate when I go to put Lincoln in his car seat and the buckles are in the way. So I end up sitting him on the buckles and somewhere in the process of pulling the buckles out and around Linc it never fails that they get all tangled up. Argh!!! Anyhoo... So that's when I decided to do something about it. I remembered awhile back I saw a product that would hold the harness straps back but for the life of me I couldn't remember what they were called or find them on the Internet anywhere. That's when I put my thinking cap on and set to work to design my own Infant Car Seat Harness Strap Holdbacks. The end result came out better and easier to use than I had originally planned. See below how you too can make your own Infant Car Seat Harness Strap Holdbacks. Once you have them you'll wonder how you ever got by without them.
What You Will Need:
(Qty 2) 10" x 4.5" Fabric Piece
(Qty 2) 16" x 2.5" Fabric Piece
(Qty 2) 2" x 2" Sets of Hook & Loop
(Qty 2) Buttons (approx 1" dia)
1/4" Elastic
Thread
Safety Pin
Sewing Machine
Scissors
Measuring Tape
Step By Step:
- Fold your 10" x 4.5" Fabric Piece in half lengthwise with the wrong side of the fabric facing out.
- Sew a straight stitch 1/4" in on the long open side.
- Turn your fabric piece right side out. With the seam in the center iron your fabric piece flat.
- Fold one of the open ends in 1/4" and then fold another 1/4". Iron the folds flat and seal closed with a straight stitch. Repeat with the other side.
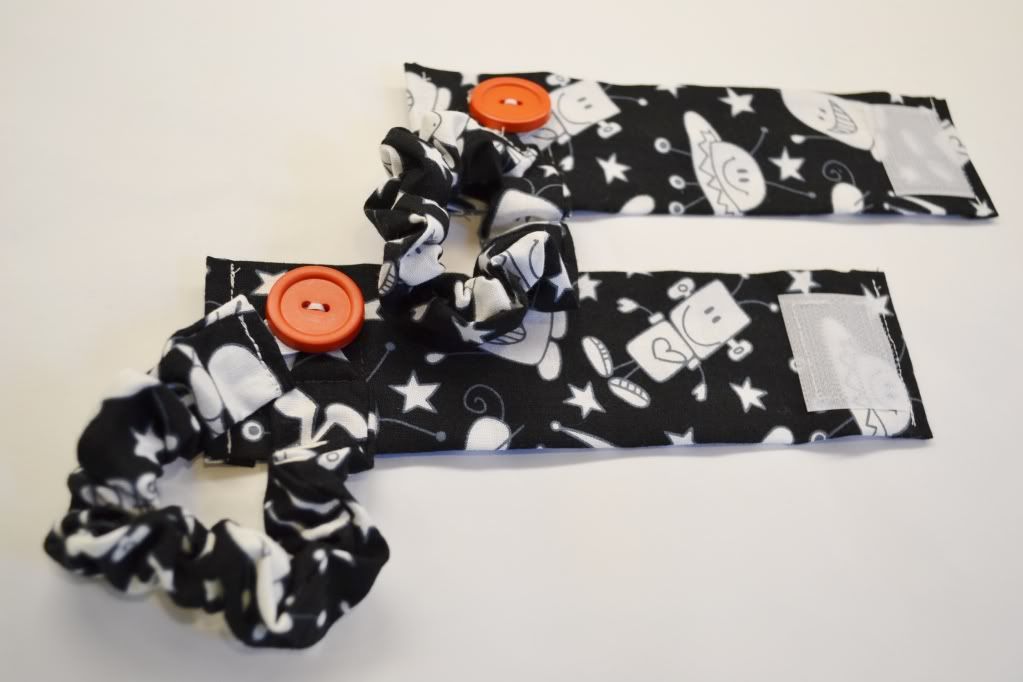
- Using a straight stitch sew the loop side of your Velcro on the right side of the seam side of your strap. Sew the hook side of your Velcro on the left side of the non-seam side of your strap. Set your strap aside.
- Fold your 16" x 2.5" Fabric Piece in half lengthwise with the wrong side of the fabric facing out. Iron the fabric flat.
- Attach a length of thread to your safety pin. Attach the safety pin to one end of the fabric so that the thread lays along the entire length of the inside of the fabric fold.
- Refold the fabric and sew a straight stitch 1/4" in on the long open side. Trim off the extra fabric.
- Turn the long tube right side out. To do this fold the end where the safety pin is in slightly to get it started. Then pull on the thread to work the ready of the tube right side out. Remove the safety pin.
- Attach the safety pin to one end of the elastic strip. Using the safety pin thread the elastic all the way through the fabric tube.
- Remove the safety pin. Line the elastic up with the end of the fabric tube. Taper the fabric around the end of the elastic. Sew the end of the tube and elastic to the back side of the loop.
- Cinch the fabric tube up while keeping the elastic loose (don't pull the elastic tight). Now measure 9" down the elastic and mark with a pen. Cut the elastic at this point.
- Create a 1" loop at the end of the elastic and tuck the end into the end of the fabric tube. Make sure to tuck a 1/4" of the fabric in too so that you have a clean edge.
- Sew the end closed with a straight stitch (make sure you're sewing into the tucked in fabric as well as the end of the elastic).
- Sew the button over the top of the elastic stretchy tube.
- Repeat with the other strap.
Voila!!!! You're done!!!!
Using your holdbacks is very easy. Just velcro your holdbacks around the each side of the handlebar with the loops facing inward. You have two options on how to hold your straps back.
1. You can take the elastic loop off of the button, loop the stretchy band around the harness strap, and then attach the elastic loop back onto the button.
2. You can just loop the stretchy band around the buckles without taking the elastic loop off of the button. (This is what I do because it's faster... although less secure).
I hope your Infant Car Seat Harness Strap Holdbacks help to make life a little easier when transferring your little one into and out of their car seat. I've only been using mine a couple days now and I love them!!! Feel free to post pictures of your creations on my Facebook Page so we can all see them. It's always fun to see how these tutorials are being used. Till then, keep checking back every Monday for more "Make It Monday" projects. I've got lots more planned.
***Don't Forget To Pin This Tutorial For Future Use With My Pin It Button Below***
Labels:
Baby Accessories,
DIY Projects,
Make It Monday
Monday, January 23, 2012
Make It Monday - 2 Minute Mug Brownies YUM!
Hi, my name is Chana and I'm a chocoholic. I could eat chocolate morning noon and night. Has anyone come across a super healthy, keep you skinny, extra yummy, chocolate recipe??? I'd be all over that! Till then I'll indulge in my not so healthy chocolate... once in awhile... or more. : ) So add my chocolate addiction to my new found Pinterest obsession to my new years resolution to eat healthier and you have quite the problem. Every time I go on Pinterest I always have to peek in the food category and I can't help buy pin tons of yummy chocolaty goodness. It's not my fault really. It's all those sinners... I mean pinners faults. They're luring me to the dark side with their little pictures of cookies, cakes, pies, & more that take me even further away from my pre-pregnancy weight than I am already.
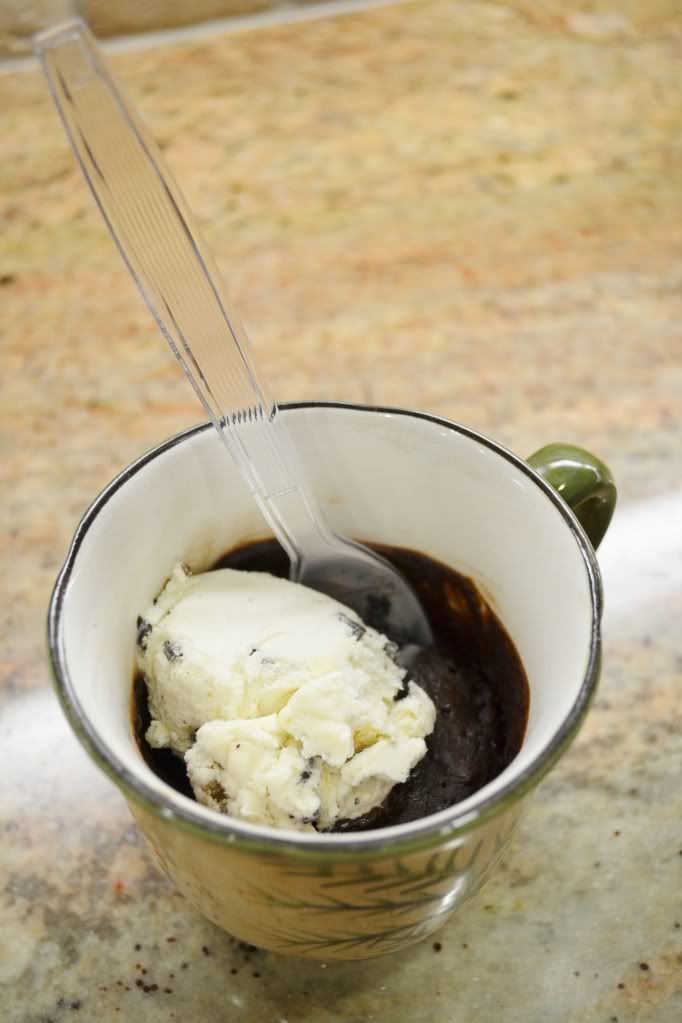
This leads me to the mother of all pins. I knew the second I saw it that it had trouble written all over it. Two Minute Mug Brownies. Ack! I LOVE brownies. And the ice cream melting on the top just pushes this recipe over the edge. This recipe has so many good things going for it...
2. Ice Cream
3. Single Serving
4. Simple Everyday Ingredients
5. Two Minutes
ENOUGH SAID!!!
I set out to test this one out ASAP. My little helper (fellow chocoholic) Reagan got her gear on, I got the ingredients out, and we set to work. It only took us one minute to prepare the brownies, one minute to cook the brownies, and a second to scarf them down. Ok, I guess they should be called 2 Minute & 1 Second Mug Brownies. I'll let the creator of this recipe know. Now the hard part will be keeping me from making these for dessert everyday... or more than once a day. If you're a chocoholic too and short on time like I am check out the recipe below for the best 2 Minute Mug Brownies you will ever have!
_________________________________________________________________________________ Two-Minute Mug Brownie
1/4 cup flour
1/4 cup packed brown sugar
2 Tbsp unsweetened cocoa powder
Pinch salt
2 Tbsp canola or other mild vegetable oil
2 Tbsp milk, coffee or water
In a heatproof mug or ramekin, stir together the dry ingredients until no lumps remain. Stir in the oil and milk until you have a thick paste.
Microwave on high for a minute, checking it after 30 seconds (microwaves vary) – it will be done when it’s springy on top but still a bit gooey – like the very best brownie. Eat warm. Add ice cream on top for extra yummyness.
_________________________________________________________________________________
Labels:
DIY Projects,
Make It Monday,
Recipes
Subscribe to:
Posts (Atom)

