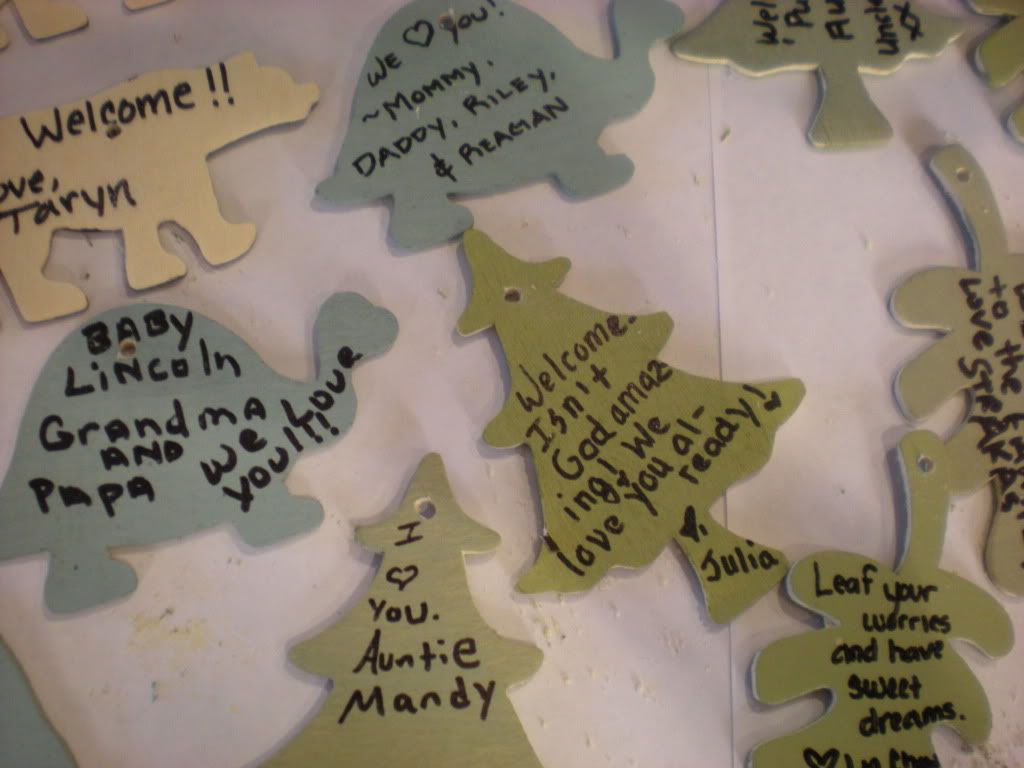
With our baby shower quickly approaching, I wanted to think of a way that each guest could write well wishes for the baby in a creative way. Of course there is the usual book that people write their well wishes or advice for the baby, but then it just sits on a shelf and collects dust. I wanted something that the baby could see or would contribute to the design of the nursery. That’s when I came up with the idea of incorporating a mobile into the design. Each guest would get a pendant that they could write a short note to the baby on and sign. Later I can attach all of the pendants to the mobile and hang it in the room for all to see every day.
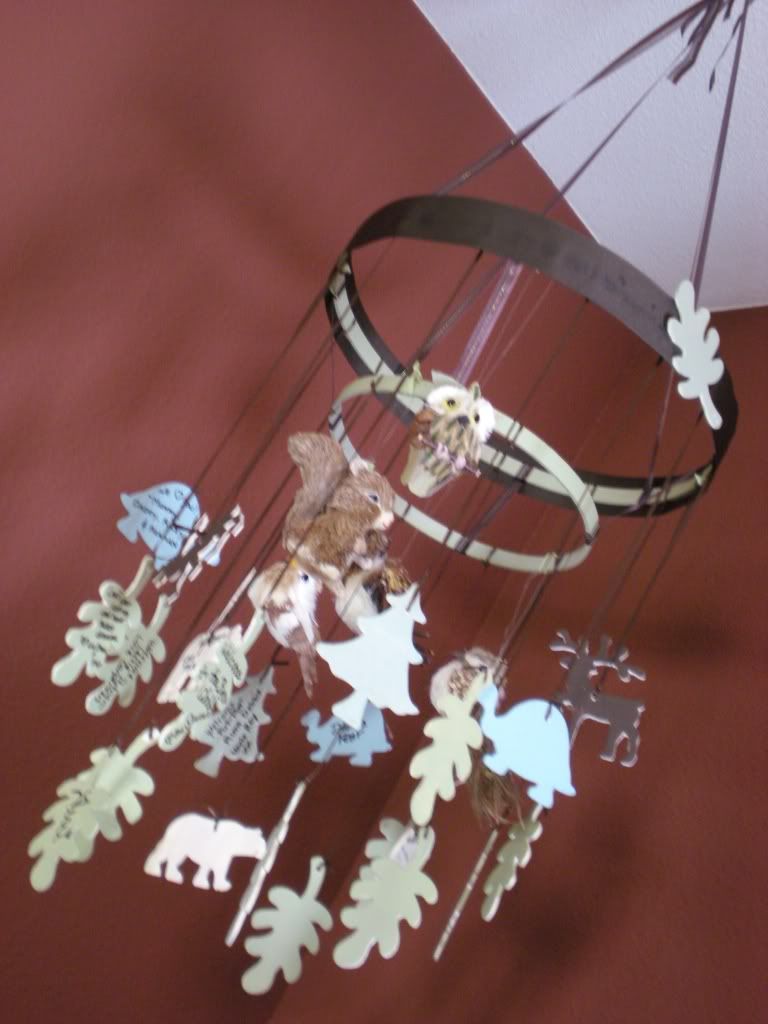
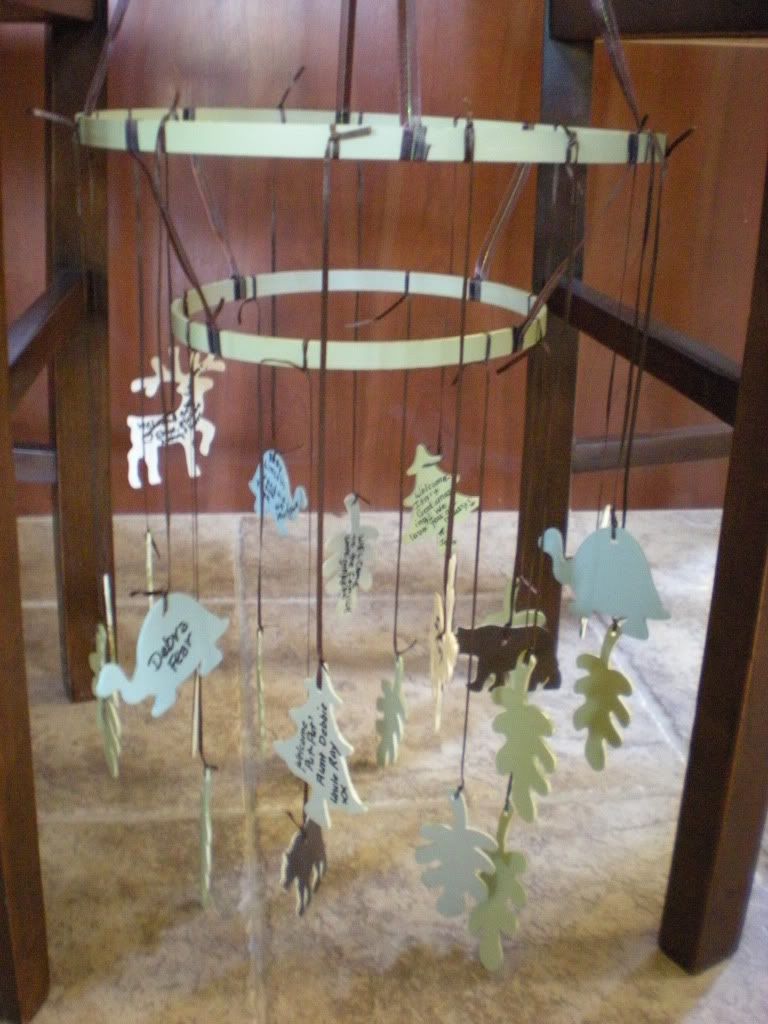
Our baby’s nursery has a forest theme. This geared me in the right direction for the look of our mobile. I picked paint colors that I had used in other areas of the room (dark brown, sage green, and a light blue). Then I picked pendants that went along with our theme as well. I picked wood cutouts of leaves, trees, bears, deer, and turtles that I found at Michaels. I didn’t go into a lot of detail painting my pendants. I wanted to keep them simple to mimic the simple tree silhouettes that I had already painted on the walls of the nursery. Last, but not least, I picked a dark brown ribbon to hang my mobile up with.
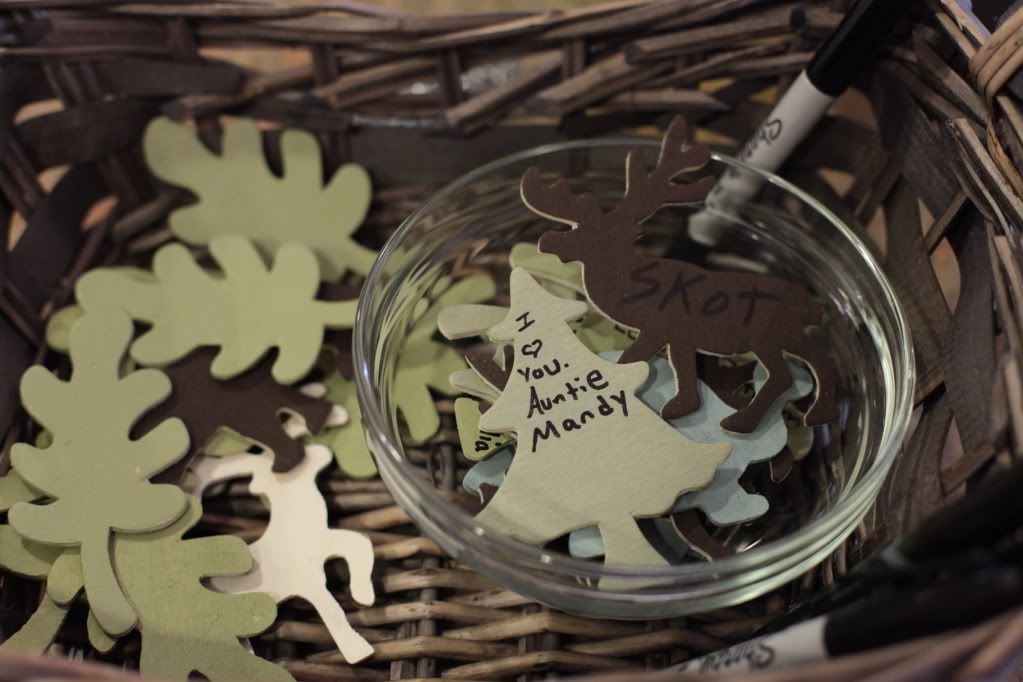
At the baby shower I had my pendants sitting in a basket so that guests could fill them out throughout the party. Depending on the size of your baby shower you can either have each guest sign a pendant or each family sign a pendant. We had quite a few guests so I just had each family sign a pendant. It didn't leave a lot of room for comments, but I really was just going for a simple "We Love You" or something like that. A thin tipped permanent marker worked best for writing, but it really depends on the type of pendants that you use for your mobile.
Now it’s time to get started on your own project. Follow the easy step by step directions below to create your own Baby Shower Well Wishes Mobile.
What You Will Need:
(Qty: 1) 12” Embroidery Hoop
(Qty: 1) 8” Embroidery Hoop
(Qty: ~ 10-25) Decorative Pendants (These can be wood cutouts, cardstock cutouts, etc.)
1/8” Ribbon To Match Nursery Décor
1/2” Ribbon To Match Nursery Décor
1" Ribbon To Match Nursery Décor
Paint
Paint Brushes
Drill with 1/8” Drill Bit (For wood cutouts) or Small Hole Punch (For cardstock cutouts)
Glue (White or Hot Glue)
Scissors
Ceiling Hook
Step By Step Instructions:
-Paint each decorative pendant. You can make them very simple and just paint them a single color or you can go very detailed and paint actual pictures on them. Get as creative as you like. Add sequins, glitter, or fabric to your pendants. There are so many possibilities. Make sure that one side of the pendant is left blank or only painted a single color. You’ll also want to make sure that the color of the plain side is light enough that writing will be easily seen on it. (Note, If you use scrapbooking cardstock then you can just use a cool pattern and not have to paint them at all)
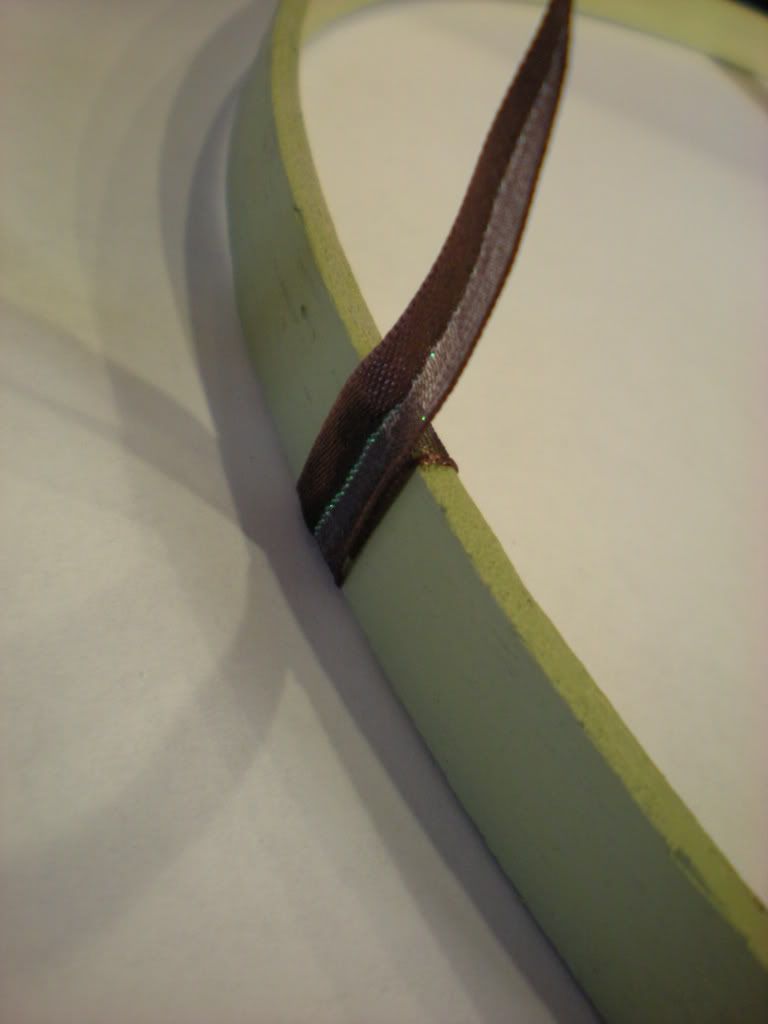
-Remove the inner ring from both embroidery hoops. Discard the outer ring or save for a future project.
-Paint each ring to coordinate with your nursery. You can paint them both the same color or you can paint them each a different color. If you want the finish to be really smooth then you can use spray paint, but your color choices will be much more limited. Set the rings aside.
-Place all your pendants in a basket and let each of your guest sign them at your baby shower.
-After the shower drill or hole punch a hole at the top of each pendant. Set Pendants Aside. Make sure that you place your hole in a location that will keep the pendant in balance when it is hung.

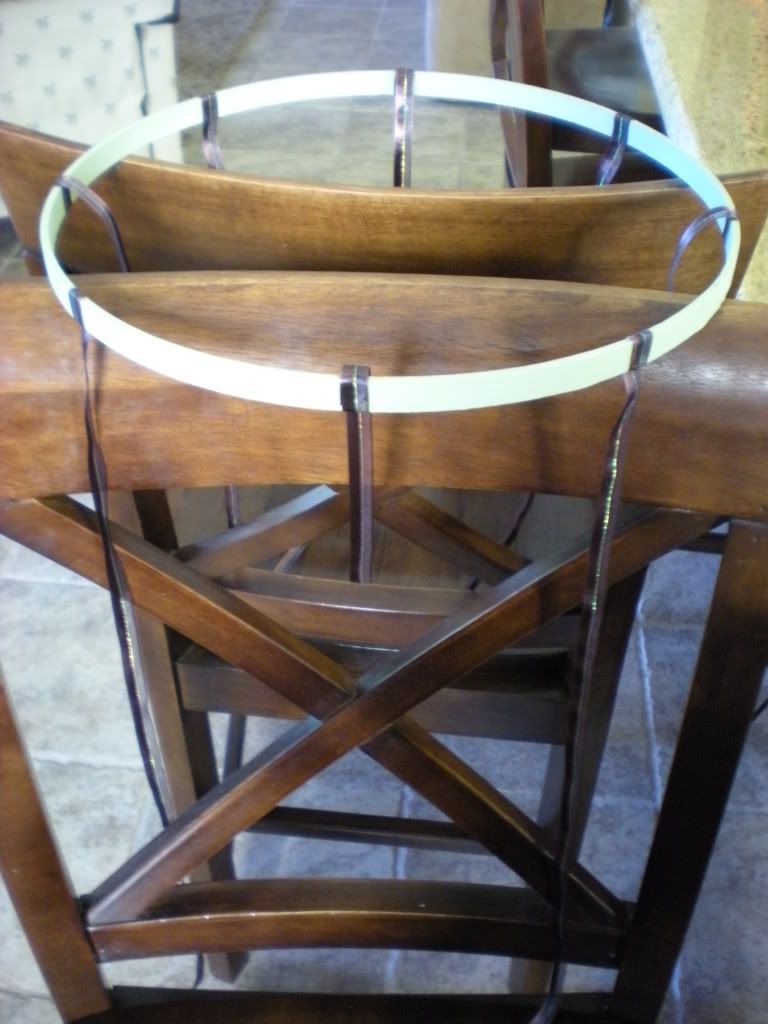
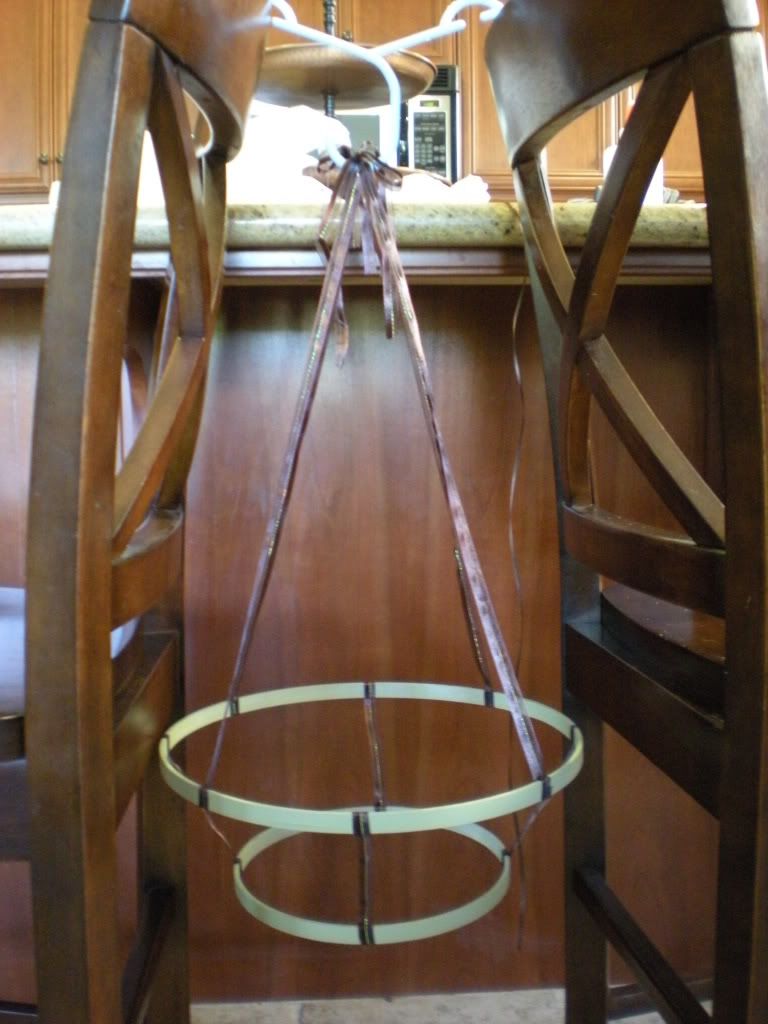
-Cut four pieces of the 1/2” ribbon 24” long. Glue the ends of each ribbon onto each of the four quadrants of the 12" diameter ring. Allow the glue to dry.
-Cut four pieces of the 1/2" ribbon 7" long. Glue the ends of each ribbon onto each of the four quadrants of the 12" diameter ring in between the longer strands of ribbon. Allow the glue to dry.
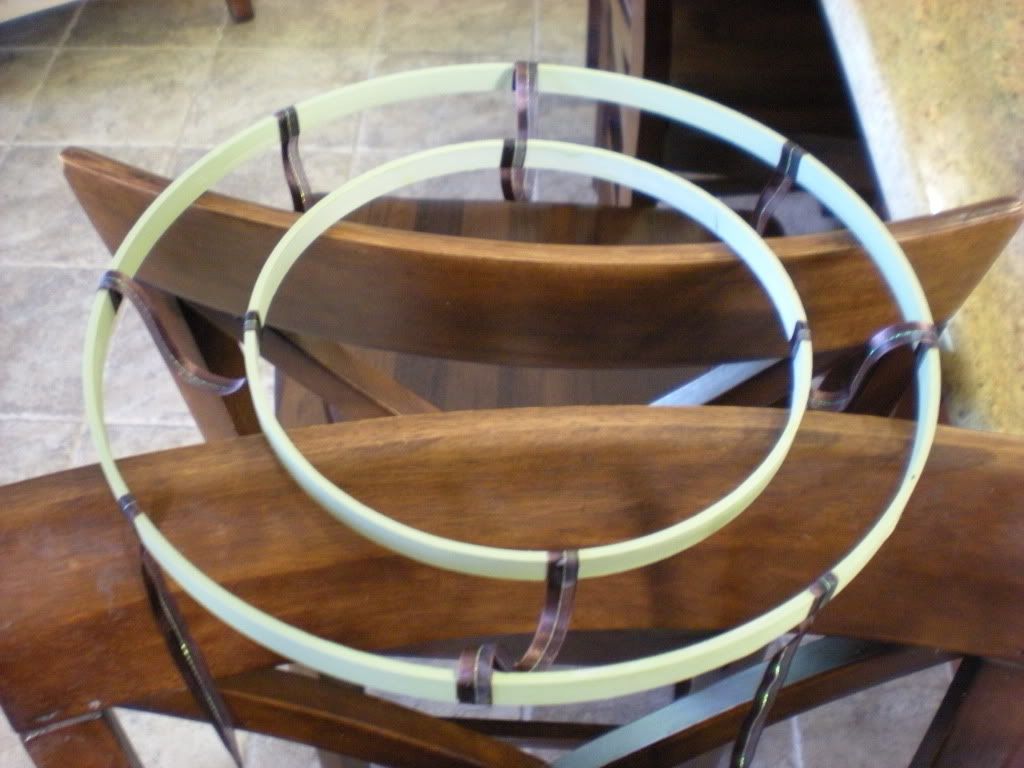
-Glue the opposite ends of each of the 7" long ribbons on the 12" ring onto four quadrants of the 8" ring. Allow the glue to dry.
-Take the four 24" long ribbons and pull them together at the top. Hold your mobile up at the top and adjust each ribbon till you have the mobile balanced. When it is balanced tie all four ribbons together at the top. Then tie a smaller piece of the ribbon (about 12") in a bow around the knot that you just tied.
-Now using your pendants and the 1/8" ribbon, evenly disperse and tie the pendants on both the outer and the inner circle. Just tie the ribbon onto the pendant first and then tie the other end of the ribbon onto the mobile ring. I like to vary the lengths of the ribbon a little so that it has more interest. After you get all your pendants situated on the mobile snip any extra ribbon that is hanging out from tying your little knots.
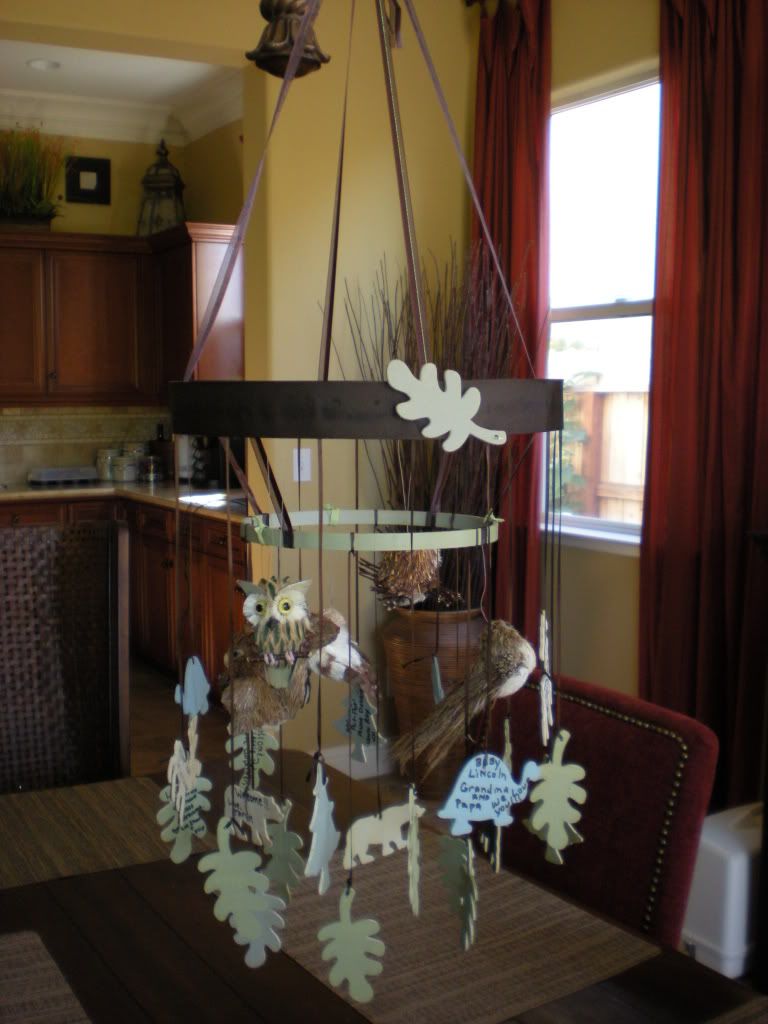
-If you want, at this point you can add any extra pieces that you want to the mobile. (I added little woodland animals to mine that were more real looking). This step is optional.
-Using your 1" ribbon glue a strip of ribbon around the perimeter of the 12" ring. This will hide all the ties and give a nice border at the top. If you would like you can glue a pendant right where the seam of the ribbon is to hide the seam. You could also add more pendants onto the ribbon evenly around the edge if you wish.
-To hang your mobile just insert a c-hook into your ceiling and slip the bow loops onto the hook.
Voila!!!!! You're done. Now you will have a lasting memory of the well wishes and congratulations of those that are closest to you and your newest addition. It will also be a nice accent piece in the room that will entertain your little each day.
I hope you enjoyed this tutorial and go on to make your own "Baby Well Wishes Mobile". I know I love mine and I can't wait to see yours. If you get a chance to take some pictures of your mobile then please post them on my
Facebook page so I can see them. I love to see all of your creations. Thanks again, and don't forget to join me for another one of my
Adventures In Fluff !!!