Guest post written by Celeste from Thinking About Cloth Diapers.
How to Make an Inexpensive Fitted Diaper
Fitted diapers can be fun to make! If you know the basics of sewing, and you have a sewing machine (or can borrow one!), you can make a simple fitted diaper following the steps outlined below in this photo tutorial.
By making your own diapers, you can save a lot of money, and get a one-of-a-kind design that fits your baby perfectly!
This tutorial shows you how to turn a prefold into a fitted diaper. Prefolds are workhorses in the cloth diaper world. Made of high quality cotton, they are absorbent and reliable diapers. But if you've ever tried to secure a prefold to a wiggly baby, you'll know that they are sometimes a challenge to use.
Fitted diapers are awesome for night-time use, and lots of families use them all day, every day. Combined with a cover, they are both reliable and affordable - and even more so if you make your own.
Materials Needed to Make a Fitted Diaper:
- 1 pre-washed 100% cotton prefold diaper (if you are using new prefolds, be sure to prep them. You can buy used prefolds from diaper services, or check out the used cloth diaper section at your favorite cloth diaper retailer to find some at great prices).
-
1 piece of woven cotton fabric such as flannel for outside layer, the same size as the prefold (be sure to pre-wash and dry this so it doesn't shrink later!)
-
Microfleece or suedecloth (optional)
-
1/4" wide swimsuit elastic (available from Wazoodle)
- Sewing machine with zigzag
Instructions to Make a Fitted Diaper
Center diaper pattern on prefold, and trace. As you can see from this picture, I selected a pattern where the 8 layer portion of the diaper was fully covered by the pattern, and the contours would trim away only the 4-layer portion of the prefold. The tabs for the diaper will not fit on the prefold, but we will add fabric to make the tabs later on.
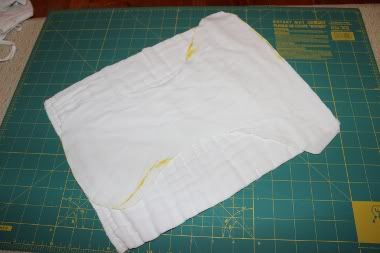
Cut out diaper, keeping side pieces as these will be used to make the insert.
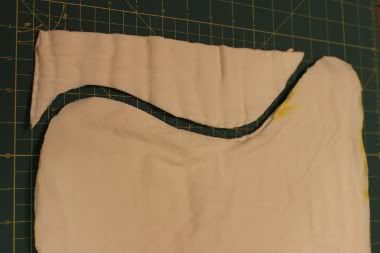
In this image, you can see the diaper starting to take shape.
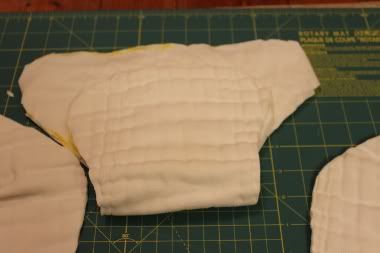
Unfold the cut-aways from the legs. These will be used to create the soaker layer for your fitted diaper. We will want to retain as much fabric as we can as we cut the soaker out, so that your fitted has the same absorbency as the prefold did!
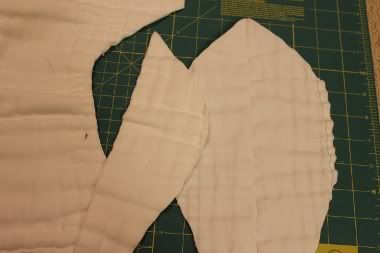
Stack the cut-aways together, and trim down to your preferred soaker shape.
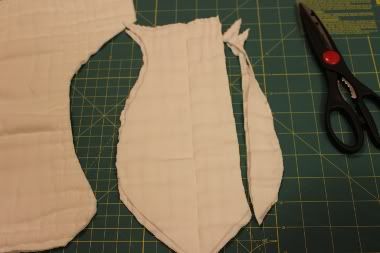
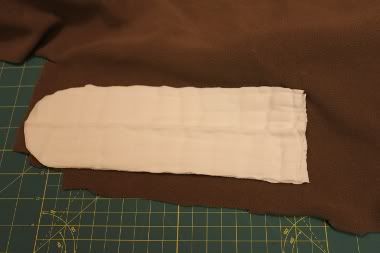
As you can see in the picture below, I made a long, straight insert. Depending on your diaper pattern and your personal preference, you may also be able to make an hour-glass shape.
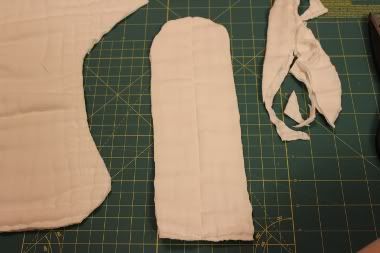
Since I don't have a serger, I will be turning this fitted, and top-stitching it for neatness. If you plan to turn and top-stitch, you will need to add another layer of fabric. This is where we will be using the cotton or flannel print. Lay the fabric out, and cut to the same shape as the prefold fitted pattern.
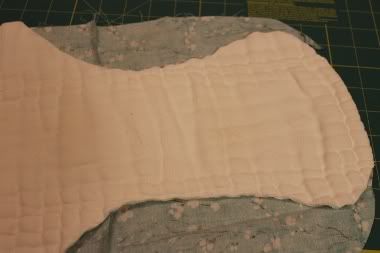
If your cotton print is wide enough, you can cut the diaper tabs at the same time. In this case, I used a smaller scrap of cotton I had left over from another project, so I will use smaller pieces to make the diaper tabs.
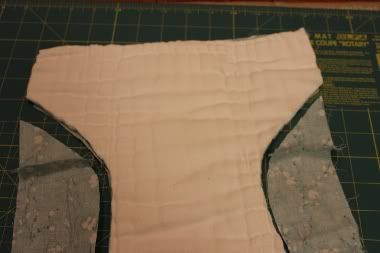
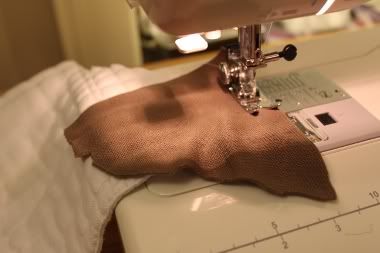
Here, I am attaching microfleece tabs to the prefold.
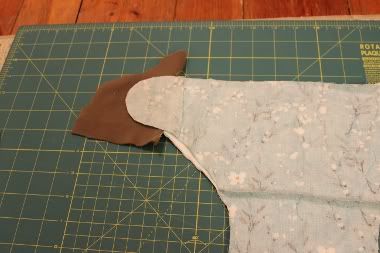
I also attached tabs to the outer cotton print layer using smaller pieces of the same cotton print. You could also make the tabs from a contrasting color or print! Lay coordinating print layer right-side down on top of the prefold, and trim both layers for the tabs down to match.
We will also need to finish the edges on the soaker layer. I prefer to turn and top-stitch the soaker too, so I will need another layer for this component as well. I opted to use a coordinating microfleece, which will provide a "stay dry" barrier between the absorbent cotton and your baby's bum, but you can use any fabric you want! Keep in mind, this is the fabric that will get soiled and wet, so you don't need to find anything beautiful if you don't want to!
Placing microfleece right-side into the cotton soaker, sew both with a 1/4" seam allowance. You could also sew a 1/2" seam allowance, and then trim the insert back to 1/4" inch allowance after. Leave the end of the insert open for turning.
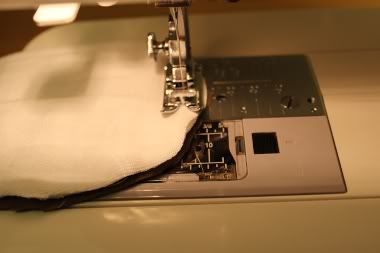
Next, turn the soaker right-side out, and then top-stitch all the way around except for the open end.
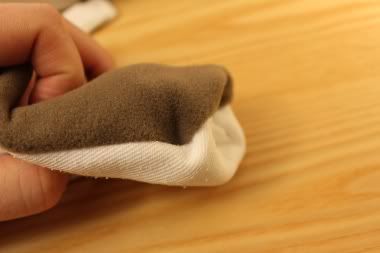
Next, we will be attaching the soaker to the diaper, before we sew the outer print on. To reduce bulk in the insert, I decided not to turn the edges at the end of the diaper. Instead, I placed it, pointing up away from the prefold diaper piece, with the right-side down, as shown below.
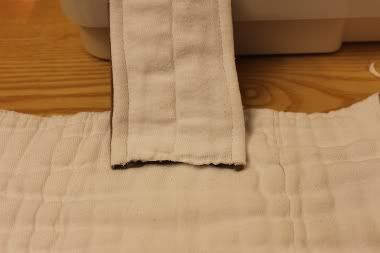
I secured the soaker to the diaper with a straight seam, and then a zig-zag stitch that overlaps the edge, effectively catching any loose threads from the raw end of the soaker.
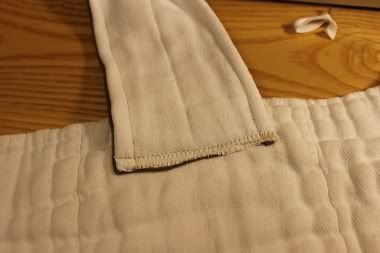
Having a soaker layer will allow this diaper to dry faster than if the extra absorbency had been sewn right into the core of the diaper. Next, I fold the soaker down, and add a straight seam about 3/4 of an inch from the end, which will cover up and contain any loose threads.
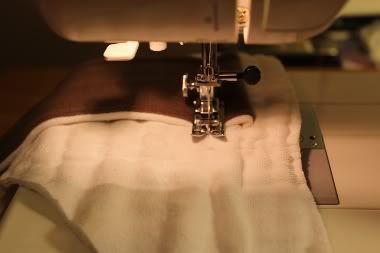
Now, place the diaper soaker-side up, and lay the cotton print right-side down on top, as shown below, and sew with a 1/4" seam all the way around, leaving 4-6" open at the back to turn the diaper.
Using swimsuit elastic, or other performance elastic products made to withstand the acidic conditions from urine, stitch the ends of the elastic to the seam allowance area on the diaper.
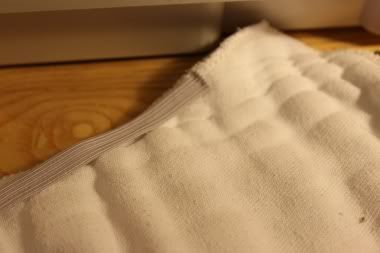
Be sure to pull the elastic snug across the legs and back.
Please note: I do not stitch the elastic in place all the way down the diaper. The reason for this is it can be very time-consuming to rip it out later for repairs or replacement if the elastic wears out before the diaper.
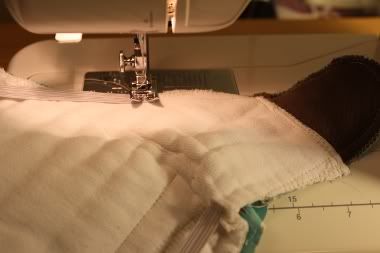
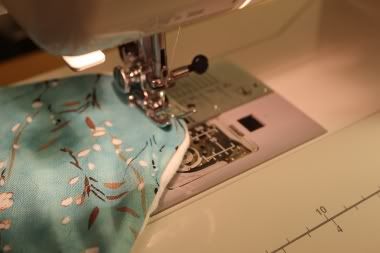
Almost finished! Now that the elastic is in place, the next step is to turn the diaper right-sides out. Pin the opening at the back of the diaper together, and then top-stitch around the diaper, using a 1/8" seam allowance.
For the pattern I used, I did not sew around the elastic at the legs. This helps the elastic to "roll in" toward the legs.
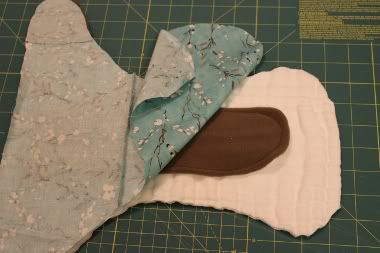
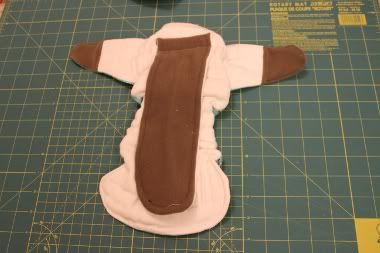
Congratulations! You have now finished turning a prefold into a fitted diaper! Here is a picture of inside of our finished diaper!
And now, for the beauty shot! Isn't it cute?
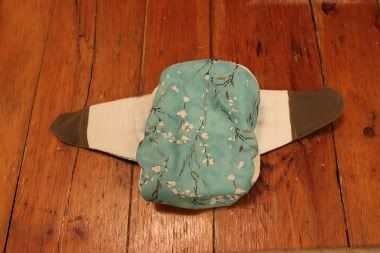
I am planning to add snaps to this diaper, but you can also use a Snappi or Boingos to fasten your fitted diaper, in which case you don't need to add any closures.
Voila - a cute custom fitted diaper, and all for less than $5 in supplies! What do you think? Would you make your own diapers?
Guest post by Celeste Ireland, author of Thinking About Cloth Diapers , a cloth diaper information website designed for new parents. If you plan to make your own diapers, don't miss her "make your own" section. Plus, receive another free tutorial for a fitted diaper made from old t-shirts when you subscribe to her monthly cloth diaper newsletter !
So you can easily keep track of the September Fitted Diaper Event, I will add a link to each of the posts below. No need to worry if you've missed one of the reviews. I've got ya covered!


I love the way she made use of this prefold... I wish I had sewing skills to make a ton of these! Maybe I'll be adventurous and try to learn ;)
ReplyDeleteI still need to try this one too. I did make a pocket diaper from a prefold so this should be pretty close to that.
DeleteHi Princessnorm, Thanks so much for your feedback on the tutorial! I never thought I would have the time or the sewing skills to make my own diapers either. I started with wet bags and pail liners, and then I decided to give it a shot for diapers. I made a few t-shirt diapers, first a modified prefold using Chana's pattern, and then a t-shirt fitted (this tutorial is available when you sign up for my newsletter). After that I tried the prefold fitted, and I would have to say, they're not nearly as hard as I thought. The first one took me a bit more than an hour, and I never had to rip out any seams! I think if I did the cutting ahead of time, I could probably make 3 or 4 in a couple of hours now, so you might totally find it's worth it! Best of luck! ~Celeste
DeleteI only know the very basics of sewing, this looks pretty complicated to me. Any chance of making a how to video for this project?
ReplyDeleteI might be able to to a how to video next month. I was just too swamped this month to even attempt it. : )
DeleteIt makes sense in my head, nut elastic scares the bejeebus out of me! Thanks, China! :)
DeleteElastic is very tricky. I've yet to master it myself. : )
DeleteCeleste, that is one beautiful fitted! Thanks, Chana, for posting and giving us some great project ideas! I'm working on newborn prefolds right now, which is much more simple and should give me some diaper sewing confidence. Anne
ReplyDeleteThanks Anne! I started on the prefolds, too, and found this seemed much less daunting to tackle after I had sewn a few! If you have a few prefolds around, it's pretty risk-free to try! All the best! ~Celeste
Deletethanks for sharing!
ReplyDeleteWhat needle do you use? I'm working on this right now (Thanks for the tutorial) and have broken 2 needles. Wondering if I need a heavier duty needle. Right now just using a general purpose.
ReplyDeleteHi Sarah, I hate having broken needles - so I can understand your frustration. I just have a standard needle in my machine. Perhaps because I used a pre-loved prefold it was more broken in. Maybe a quilting needle would work better?
DeleteThis is a great tutorial! Im still a little confused on how to sew in the elastic, did you create a hole for it to slide through, or is the elastic exposed?
ReplyDeleteHi Alisa Marie - Thanks - glad you enjoyed it! The elastic is exposed as you say, but once you turn the diaper right-side out, it becomes hidden inside the diaper. I basically tacked it in place at the ends of the elastic, keeping my tacking stitches to the outside of the seam allowance. Then when you turn it, it goes inside. It's a bit hard to describe, but I hope that makes sense. ~Celeste
DeleteLovely tutorial! Wish I had sewing skills to do this!
ReplyDeleteThanks for the tutorial. I've made fitted cloth diapers out of a few prefolds and like how they're dressed up.
ReplyDeleteThanks for the tutorial! Now all I need is a sewing machine and someone to sew for me!
ReplyDeleteI need to learn how to use a sewing machine!
ReplyDeleteI love this and I really wish I had a sewing machine so I could get started on making my own diapers for my babies :)
ReplyDeleteThank you so much for this! I have some newborn prefolds laying around but prefer fitted diapers. I may just have to make some for this next baby:)
ReplyDeleteWhat a great idea! I have some prefolds that are getting holes on the edges - what a great way to repurpose them!
ReplyDeleteThanks for this great tutorial. I've tried a couple of the non serged prefold to fitted tutorials and I like this one the best. Love how the diaper turned out and that it has the extra soaker on just the one end so it doesn't create excessive drying time. I'm off to get some cute prints to do this today. Is the pattern you used your own or did you use a free or purchased pattern?
ReplyDeleteI have a question- I have about 36 infant prefolds that I use till my babies are about 6 weeks and they can fit into pockets. If I make them into fitteds, will they be the same size or will they fit smaller? It looks great and I would love to do this! How long did it take you to do one diaper?
ReplyDeleteThis is neat! It is a helpful tutorial! But I am still nervous to try because I am not good at sewing. I love the illustrations though!
ReplyDeleteWhat if someone wanted to make a fitted diaper without adding the extra material on the outside of the diaper? Like the Green Mountain Fitteds? I can definitely do this, but I was thinking I'd make it a lot easier and just trim the prefold to be like a fitted....opinion?
ReplyDeleteThat's what I do! :)
DeleteI sew the "extra" as a soaker flap, add blind elastic to the legs only (could do back too, but no need for my babe) & serge the sides closed.
I've made 2dozen like this & I LOVE them! I use a snappi & don't need extended tabs.
I actually just received 3dozen new prefolds from GMD (12 Large & 24 Newborn, yay) & I'm trying to see if I need to prep/shrink them first, or if I can convert them then prep them..... Hmmmmm....
That fitted came out so cute! I have no experience sewing, but this looks a project that I might be willing to attempt!
ReplyDeleteThis is awesome! I would never have thought to do this! Such a great idea.
ReplyDeleteThis is gonna save me so much money! Thank you!
ReplyDelete