Well, it's day one of the Upcycled Crafting Challenge! Are you psyched!?!? I know my girls and I are. If you haven't heard already, I've joined up with Calley, The Eco Chic, in her July Upcycled Crafting Challenge. Each day in the month of July I've committed to creating a craft project that utilizes items that I would normally throw away. I love that I'm not only having fun with my girls while they're out of school, but also teaching them to be more eco-conscious by using what we have on hand and wasting less. Such a great way to think out of the box!
Today we're going to be working with old t-shirts. I know my girls grow out of t-shirts faster than I can blink my eyes, and I personally have quite a few t-shirts that I could wear before I was pregnant that no longer fit quite right. Then there's my husband who buys new clothes more often than any girl I know. Haha! Ok, not that bad, but I'm sure he has quite a few shirts he no longer needs. Today I'm going to be putting all those old shirts to good use. Check out this great tutorial below on how to make your own re-usable tote bag using your old shirts.
What You Will Need:
Old T-Shirt
Scissors
Sewing Pins
Sewing Machine
Plate (optional)
Marking Pen (optional)
Step By Step:
1 - Lay your shirt flat on the table. Smooth out all creases and folds. If you're using a tank top then skip to step 5.
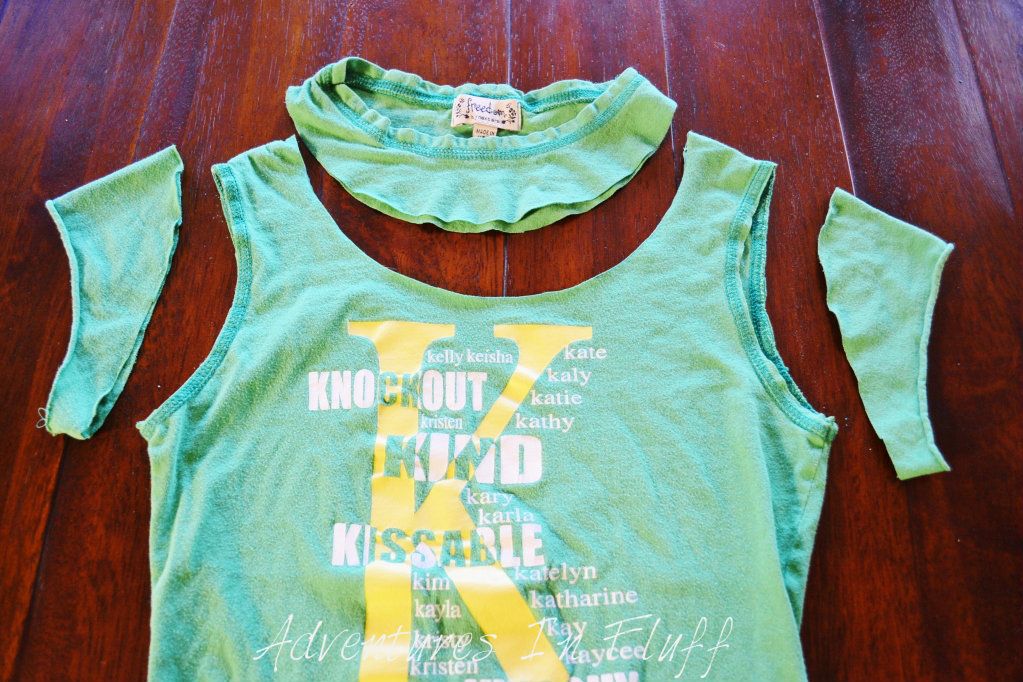
2 - Trace your plate around the neckline of your shirt. Make sure it's wide enough so the opening of your tote will be large enough to put things in, but not so large that your handles become super skinny.
3 - Cut out the neckline of your t-shirt along the line your just drew. Make sure to cut through both sides of the shirt.
4 - Cut off the sleeves. Cut close the the arm seam, but make sure to leave the arm seam on the shirt. The seams give the handles more strength.
5 - Turn your shirt inside out.
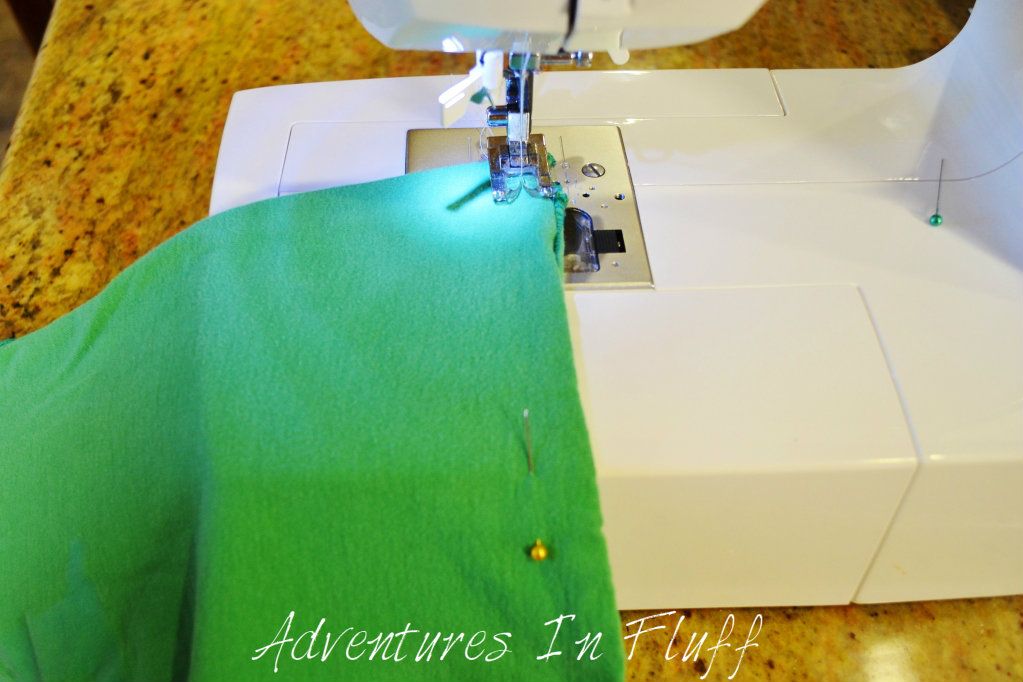
6 - Smooth out all creases and folds. Make sure the shirt is nice and straight. Pin the bottom of the shirt closed making sure it is nicely lined up.
7 - Sew the bottom of the shirt closed along the shirt's bottom seam. You can use a straight stitch and go over it twice to make it really strong, or you can use a stronger stitch such as a double overlock stitch and go over it only once. Make sure to back stitch at the beginning and end of your stitch. Trim your threads.
8 - Turn your shirt right side out.
Voila!!! You're done. You've just upcycled your old t-shirt into a super awesome re-usable tote bag! I was so excited by this project that the girls and I have already made 5 of them. They love their little bags and use them to bring toys over to Grandma & PaPa's house. I throw mine in the back of my car so I have them on hand for shopping. What will you use your bags for?
*This post is part of the Upcycled Crafting Challenge (#freefromtrash) hosted by Calley, The Eco Chic, and is part of a one month challenge to create from trash. This challenge will hopefully open your eyes to the number of items that we still end up trashing every day that could be used by ourselves or our kids to create fun and useful items. To find out more about the challenge and to see other projects click on over to Calley’s announcement post.*
Check out some of the other great posts from today below and be sure to link up your projects today too!!! Just link to your blog post, Pinterest picture, Photobucket Picture, etc. I'd love to see your upcycled t-shirt projects.
Check out some of the other great posts from today below and be sure to link up your projects today too!!! Just link to your blog post, Pinterest picture, Photobucket Picture, etc. I'd love to see your upcycled t-shirt projects.


These are now on my (lengthy) to-do list! :)
ReplyDelete