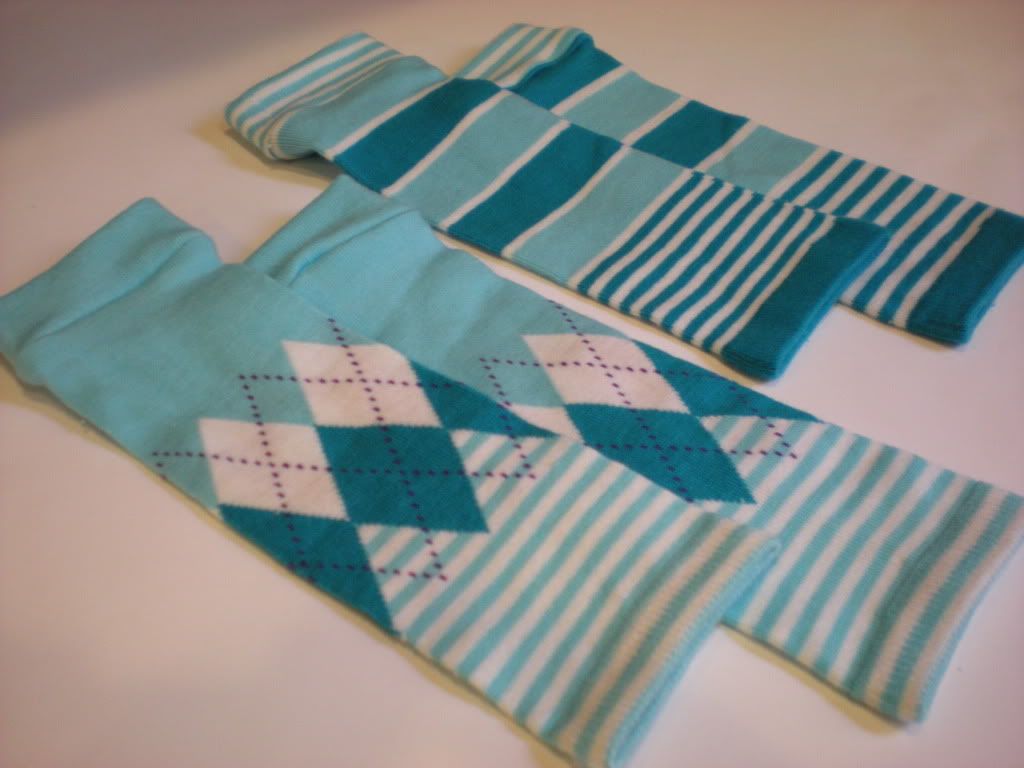
What's not to love about Baby Legs??? They are sooooo cute! They make diaper changing easier! They show off all of our cute baby fluff ! Enough said. Baby Legs are a must for any cloth diaper collection. I did buy a couple Baby Legs online from
Sweetbottoms Baby Boutique (Affiliate Link) since they have such great pricing on theirs, but the DIY girl in me couldn't help but find a way to make my own.
My first set came out a bit wonky at the top and they were different lengths, but by the time I hit the second set it was pretty easy. Here is an easy tutorial so you too can make your own set of baby legs for your child.
What You Will Need:
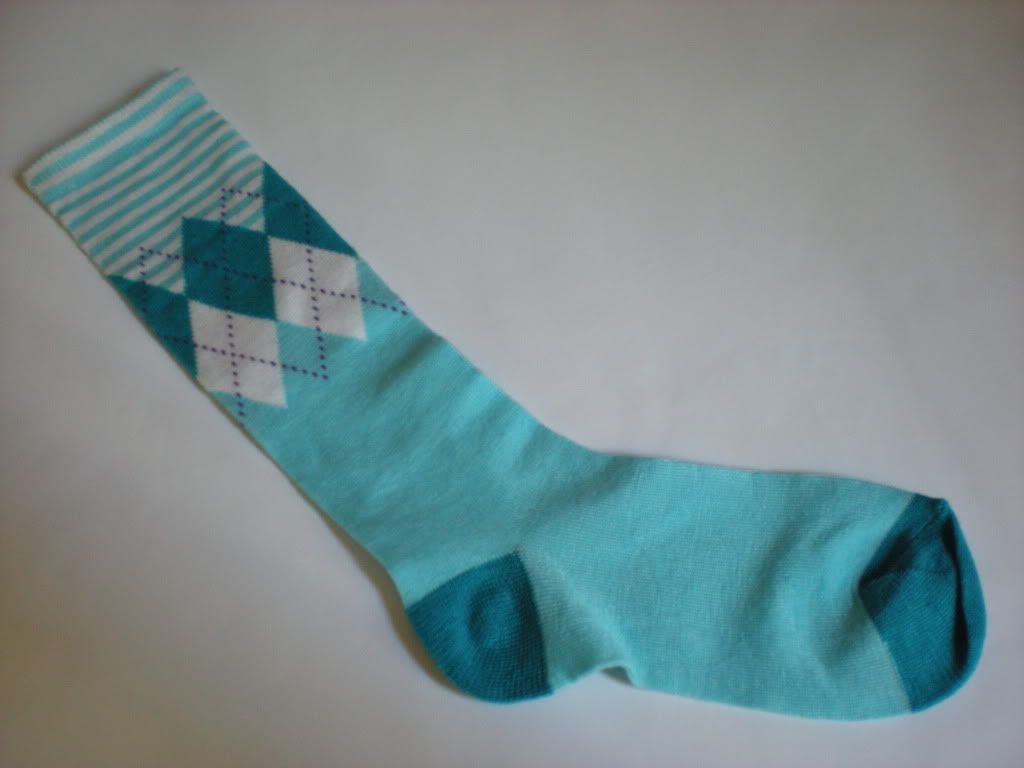
Tall Socks (I used kids knee high socks)
Scissors
Thread
Sewing Machine (optional)
Pins

Step By Step:
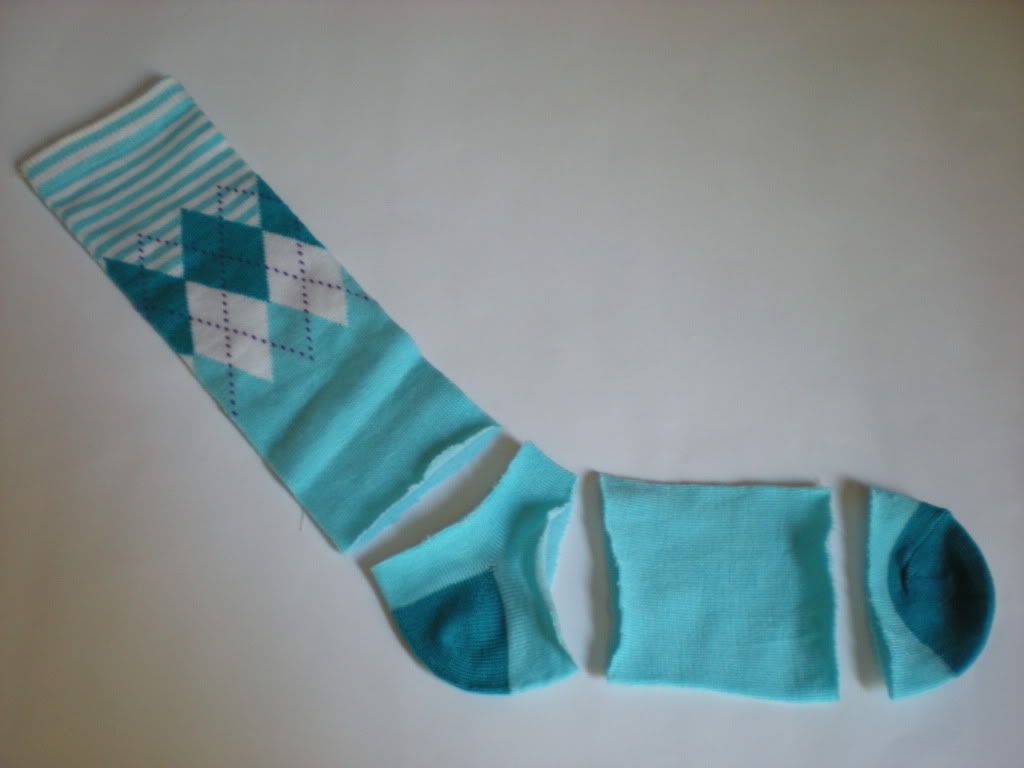
- Take your sock and cut it into four parts. Cut it right above the heel. Cut it right after the heel. Cut it right before the toe. Make sure that your sections are rectangular and not angled on the ends. Discard the heel and the toe.
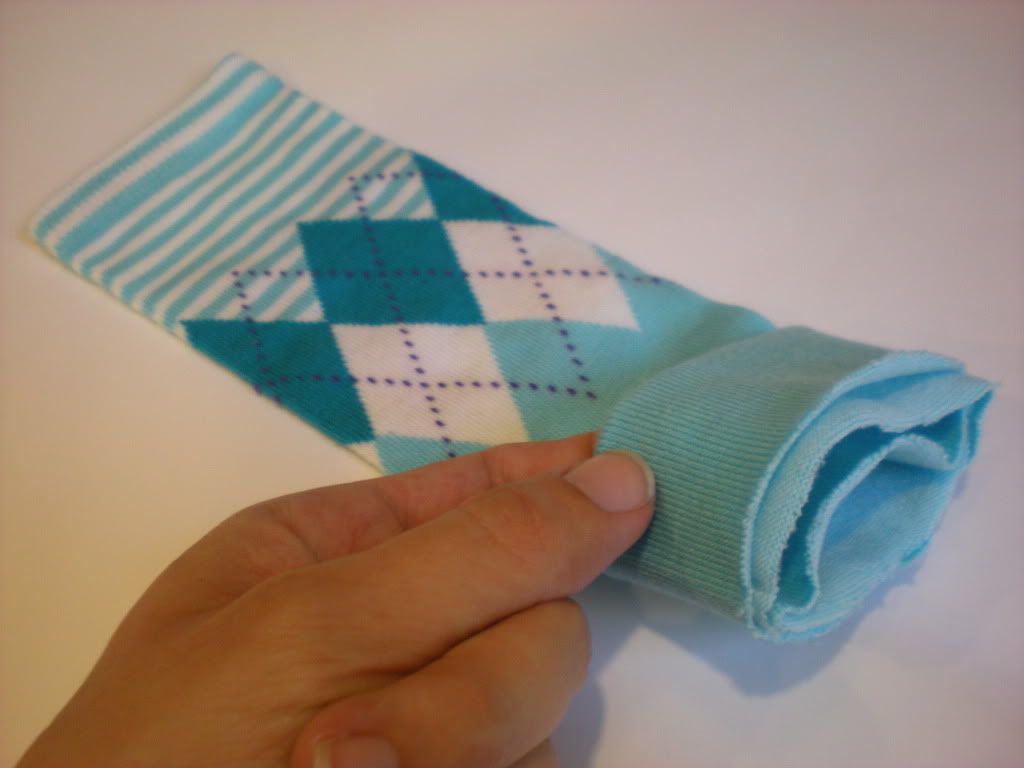
- Take the foot portion that you just cut out and fold it inside of itself so that you see the good side of the sock on both the outside and the inside.
- Stick the long portion of the sock inside the smaller foot of the sock that you just folded in half. All cut edges of the sock should be on the same side (the very end). The folded side should be closer to the middle of the long section of sock. Line up the edges so they are straight and the cut edges are all lined up. Make sure that if you have a pattern that it lines up as well.
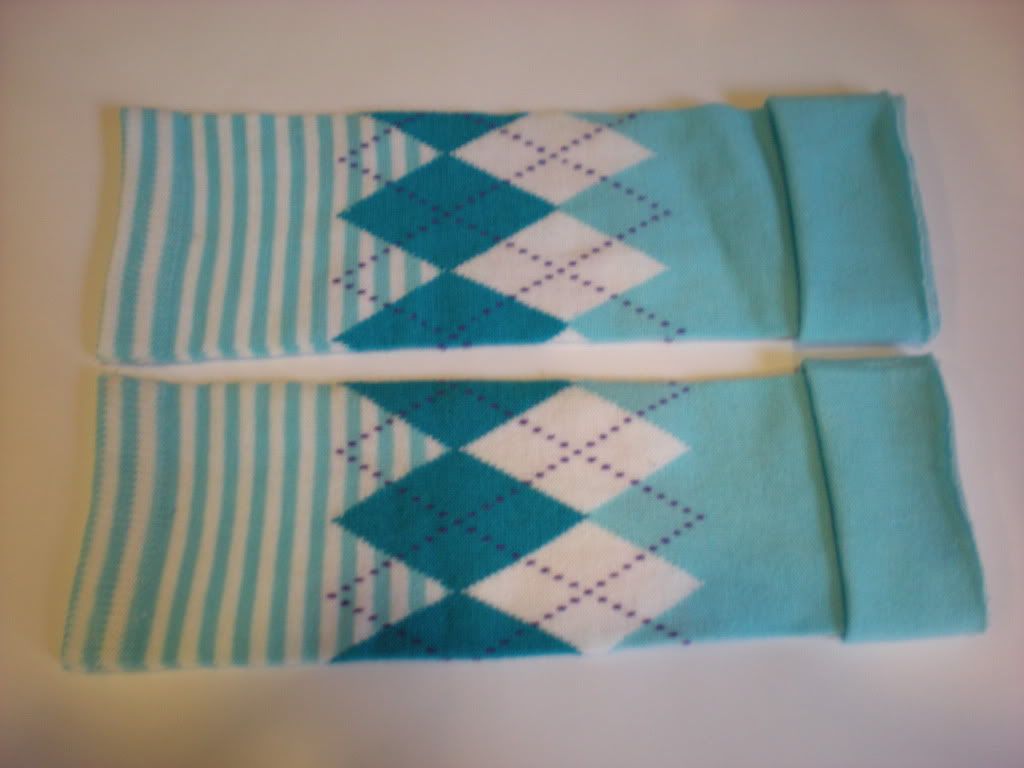
- Repeat the above steps with your second sock. Make sure they line up before you pin and sew the tops onto your baby legs.
- Pin the long sock to the short folded sock. Only pin three pieces of fabric together. Make sure that there is still a hole to put your baby's leg into when you are all done. Don't sew all 6 layers together or you won't have a leg hole.
- Sew the long section to the short folded section about a 1/4" in from the edge. You can do this with a sewing machine or by hand. I used my sewing machine and set the stitch to a straight stretch stitch. You could also just use a regular straight stitch set to the longest stitch ~4 or you could use a narrow zig zag stitch with the width at 2 and length at 3. Sew completely around your sock edge making sure to go slow and make sure to periodically check that your edges have not rolled under on any of the three layers. Make sure to back stitch at the begining and end of your stritch.
- Trim your thread and extra fabric on the inside.
- Flip the short folded portion up.
Voila! You have your baby legs!!!! Aren't they so cute? Mine only cost me $2.50 to make two pairs of baby legs and probably only 15 min of sewing time. I got my socks on clearance from Target. You might want to try the Dollar Store too, or your own sock drawer. I know I have a few socks that will work out great.
Hope this tutorial was helpful and has inspired you to make your own pair of baby legs ... or two ... or three. Feel free to contact me if you have any questions and I will modify this post to make it clearer. I'm sure if one person has questions then there are others that have the same question. Don't forget to post pictures of your baby legs creations on my
Facebook Page too. I love to see how all of your projects come out. I'll be posting mine on there and you know I'll be back very soon with another one of my
Adventures In Fluff... and other mommy stuff.


Oh my goodness Chana!! Those are SO cute. I'm going to have to whip up a few pairs for Meg!!
ReplyDeleteI know! I need to make some more.
ReplyDeletewow, that's awesome. thanks for sharing that. i was wondering how to do the band best.
ReplyDeleteI would've never thought to make baby legs out of knew highs! Such a smart idea and oh so cute!
ReplyDeleteGreat idea! Going to make some for my baby due in 13 weeks. What age do you think these will fit?
ReplyDeleteThe age range all depends on the sock size you use. Little girls knee highs will fit a newborn. Adult knee highs will fit a larger baby or toddler. Adult thigh highs will fit a tall toddler.
ReplyDeleteI just made these using my 6 year old daughter's tights, they turned out great for my 9 month old, you should try that also
ReplyDeleteI have all girls and have a ruffle variation of baby legs. Cut the heel area off and do a quick zigzag stitch around the bottom of the leg and you end up with a cute little ruffle on the bottom instead of a straight edge.
ReplyDeleteOMG!!! I love these. My son needed more, just grew out his newborn ones I bought. I'm so glad I wont need to spend $10 on them.
ReplyDeleteI found this post on Pinterest, and made a few sets. Thanks for this tutorial, it was super easy to follow, and the product is adorable! I wrote a quick post on my blog if you'd like to see what I made!
ReplyDeletehttp://thehomemadeheart.blogspot.ca/2014/10/baby-leg-warmers.html